Introduction
Welcome to this tutorial on turning your VPS into a deployment and hosting platform using Stormkit! I’m Savas, the founder of Stormkit, and today, we’ll set up a VPS, install Stormkit, and deploy two applications: a Go-based API, and a hybrid TanStack application that is capable of prerendering and serving dynamic files at the same time. We’ll also connect our Go-based API to the database included with Stormkit. Let’s dive in!
Estimated time
The estimated time to complete this tutorial is 10 minutes.
Terminology
203.0.113.1: The public IP address of your VPS that will be created on Step 1.
Prerequisites
Step 1 - Setting Up and Accessing Your VPS
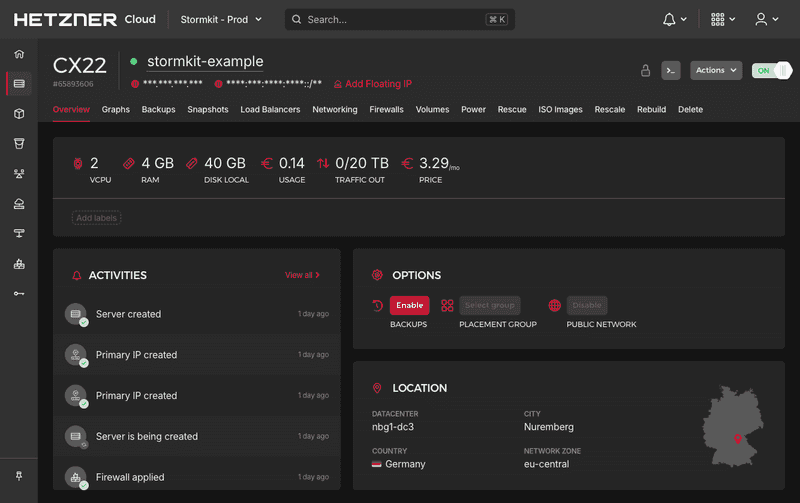
- Follow this tutorial to create a Ubuntu Server.
- Make sure to select a machine with minimum 4GB RAM and 2vCPU to have optimal performance (for instance CX23 if available).
- Copy the public IP address
Open your terminal and run the following command:
Replace
203.0.113.1with the IP of your server.
ssh root@203.0.113.1You're now logged into the VPS, ready to proceed.
Step 2 - Installing Stormkit
Before installing Stormkit, let's quickly update the system. This ensures your VPS has the latest packages for a secure setup.
Stormkit is installed via a script that sets up Docker and prepares the platform.
sudo apt update && sudo apt upgrade -y
curl -sSL https://www.stormkit.io/install.sh | sh
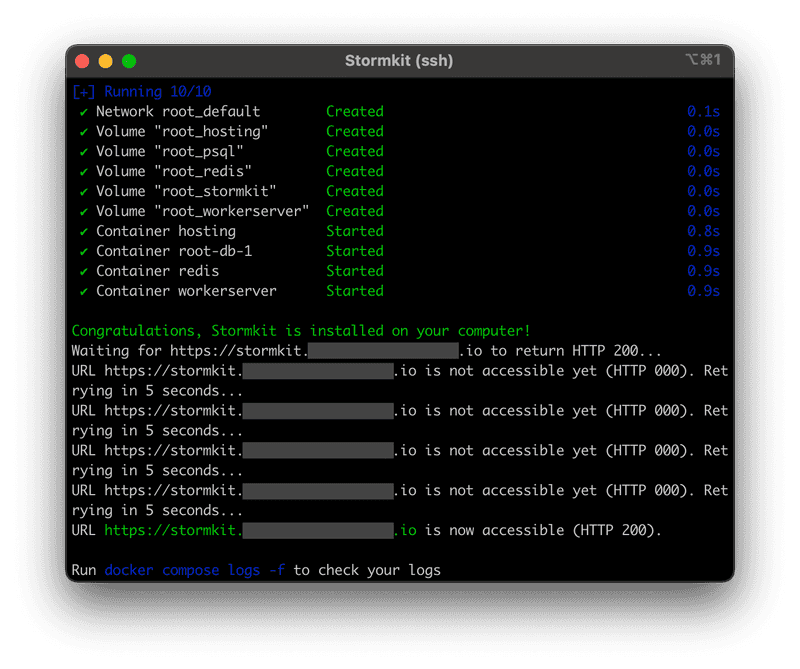
The script will install Docker, configure environment variables and install Stormkit containers on your VPS.
Now, Grab a coffee until the installation is complete.
Step 3 - Accessing the Stormkit Console
Once the installation is complete, you will see a link to the Stormkit Console printed on your terminal.
- Click on the link provided in your terminal.
- Create an administrator account.
- Login using these credentials.
Note: Stormkit has 3 subdomains reserved for itself:
stormkit.<your-top-level-domain>: Allows you to access the UIapi.<your-top-level-domain>: Allows you to access Stormkit programmaticallyhealth.<your-top-level-domain>: An endpoint to monitor your Stormkit instance
The TLS certificates for each endpoint managed by Stormkit, including your applications, are going to be generated automatically on the first request to that endpoint. This process usually takes a few seconds.
Step 4 - Setting up the Database for the Go-based API
Stormkit's installation includes a PostgreSQL database, which Stormkit uses itself to manage the platform. We can connect to it, and create a separate database for our Go-based API.
- Go back to your terminal and SSH into your VPS.
- Type
cat ~/.profileto print your environment variables to the screen. - Locate and copy the following variables:
POSTGRES_DB,POSTGRES_USERandPOSTGRES_PASSWORD
You can either access your database container and create it using psql, or use a Database Manager. For this
tutorial, we will be using DBeaver which is a free universal database manager.
-
Open DBeaver.
-
Click the
+icon on the top-left bar to create a new connection. -
Choose PostgreSQL and click Next.
-
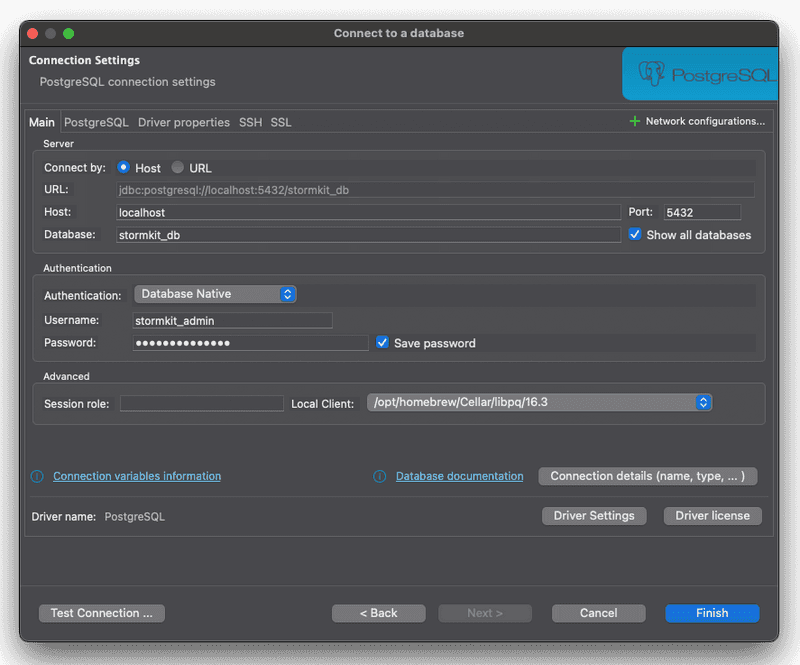
Under the Main section, fill in the following fields:
Field name Value Description Host localhost We will use an SSH tunnel, so leave this as is Database stormkit_db Or the value of POSTGRES_DBenvironment variableUsername stormkit_admin Or the value of POSTGRES_USERenvironment variablePassword The value of POSTGRES_PASSWORDenvironment variableShow all databased True Make sure to check this value -
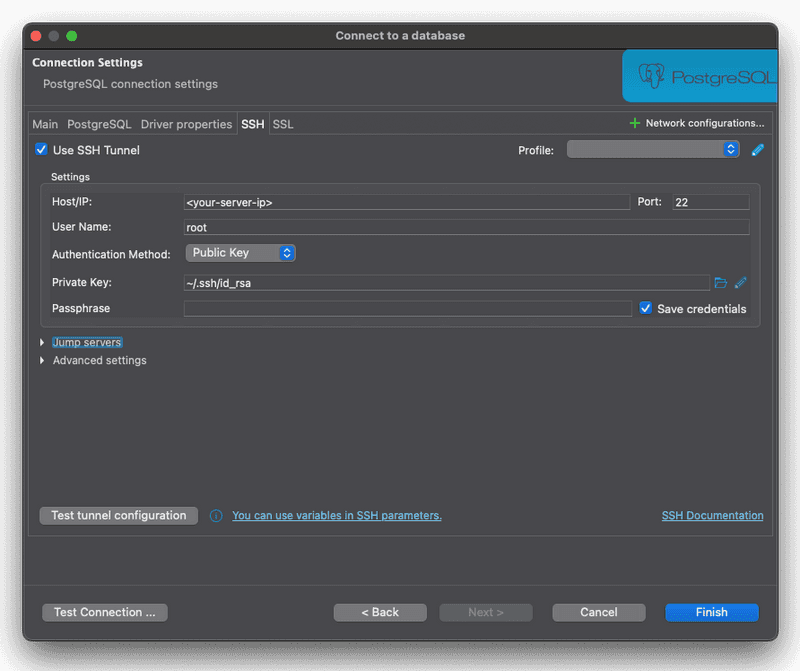
Then, switch to
SSHtab and fill in the following fields:Field name Value Description Host/IP <203.0.113.1> The public IP address of your VPS Username root The name of the SSH user Authentication Method Public Key - Private Key /<your-home-folder>/.ssh/id_rsa Or the path to the SSH key you use to access your VPS Passphrase <your-ssh-key-passphrase> Leave empty if you don't have one -
Click Test connection and verify it works.
-
If you see a success message, click save and close modal.
-
On the left navigation bar, expand the connection we just created.
-
Click right on the Databases item.
-
Click Create New Database.
-
Fill the fields and click OK.
Step 5 - Configure Go-based API on Stormkit
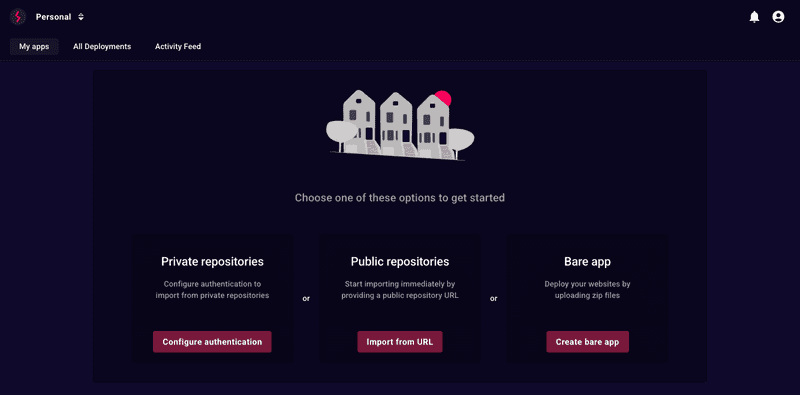
If you are not yet logged in, follow Step 3 to access the Stormkit UI. You should see an initial screen with several options:
By default, Stormkit works with public repositories. If you need to access private repositories, you can follow this documentation. For this tutorial, we'll be using an example repository.
-
Click "Import from URL".
-
Paste
https://github.com/stormkit-io/stormkit-examplesand click Import repo. -
Click on Production environment.
-
On the left menu, click on "Build" to access build settings and configure your app:
Field name Value Description Install command go get .Install dependencies Build command go build -o dist/server .Build the application, inside a dist folder Output folder ./distWe want to upload only the dist folder Build root ./go-apiSince our application is inside the top-level go-api folder, we switch the build root -
Click "Save".
-
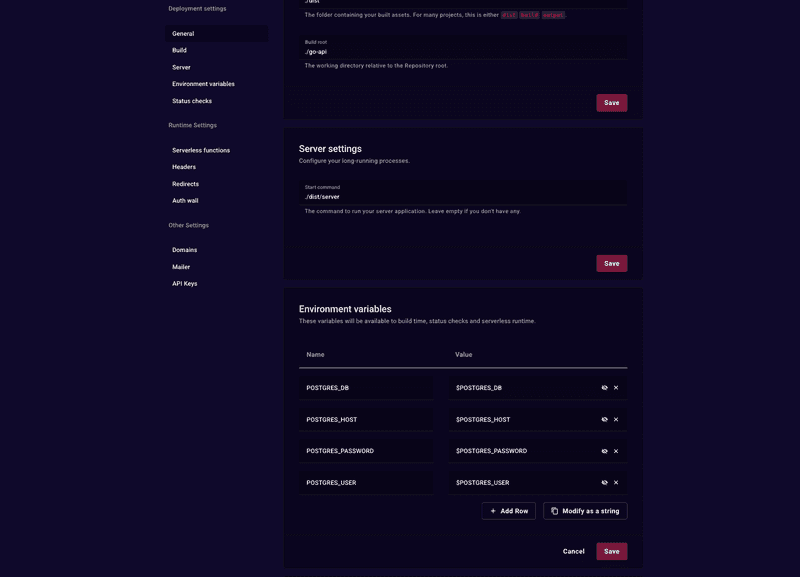
Next, scroll down to Server settings and configure your server settings:
Field name Value Start command ./dist/server -
Click "Save" again.
-
Then, scroll down to Environment variables and add these variables:
| Variable name | Value |
|---|---|
POSTGRES_DB |
$POSTGRES_DB |
POSTGRES_USER |
$POSTGRES_USER |
POSTGRES_PASSWORD |
$POSTGRES_PASSWORD |
POSTGRES_HOST |
$POSTGRES_HOST |
The $ prefix tells Stormkit to interpolate environment variables, allowing you to reuse existing variables available to the platform. While you can specify hardcoded values, interpolating existing environment variables is recommended for simplified variable management.
- Click save and scroll back to the top
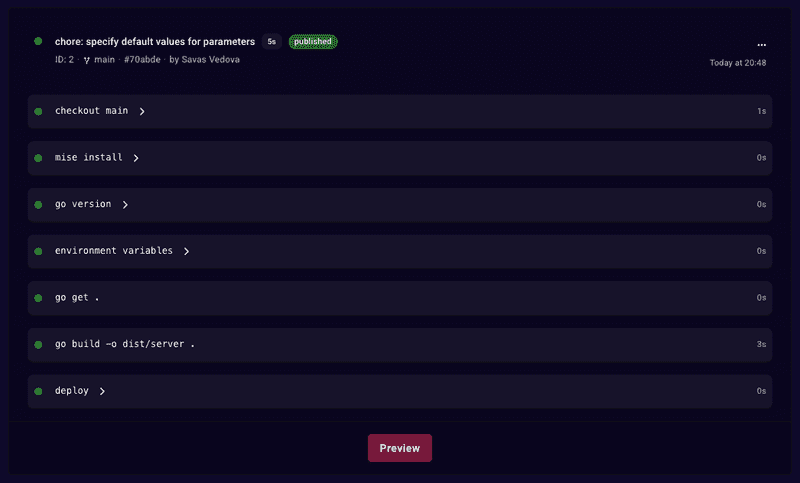
- Click on Deploy
- Once the deployment is complete and it says
publishedat the top, click on "Preview".
Optional: Configure the display name
You can configure the display name of your application to have a more rememberable URL structure for your development endpoints.
- After you created your application, click on Settings.
- Change the Display name to something more meaningful: For instance go-api.
- Click Update.
Optional: Managing Go Version
To manage your Go version, we recommend using .go-version, mise.toml or .tool-versions file. Stormkit will automatically
install the dependencies specified in these files.
Step 6 - Configure Tanstack hybrid application
- Go to "My apps", select "Create new app", and click "Import from URL".
- Paste
https://github.com/stormkit-io/stormkit-examplesand click Import repo. - Click on Production environment.
- Update the Build root to point the TanStack folder:
./tanstack-ssr. - Click Save.
- Click Deploy
Stormkit will create two artifacts from this deployment:
- Static files: These files will be served statically, without invoking any server action. You can verify the uploaded files by checking the build manifest.
- Server files: These files will be invoked on-demand. Think of it like Lambda functions.
Conclusion
Congratulations! You've successfully transformed your VPS into a powerful deployment and hosting platform using Stormkit. Throughout this tutorial, you've accomplished several key objectives:
- Set up and configured a VPS with optimal specifications
- Installed Stormkit with Docker Compose for containerized deployments
- Connected to the built-in PostgreSQL database for data persistence
- Deployed a Go-based API with custom build configurations
- Deployed a TanStack hybrid application capable of both static and server-side rendering
Your VPS now serves as a complete deployment platform that can handle multiple applications simultaneously. The automatic TLS certificate generation ensures your applications are secure, while the intuitive Stormkit interface makes ongoing management straightforward.
With this setup, you can continue to deploy additional applications, scale your infrastructure as needed, and take full advantage of having your own self-hosted deployment platform. Whether you're working on personal projects or managing applications for clients, you now have the foundation for a robust hosting solution.
Happy deploying!
