Introduction
WordPress is a popular CMS (content management system) written in PHP, with a large number of plugins and themes developed by community. When it comes to working with WordPress, usually you want to set up a local development environment and once the project is complete, deploy it to a server. How to do it without a hassle? One option is to use containers.
WordPress is a complex piece of software, it requires the web server (nginx), database server (MariaDB) and of course PHP installation (PHP-FPM) to work. You can configure the above software manually, directly on your host. The problem comes up when you need to run multiple WordPress websites, which may require different PHP versions, configuration and incompatible PHP extensions. Some dependencies may not be available in the package repositories of your distro. Not to mention that the client website you're working on may contain malicious plugins and you don't want to allow them to access your personal files on the host. If you're working in a team, it's helpful to have the same versions and configuration of software, which is hard to achieve by installing everything directly on the host.
One way to isolate the WordPress websites from each other and from the host is to use Docker. As I mentioned earlier, WordPress requires multiple software
packages to work, hence we will use Docker Compose to manage services for each major component. One of the tenets of Docker is that each container
should do one thing only. That means a separate container for the web server, database server and PHP is needed.
In theory it's not strictly required to use Docker Compose.
You can start your containers using docker run, but managing containers for WordPress this way will be annoying and time consuming.
Prerequisites
-
Docker Engine and Docker Compose are installed on your host. On Ubuntu you can install Docker using apt repository. The proprietary Docker Desktop is not needed for this tutorial to work.
-
Basic understanding of Docker is needed. You can read a Docker tutorial to get familiar with it.
-
A user with sudo privileges.
Step 1 - Creating a new WordPress website using Docker Compose
Follow this step if you want to create a new WordPress website and develop it using Docker.
Skip to Step 2 if you have an existing WordPress website that you want to run in Docker.
Create a directory where you will store your project files:
- Replace
wordpress-composewith any desired directory name.
mkdir wordpress-compose && cd wordpress-composeLet's create compose.yaml where we will define the services needed to run WordPress:
nano compose.yamlPaste the following content:
# File compose.yaml
services:
    wordpress:
        image: wordpress:fpm
        environment:
            - WORDPRESS_DB_HOST=mariadb
            - WORDPRESS_DB_NAME=${DB_NAME}
            - WORDPRESS_DB_USER=root
            - WORDPRESS_DB_PASSWORD=${MARIADB_ROOT_PASSWORD}
        volumes:
        - ./www:/var/www/html
    nginx:
        image: nginx
        volumes:
        - ./nginx.conf:/etc/nginx/conf.d/default.conf
        - ./www:/var/www/html
        ports:
        - 80:80
    mariadb:
        image: mariadb
        restart: always
        environment:
            - MARIADB_DATABASE=${DB_NAME}
            - MARIADB_ROOT_PASSWORD=${MARIADB_ROOT_PASSWORD}
        volumes:
        - db-data:/var/lib/mysql
volumes:
    db-data:
The services are described below.
| Service | Description |
|---|---|
wordpress |
The WordPress itself and PHP server to run it. Specifically, its fpm image variant is used for performance and reliability reasons, instead of its default apache variant. |
nginx |
nginx is used as a reverse proxy. It serves the static content (like images) and delegates the dynamic content generation to the wordpress service. |
mariadb |
WordPress stores the information like users and posts in the MySQL/MariaDB database. mariadb service is used to provide one. |
The db-data volume is used for persistent storage of the database data.
WordPress is stored in the local directory ./www.
Both nginx and wordpress services need to have access to it. The ./www directory is initially empty, but WordPress will be copied there by the wordpress service.
Create the .env file for storing the WordPress database name and root password:
- Replace
your_passwordwith a desired password for the database root user. - In later steps the
.envfile will be used to define the additional variables.
# File .env
DB_NAME=wordpress
MARIADB_ROOT_PASSWORD=your_password
You need to provide a configuration for the nginx service. It will act as a reverse proxy by passing dynamic content requests to PHP-FPM.
Create the nginx.conf file with following content:
# File nginx.conf
server {
    listen 80;
    root /var/www/html;
    index index.html index.php;

    location / {
        try_files $uri $uri/ /index.php?$args;
    }

    location ~ \.php$ {
        try_files $fastcgi_script_name =404;
        fastcgi_pass wordpress:9000;
        fastcgi_param SCRIPT_FILENAME $document_root$fastcgi_script_name;
        include fastcgi_params;
    }
}
Now, the directory listing of wordpress-compose should look as follows:
wordpress-compose
├── compose.yaml
├── .env
└── nginx.conf
Run the following command to start containers:
docker compose upNote: You can run containers in the background by passing
-dflag:docker compose up -d.
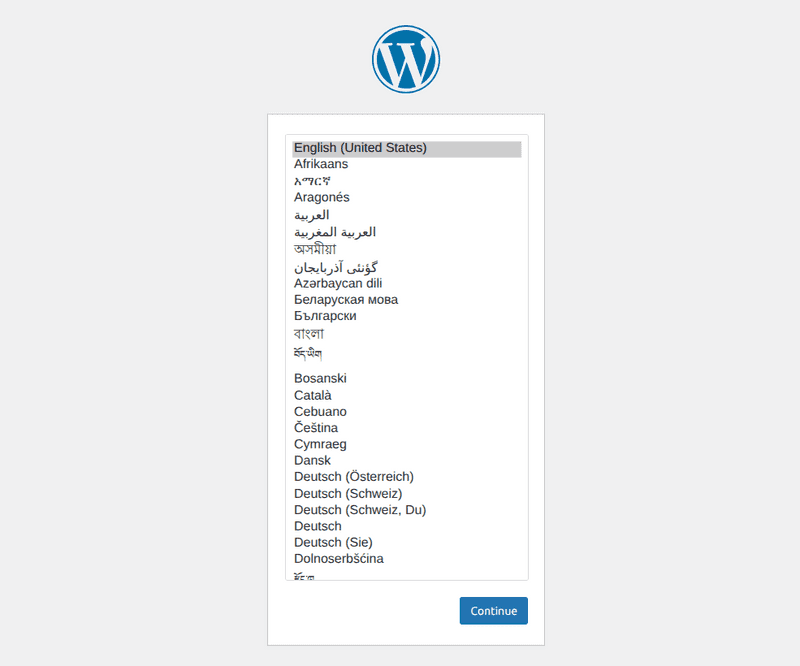
Open http://localhost in a browser. Choose a desired language for your website:
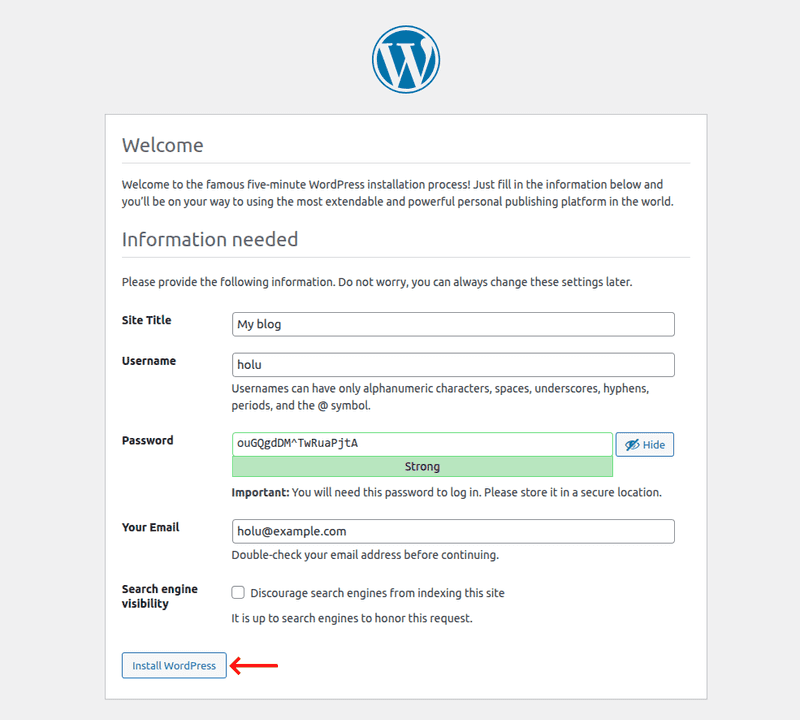
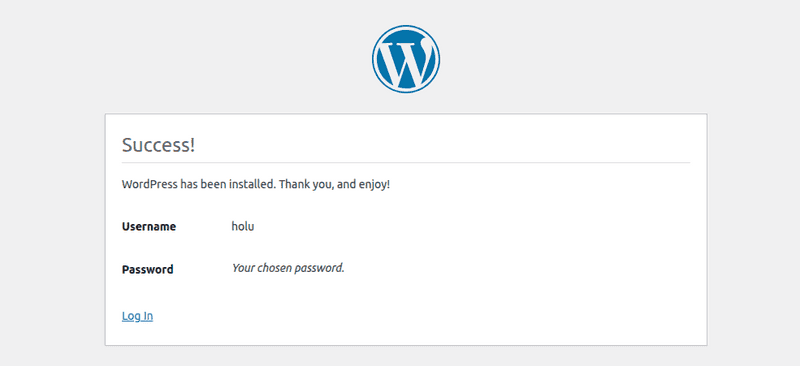
The website setup is almost complete. Choose the website title, specify the username and password for the new user. And click Install WordPress.
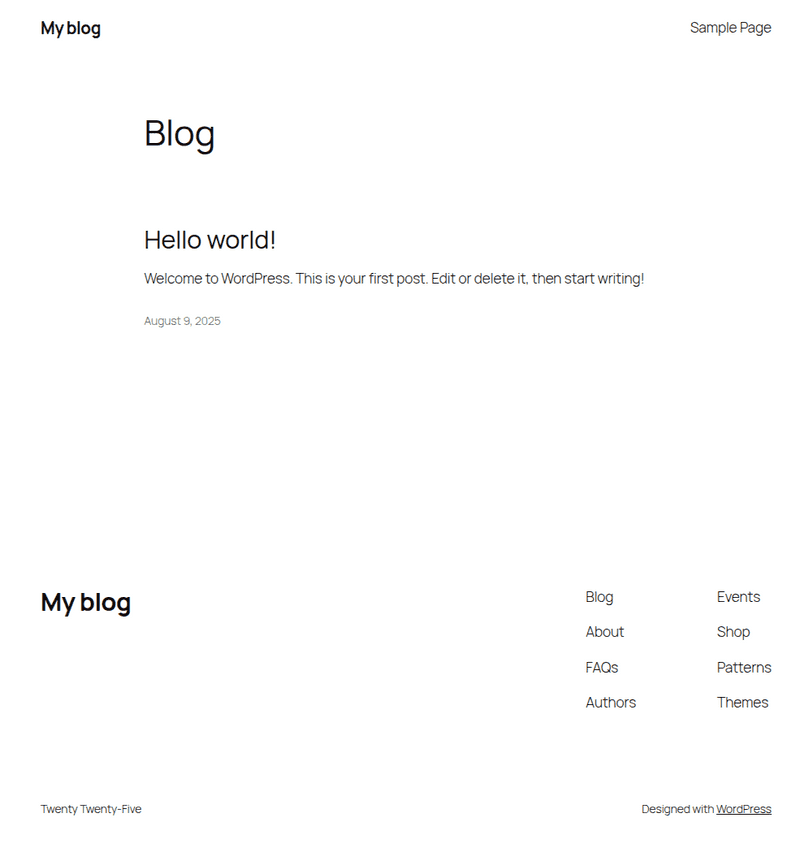
Now, you can open http://localhost in a browser. You should see the website homepage with a default theme:
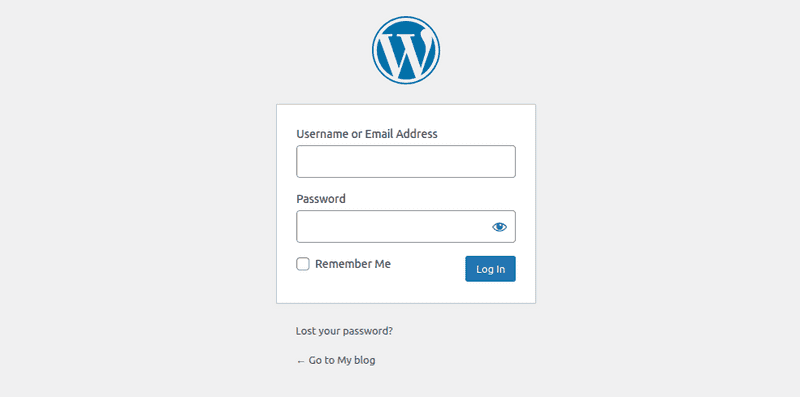
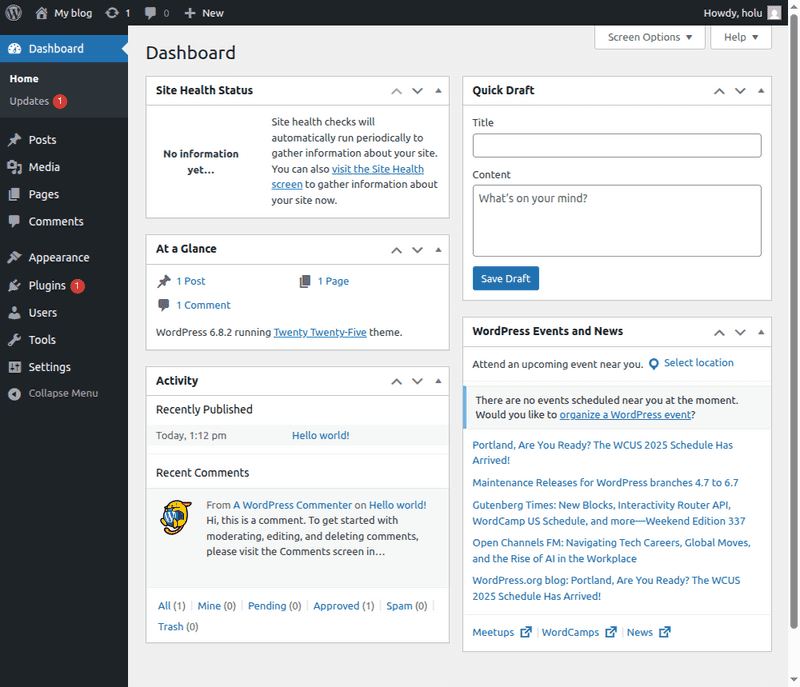
You can open http://localhost/wp-admin/ to access the WordPress dashboard:
Step 1.1 - Installing a custom theme or plugin
You can install plugins and themes, and update them from the WordPress dashboard. They will be downloaded from the official WordPress directory.
But what if you want to install a custom plugin or a premium theme which is not available in the official sources?
You can copy your plugins into the wp-content/plugins, and themes can be put into the wp-content/themes.
You can find those directories in the directory in which you ran docker compose. If you followed the example above, you can find the directories in wordpress-compose.
For example, to install a custom theme:
-
Copy a theme directory to
wp-content/themes:- Replace
custom_themewith a path to your theme.
sudo cp -rp custom_theme www/wp-content/themes - Replace
-
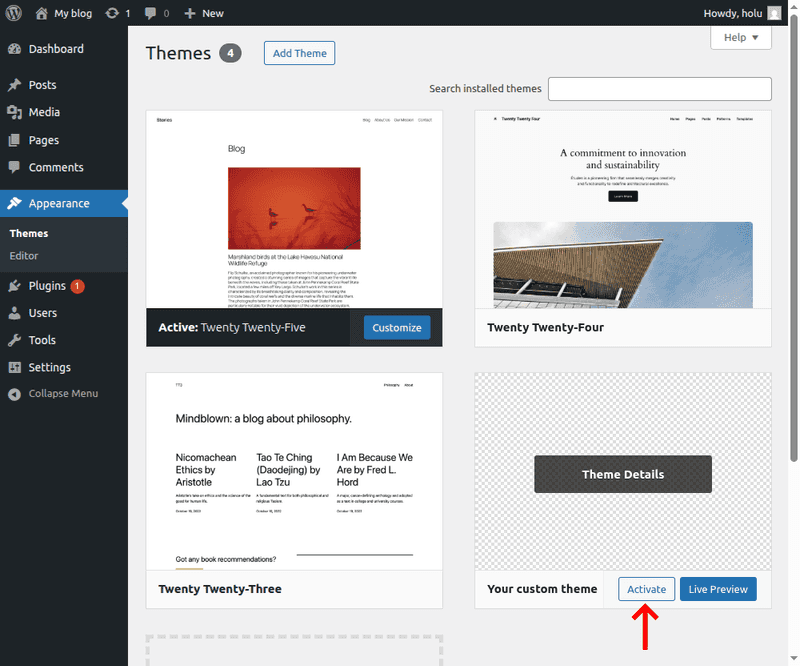
Open http://localhost/wp-admin/themes.php in your browser and click Activate on a copied theme:
Step 1.2 - Exporting a complete project
To make a copy of the WordPress website which can be deployed to a hosting, you need to perform two steps. The first one is to make a copy of all the files of your website. And the second one is to make a database dump, which contains posts, users and settings of your WordPress website. To do this, follow the instructions below.
Step 1.2.1 - Creating an archive of the files
Once the WordPress website is complete and you're ready to deploy it, you can prepare its archive, which can be extracted on your hosting.
cd wordpress-compose && tar -czf wordpress-site.tar.gz -C www .To deploy your website, copy the tar file to the web root of your hosting and extract it:
tar -xzf wordpress-site.tar.gzYou may need to adjust the database related configuration variables inside the wp-config.php file.
Particularly the database host (DB_HOST), database name (DB_NAME) and user credentials (DB_USER and DB_PASSWORD) need to be adjusted.
Disable WP_DEBUG, if it's enabled. By setting it to false, like this: define( 'WP_DEBUG', false );.
Step 1.2.2 - Creating a database dump
Now, you need to create a dump of your MariaDB database in the .sql file format. To do this, run the following command:
Note: To run this command, the
mariadbcontainer should be running, i.e. you need to rundocker compose upfirst.
- Replace
wordpress-compose-mariadb-1with a cotainer name, which can be found by runningdocker ps. Thewordpress-composeprefix corresponds to the name of directory of thecompose.yamlfile, which is followed bymariadbwhich is the service name. wordpressis the database name defined in the.envfile.- You will be asked for a password, which is defined as
MARIADB_ROOT_PASSWORDin the.envfile.
docker exec -i wordpress-compose-mariadb-1 mariadb-dump wordpress -p > dump.sqlAlternatively, you can run the following command, which will select the right container for the wordpress service for you:
docker compose exec -T mariadb mariadb-dump wordpress -p > dump.sqlIf the database is large, you can compress it:
docker compose exec -T mariadb mariadb-dump wordpress -p | gzip > dump.sql.gzThe resulting database dump can be imported to the destination using the following command:
- Replace
wordpresswith a database name created on your hosting. - Replace
rootwith a user which is allowed to modify the database.
mariadb wordpress -u root -p < dump.sqlStep 1.2.3 - Changing the domain of a website
If you have used localhost as a website domain while developing, and once deployed it will use example.com,
you need to change the domain inside the WordPress database.
This can be done using WP-CLI.
Install WP-CLI on your server. To replace all occurrences of http://localhost with https://example.com, run:
- Change
/var/www/wordpresswith a web root of your website. - Change
http://localhostandhttps://example.comwith an old and new domain respectively.
cd /var/www/wordpress && \
wp search-replace http://localhost https://example.com
Step 2 - Running an existing WordPress website in Docker
This step will be focused on running an existing WordPress website in a container, using Docker Compose.
If you want to create a new WordPress website follow Step 1 instead.
Prerequisites
-
Copy of the web root directory of your WordPress website.
It must include folders like
wp-admin,wp-contentand files likeindex.php. -
Dump of your WordPress database in the
.sqlformat.Which can be made:
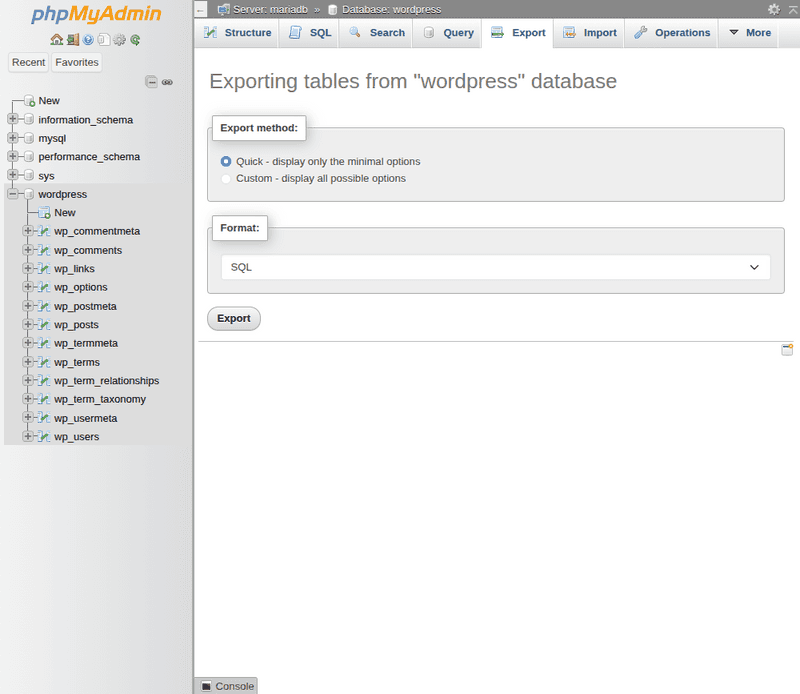
-
phpMyAdmin database export functionality:
or by other tools.
Step 2.1 - Preparing files and folders
Create a directory where you will store your project files:
- Replace
wordpress-compose-importwith any desired directory name.
mkdir wordpress-compose-import && cd wordpress-compose-importNow, put a database dump there, and name it dump.sql.
Place your WordPress files inside the www directory.
You need to download WP-CLI to the current working directory, which will be used for search and replace inside the database tables.
curl -fLO https://raw.githubusercontent.com/wp-cli/builds/gh-pages/phar/wp-cli.phar && \
chmod +x wp-cli.phar
Create the compose.yaml file, which will look as follows:
# File compose.yaml
services:
    wordpress:
        image: wordpress:fpm
        environment:
            - WORDPRESS_DB_HOST=mariadb
            - WORDPRESS_DB_NAME=${DB_NAME}
            - WORDPRESS_DB_USER=root
            - WORDPRESS_DB_PASSWORD=${MARIADB_ROOT_PASSWORD}
        volumes:
        - ./www:/var/www/html
        - ./wp-cli.phar:/usr/local/bin/wp
    nginx:
        image: nginx
        volumes:
        - ./nginx.conf:/etc/nginx/conf.d/default.conf
        - ./www:/var/www/html
        ports:
        - 80:80
    mariadb:
        image: mariadb
        restart: always
        environment:
            - MARIADB_DATABASE=${DB_NAME}
            - MARIADB_ROOT_PASSWORD=${MARIADB_ROOT_PASSWORD}
        volumes:
        - db-data:/var/lib/mysql
        - ./dump.sql:/docker-entrypoint-initdb.d/dump.sql
volumes:
    db-data:
Two more files are needed: .env and nginx.conf. They are the same as in Step 1.
After all necessary files are created, the wordpress-compose-import directory should look as follows:
wordpress-compose-import
├── compose.yaml
├── dump.sql
├── .env
├── nginx.conf
├── wp-cli.phar
└── www
    ├── index.php
    ├── license.txt
    ├── readme.html
    ├── wp-activate.php
    ├── wp-admin
    ├── wp-blog-header.php
    ├── wp-comments-post.php
    ├── wp-config.php
    ├── wp-config-sample.php
    ├── wp-content
    ├── wp-cron.php
    ├── wp-includes
    ├── wp-links-opml.php
    ├── wp-load.php
    ├── wp-login.php
    ├── wp-mail.php
    ├── wp-settings.php
    ├── wp-signup.php
    ├── wp-trackback.php
    └── xmlrpc.php
The www/wp-config.php file needs to be removed or renamed.
You need to let the wordpress service to create its own wp-config.php.
If there is anything important in the original wp-config.php file, you can copy it to the newly created file, after running the compose up command below.
To remove the original config, run:
rm www/wp-config.phpAlternatively, to rename it, run:
mv www/wp-config.php www/wp-config-orig.phpStep 2.2 - Fixing permissions
You now need to fix permissions on the www directory and all its children files and directories.
It's now owned by your local user. But the container process runs as the www-data user.
It's not allowed to modify the WordPress files. That means that automatic updates and media uploads will not work,
you will not be able to install plugins and themes.
The are two ways to solve this problem:
-
The first one is to change the ownership (
chown) of thewwwdirectory to thewww-datauser. -
The second one is to run the
wordpressservice with the permissions of your local user.
Let's start with the first method.
Run the following command to change the ownership:
Note:
33is a number that corresponds to the user id of thewww-datauser inside a container.
sudo chown -R 33:33 wwwThe downside of this method is that you may need to use sudo, if you want to modify the WordPress files from the host.
Now, you can jump to Step 2.3 below.
The second method is to run the container process with permissions of your local user.
Modify the wordpress service by specifying the user which will be used to run the container process:
- Replace
1000:1000with a string obtained by runningecho "$(id -u):$(id -g)"on your host.
wordpress:
    image: wordpress:fpm
    environment:
        - WORDPRESS_DB_HOST=mariadb
        - WORDPRESS_DB_NAME=${DB_NAME}
        - WORDPRESS_DB_USER=root
        - WORDPRESS_DB_PASSWORD=${MARIADB_ROOT_PASSWORD}
    volumes:
    - ./www:/var/www/html
    - ./wp-cli.phar:/usr/local/bin/wp
    user: "1000:1000"
After you added the user attribute, the compose.yaml will look like this:
# File compose.yaml
services:
    wordpress:
        image: wordpress:fpm
        environment:
            - WORDPRESS_DB_HOST=mariadb
            - WORDPRESS_DB_NAME=${DB_NAME}
            - WORDPRESS_DB_USER=root
            - WORDPRESS_DB_PASSWORD=${MARIADB_ROOT_PASSWORD}
        volumes:
        - ./www:/var/www/html
        - ./wp-cli.phar:/usr/local/bin/wp
        user: "1000:1000"
    nginx:
        image: nginx
        volumes:
        - ./nginx.conf:/etc/nginx/conf.d/default.conf
        - ./www:/var/www/html
        ports:
        - 80:80
    mariadb:
        image: mariadb
        restart: always
        environment:
            - MARIADB_DATABASE=${DB_NAME}
            - MARIADB_ROOT_PASSWORD=${MARIADB_ROOT_PASSWORD}
        volumes:
        - db-data:/var/lib/mysql
        - ./dump.sql:/docker-entrypoint-initdb.d/dump.sql
volumes:
    db-data:
As you can see the user configuration is added inside the wordpress service, to run it as your host user.
Step 2.3 - Running the website
Now, you can start your services. But don't open your website, it will not work yet:
docker compose upThe next step is to change your WordPress domain name. WordPress stores its domain name inside the database.
You will need to change it from the domain that was used previously to the localhost.
If you will not change it, the website will not work.
Open a Bash shell inside the container of the wordpress service:
docker compose exec --user www-data:www-data wordpress bashRun the following command to change the domain name to localhost:
- Replace
https://example.comwith the domain and protocol that was used previously on your website.
wp search-replace https://example.com http://localhostNow, you can open http://localhost in a browser to view your working website. Use your regular username and password to log in to the dashboard.
Step 3 - Managing the WordPress database using phpMyAdmin
If you want to query the WordPress database, you can start the mariadb command-line shell:
docker compose exec mariadb mariadb wordpress -pProvide the password from the .env file.
Now, you can type your query. For example, to get the latest published posts and their authors, run:
SELECT post_date, display_name AS post_author, post_title
FROM wp_posts
INNER JOIN wp_users ON wp_posts.post_author = wp_users.ID
WHERE post_status = 'publish' AND post_type = 'post'
ORDER BY post_date DESC
LIMIT 10;
You can dump your WordPress database as described in Step 1.2.2.
If you need a functionality which is not provided by mariadb shell or you just want to use a GUI,
you can control your database using phpMyAdmin instead.
To do this, define a new service for phpMyAdmin in the compose.yaml file:
services:
    wordpress:
        image: wordpress:fpm
        environment:
            - WORDPRESS_DB_HOST=mariadb
            - WORDPRESS_DB_NAME=${DB_NAME}
            - WORDPRESS_DB_USER=root
            - WORDPRESS_DB_PASSWORD=${MARIADB_ROOT_PASSWORD}
        volumes:
        - ./www:/var/www/html
    nginx:
        image: nginx
        volumes:
        - ./nginx.conf:/etc/nginx/conf.d/default.conf
        - ./www:/var/www/html
        - phpmyadmin:/var/www/phpmyadmin
        ports:
        - 80:80
    mariadb:
        image: mariadb
        restart: always
        environment:
            - MARIADB_DATABASE=${DB_NAME}
            - MARIADB_ROOT_PASSWORD=${MARIADB_ROOT_PASSWORD}
        volumes:
        - db-data:/var/lib/mysql
    phpmyadmin:
        image: phpmyadmin:fpm
        restart: always
        ports:
        - 8080:80
        environment:
        - PMA_HOST=mariadb
        - PMA_USER=root
        - PMA_PASSWORD=${MARIADB_ROOT_PASSWORD}
        - PMA_ABSOLUTE_URI=http://localhost/phpmyadmin/
        volumes:
        - phpmyadmin:/var/www/html
volumes:
    db-data:
    phpmyadmin:
The PMA_* variables connect phpMyAdmin to the MariaDB server.
PMA_ABSOLUTE_URI is the URL you need to open in your browser to access phpMyAdmin.
The phpmyadmin volume is defined. The first time the service is started, phpMyAdmin files will be copied to it.
This is needed because we need to access phpMyAdmin files from both the nginx and phpmyadmin containers.
Thus, you need to add it into the volumes attribute of the nginx service:
volumes:
- ./nginx.conf:/etc/nginx/conf.d/default.conf
- ./www:/var/www/html
- phpmyadmin:/var/www/phpmyadmin
You need to adjust the nginx configuration as follows:
# File nginx.conf
server {
    listen 80;
    root /var/www/html;
    index index.html index.php;

    location / {
        try_files $uri $uri/ /index.php?$args;
    }

    location ~ \.php$ {
        try_files $fastcgi_script_name =404;
        fastcgi_pass wordpress:9000;
        fastcgi_param  SCRIPT_FILENAME $document_root$fastcgi_script_name;
        include fastcgi_params;
    }

    location /phpmyadmin/ {
        root /var/www;
        location ~ \.php$ {
            try_files /phpmyadmin$fastcgi_script_name =404;
            fastcgi_split_path_info ^/phpmyadmin(.+\.php)(.*)$;
            fastcgi_pass phpmyadmin:9000;
            fastcgi_param  SCRIPT_FILENAME /var/www/html$fastcgi_script_name;
            include fastcgi_params;
        }
    }
}
All the configuration related to phpMyAdmin is placed in the /phpmyadmin/ location.
The configuration is somewhat tricky. We need to remove the /phpmyadmin prefix,
before we can pass a request to PHP-FPM.
Now, you are ready to run:
docker compose upto start your services.
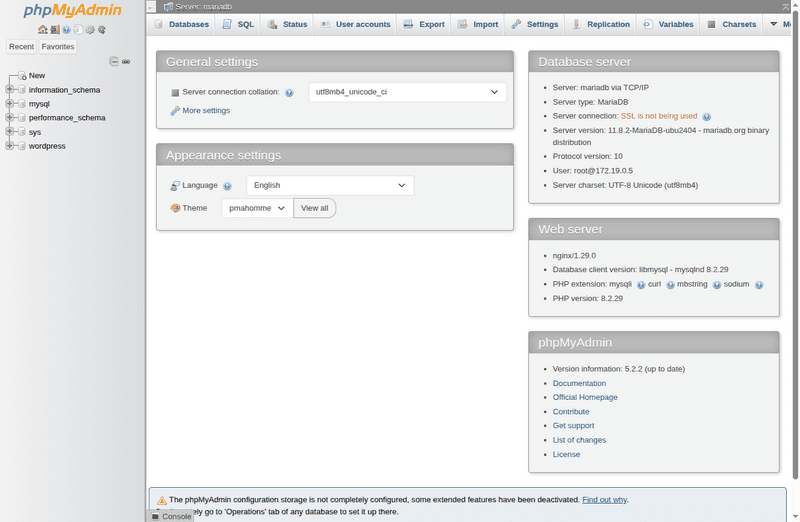
Open http://localhost/phpmyadmin/ in your browser. You should see the working phpMyAdmin installation:
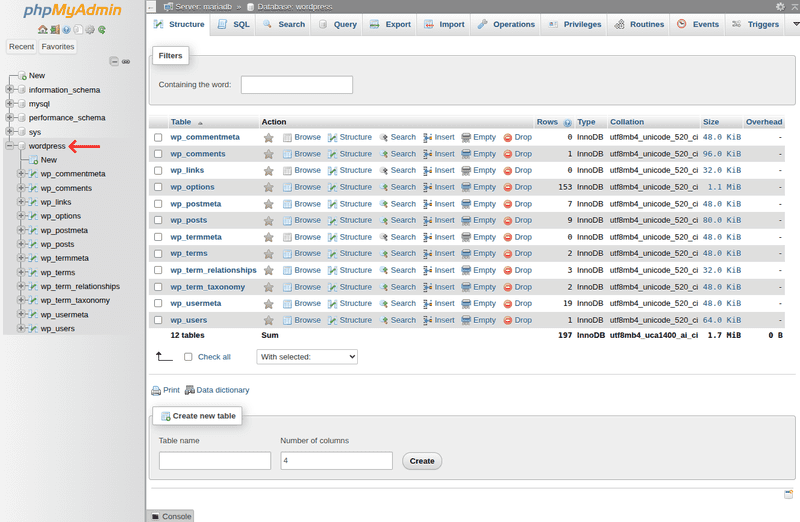
Click wordpress in the left sidebar to select the database:
Now, you can perform all the tasks needed.
Step 4 - Logging errors
Step 4.1 - Using compose logs to view the logs
Logs of your wordpress service can be viewed with the command below:
docker compose logs wordpressYou can write to the log using the error_log function. For example, add this function call somewhere in your PHP code:
error_log("Hello World");Open the website to trigger the logging call. Now, you can re-run the compose logs command above to see your message.
Step 4.2 - Writing logs to the file
You can write the WordPress logs to the file on your host. Then you can view and analyze them using your regular tools.
There are multiple steps needed to configure this.
First, change the working directory to the one with a compose.yaml file,
and create a file where the logs will be written:
Note: What is
33:33is already described.
touch wordpress.log && sudo chown 33:33 wordpress.logSecond, adjust the .env file as follows:
-
New environment variable
WORDPRESS_DEBUGis added and set to1.This will enable the debug mode in WordPress.
-
WORDPRESS_CONFIG_EXTRAis used to pass the additional configuration options.The
WP_DEBUG_DISPLAYoption ensures that errors are not displayed on the web pages, andWP_DEBUG_LOGthat they are written into/var/log/wordpress.loginside the container instead.
# File .env
DB_NAME=wordpress
MARIADB_ROOT_PASSWORD=your_password
WORDPRESS_DEBUG=1
WORDPRESS_CONFIG_EXTRA="define( 'WP_DEBUG_DISPLAY', false );
define( 'WP_DEBUG_LOG', '/var/log/wordpress.log' );"
You can switch the WORDPRESS_DEBUG on and off by setting it to 1 or 0 respectively in the .env file.
The log file will be populated only when it's on.
Finally, modify the compose.yaml file:
- The
WORDPRESS_DEBUGandWORDPRESS_CONFIG_EXTRAvariables above are added to theenvironmentattribute of thewordpressservice. - The
wordpress.log, created at the beginning of this step is mounted into the/var/log/wordpress.loginside the container.
wordpress:
    image: wordpress:fpm
    environment:
        - WORDPRESS_DB_HOST=mariadb
        - WORDPRESS_DB_NAME=${DB_NAME}
        - WORDPRESS_DB_USER=root
        - WORDPRESS_DB_PASSWORD=${MARIADB_ROOT_PASSWORD}
        - WORDPRESS_DEBUG=${WORDPRESS_DEBUG}
        - WORDPRESS_CONFIG_EXTRA=${WORDPRESS_CONFIG_EXTRA}
    volumes:
    - ./www:/var/www/html
    - ./wordpress.log:/var/log/wordpress.log
After you adjusted the wordpress service, the compose.yaml will look similar to this:
# File compose.yaml
services:
    wordpress:
        image: wordpress:fpm
        environment:
            - WORDPRESS_DB_HOST=mariadb
            - WORDPRESS_DB_NAME=${DB_NAME}
            - WORDPRESS_DB_USER=root
            - WORDPRESS_DB_PASSWORD=${MARIADB_ROOT_PASSWORD}
            - WORDPRESS_DEBUG=${WORDPRESS_DEBUG}
            - WORDPRESS_CONFIG_EXTRA=${WORDPRESS_CONFIG_EXTRA}
        volumes:
        - ./www:/var/www/html
        - ./wordpress.log:/var/log/wordpress.log
    nginx:
        image: nginx
        volumes:
        - ./nginx.conf:/etc/nginx/conf.d/default.conf
        - ./www:/var/www/html
        ports:
        - 80:80
    mariadb:
        image: mariadb
        restart: always
        environment:
            - MARIADB_DATABASE=${DB_NAME}
            - MARIADB_ROOT_PASSWORD=${MARIADB_ROOT_PASSWORD}
        volumes:
        - db-data:/var/lib/mysql
volumes:
    db-data:
The configuration is done, stop and start your services again to apply your changes:
docker compose down
docker compose up
If an error happens or the error_log function is called, the message will be written into the ./wordpress.log file on the host.
Additionally, you will potentially see more errors than in the default configuration.
Because when WORDPRESS_DEBUG is on, WordPress will use the E_ALL reporting level. In other words, all PHP errors will be reported.
Step 4.3 - Display errors on the web pages
If an error happens while you're opening the page of your website, usually what you see is this:
There has been a critical error on this website.
This kind of error is sometimes called "white screen of death".
It's not very useful if you want to investigate the underlying issue.
If you're developing your website locally and it's not publicly available, it's safe to show the exact text of an error on the web page. This makes debugging easier.
In WordPress, the display of the errors is controlled by the configuration option WP_DEBUG_DISPLAY. By default, it's set to true and errors are displayed,
unless the WP_DEBUG option is set to false.
Thus, we need to set WP_DEBUG to true, and ensure that WP_DEBUG_DISPLAY is not set to false explicitly.
In Docker, WP_DEBUG can be set to true by setting the environment variable WORDPRESS_DEBUG to 1:
# File .env
DB_NAME=wordpress
MARIADB_ROOT_PASSWORD=your_password
WORDPRESS_DEBUG=1
The configuration of the wordpress service will be similar to this:
wordpress:
    image: wordpress:fpm
    environment:
        - WORDPRESS_DB_HOST=mariadb
        - WORDPRESS_DB_NAME=${DB_NAME}
        - WORDPRESS_DB_USER=root
        - WORDPRESS_DB_PASSWORD=${MARIADB_ROOT_PASSWORD}
        - WORDPRESS_DEBUG=${WORDPRESS_DEBUG}
    volumes:
    - ./www:/var/www/html
Note that WORDPRESS_DEBUG is present in the list of the environment variables.
Now, you can start your services. If an error happens it will be displayed like this:
Fatal error: Uncaught Error: Undefined constant "FOO" in /var/www/html/wp-content/themes/twentytwentyfive/functions.php:161
Stack trace:
#0 /var/www/html/wp-settings.php(695): include()
#1 /var/www/html/wp-config.php(139): require_once('/var/www/html/w...')
#2 /var/www/html/wp-load.php(50): require_once('/var/www/html/w...')
#3 /var/www/html/wp-blog-header.php(13): require_once('/var/www/html/w...')
#4 /var/www/html/index.php(17): require('/var/www/html/w...')
#5 {main}
  thrown in /var/www/html/wp-content/themes/twentytwentyfive/functions.php on line 161
You should set WP_DEBUG_DISPLAY to false in production environments to prevent the exposure of sensitive information.
This can be done by putting it into WORDPRESS_CONFIG_EXTRA inside the .env file.
Step 5 - Debugging WordPress using Xdebug
As noted in Step 4.1 you can call the error_log function to write the PHP values into a log file.
Sometimes this is not enough and you need to step through your code in a debugger.
Xdebug extension provides the step debugger which can be used within your IDE (Integrated development environment) or editor of choice.
Step 5.1 - Creating a custom Docker image with the Xdebug extension
The official WordPress Docker image doesn't include the Xdebug extension. Thus, we will create a custom one.
Change the working directory to the directory with a compose.yaml file. For example:
cd wordpress-composeLet's create a Dockerfile and place it to the wordpress-xdebug directory:
mkdir wordpress-xdebug \
&& nano wordpress-xdebug/Dockerfile
Paste the following content:
FROM wordpress:fpm

RUN set -ex; \
    pecl install xdebug; \
    docker-php-ext-enable xdebug; \
    rm -r /tmp/pear

RUN { \
        echo 'xdebug.discover_client_host=1'; \
        echo 'xdebug.mode=debug'; \
        echo 'xdebug.start_with_request=yes'; \
    } > /usr/local/etc/php/conf.d/xdebug-custom.ini
There are two layers in this Dockerfile. In the first one Xdebug is installed. In the second one the Xdebug extension is configured to enable a step debugger and to make it convenient to use with an IDE on your host.
You need to adjust the wordpress service in the compose.yaml file.
Replace the image with a build attribute:
wordpress:
    build: ./wordpress-xdebug
    environment:
        - WORDPRESS_DB_HOST=mariadb
        - WORDPRESS_DB_NAME=${DB_NAME}
        - WORDPRESS_DB_USER=root
        - WORDPRESS_DB_PASSWORD=${MARIADB_ROOT_PASSWORD}
        - WORDPRESS_DEBUG=${WORDPRESS_DEBUG}
    volumes:
    - ./www:/var/www/html
The compose.yaml and .env files for Xdebug debugging of WordPress should look as follows:
- The nginx configuration is the same as in Step 1.
# File compose.yaml
services:
    wordpress:
        build: ./wordpress-xdebug
        environment:
            - WORDPRESS_DB_HOST=mariadb
            - WORDPRESS_DB_NAME=${DB_NAME}
            - WORDPRESS_DB_USER=root
            - WORDPRESS_DB_PASSWORD=${MARIADB_ROOT_PASSWORD}
            - WORDPRESS_DEBUG=${WORDPRESS_DEBUG}
        volumes:
        - ./www:/var/www/html
    nginx:
        image: nginx
        volumes:
        - ./nginx.conf:/etc/nginx/conf.d/default.conf
        - ./www:/var/www/html
        ports:
        - 80:80
    mariadb:
        image: mariadb
        restart: always
        environment:
            - MARIADB_DATABASE=${DB_NAME}
            - MARIADB_ROOT_PASSWORD=${MARIADB_ROOT_PASSWORD}
        volumes:
        - db-data:/var/lib/mysql
volumes:
    db-data:
# File .env
DB_NAME=wordpress
MARIADB_ROOT_PASSWORD=your_password
WORDPRESS_DEBUG=0Now, you can start the services and build your custom WordPress image with Xdebug support:
docker compose up --buildStep 5.2 - Configuring IDE
In this step I will show you how you can connect your IDE with the Xdebug extension inside a container. Instructions are provided for VS Code. For other IDEs and editors, the steps will be similar, consult their official documentation.
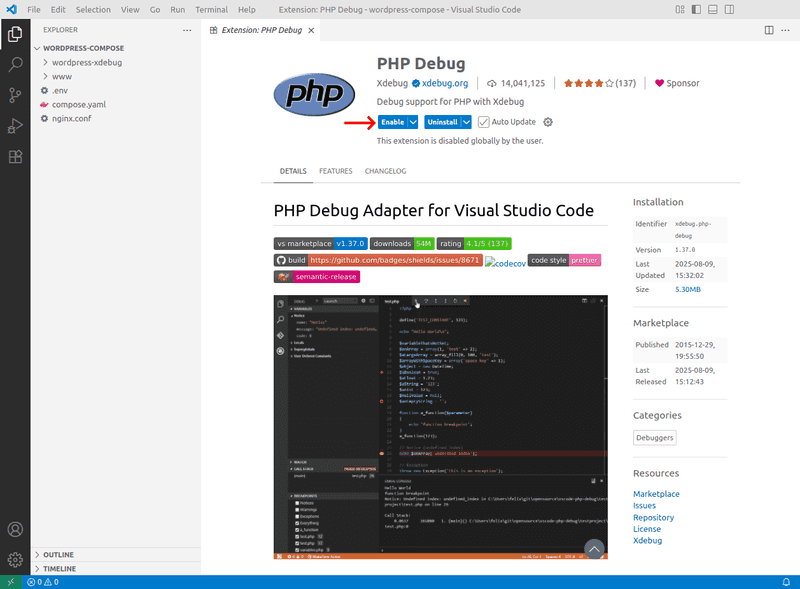
Install the Xdebug extension for VS Code and enable it:
Create a VS Code launch configuration:
mkdir -p .vscode \
&& nano .vscode/launch.json
Paste the following content:
{
    "version": "0.2.0",
    "configurations": [

        {
            "name": "Listen for Xdebug",
            "type": "php",
            "request": "launch",
            "port": 9003,
            "pathMappings": {
                "/var/www/html": "${workspaceFolder}/www"
            }
        }
    ]
}
The only interesting thing here is path mapping, which maps from the path inside a container (/var/www/html) to the path on the host.
Without this mapping, debugger will not work.
Now, close all the VS Code windows and reopen it:
- Replace
wordpress-composewith a directory of thecompose.yamlfile.
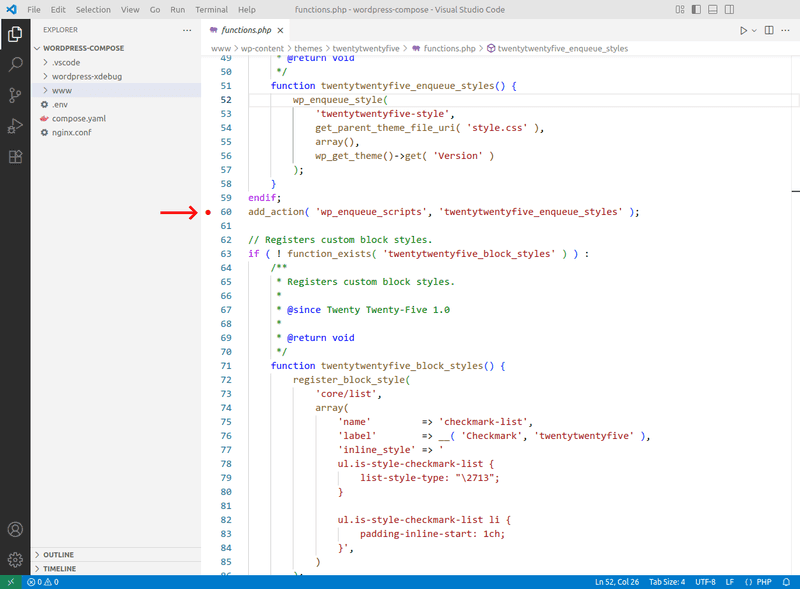
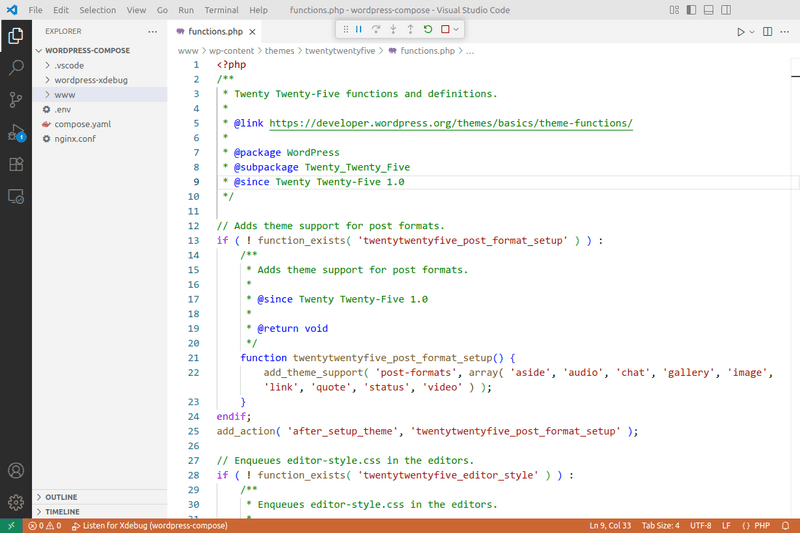
code wordpress-composePlace a breakpoint on a desired line, where you want to stop the execution:
Press F5 to start debugging in VS Code. Now, you need to visit your website to trigger the breakpoint.
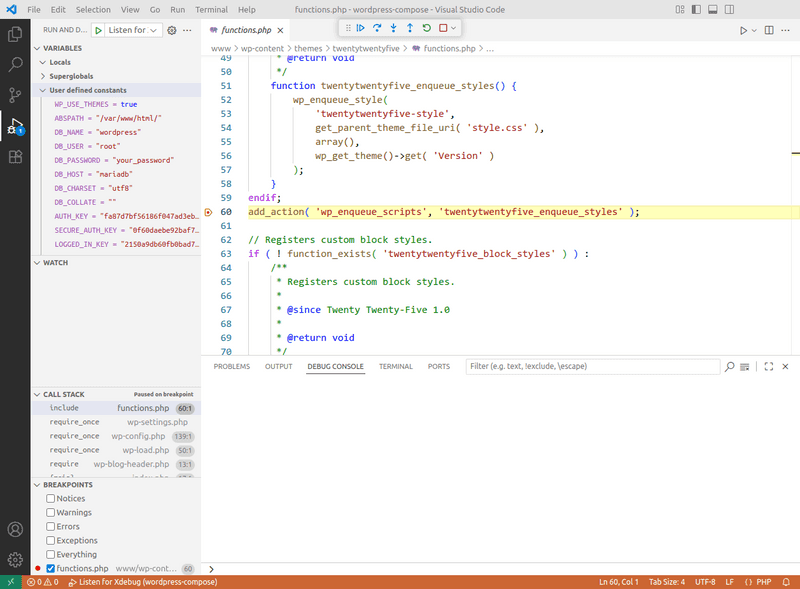
Once you are back in VS Code, you should see that execution is stopped.
You can inspect the variables, call stack and step through your code.
Step 5.3 - Break on an error
If an error has occurred, it's often helpful to inspect the state of your WordPress website at that point.
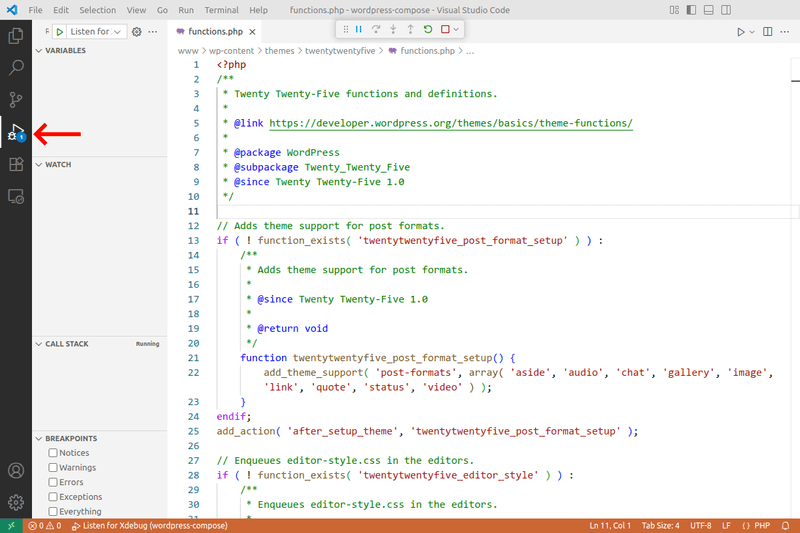
Configure your IDE and press F5 to start debugging:
Now, open the Run and Debug view by pressing Ctrl+Shift+D or by clicking its icon in the activity bar:
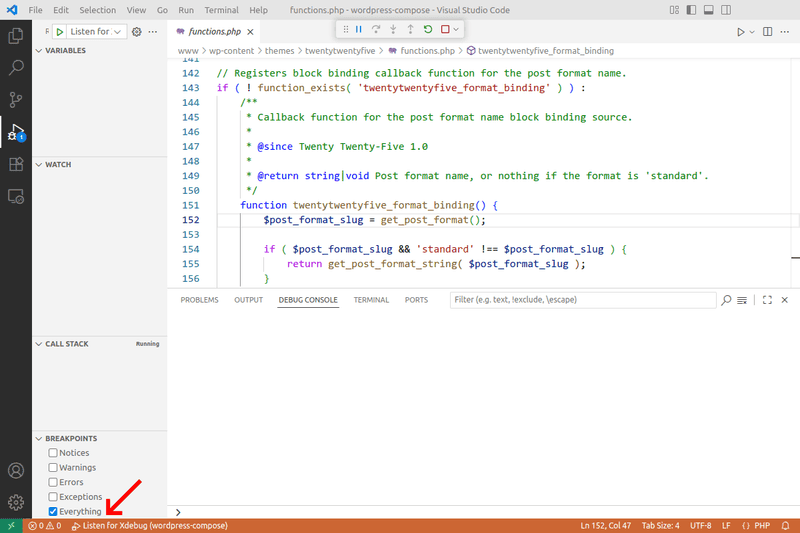
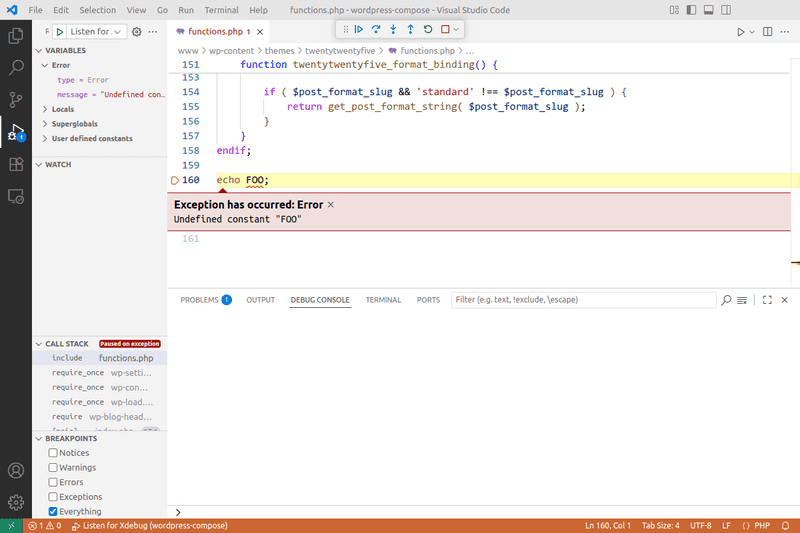
Find the Breakpoints section in the sidebar and check Everything. This means that breakpoint will be created at the point of any error condition.
When an error happens, you will see that execution is stopped at the erroneous line:
At this point you can inspect the variables and call stack to find out what caused the error.
Conclusion
Hopefully you have learned the basics of running WordPress in a container. Not just running, but solving issues if they arise. You know how to debug your PHP code running in a container using Xdebug, and how to inspect the logs. No matter if you need to develop a WordPress website from scratch or to run an existing website. You can use Docker Compose to provide an isolated and reproducible environment for it.
