

Introduction
Having backups of your data is crucial for any software deployment. The Storage Boxes provided by Hetzner are a cheap way to store your backups, but how can you get them from your production server to the Storage Box? You could configure each application to send its data to your Storage Box, using any of the methods described in the documentation, but, if you are using Kubernetes to deploy them, you may as well take advantage of the fact, and use a backup operator to back up all your data from your cluster at once.
There are many Kubernetes backup operators: some of them, such as Velero, store both the persistent data stored in Kubernetes Persistent Volumes (PVs), as well as the cluster state (the manifests you have deployed on the cluster). The other kind, (for example, k8up) only stores the data in your PVs. It is also capable of storing application-aware backups (such as .sql database dumps) that you can restore. This is enough to perform disaster recovery if you use a GitOps flow, where all your manifests are stored in a Git repository, therefore being able to easily restore the actual applications, without data, easily. This would be the case if you use ArgoCD, which you can learn to deploy on this tutorial.
In this tutorial, you will learn to configure k8up on an existing Kubernetes cluster to store your data on a Hetzner Storage Box. As an example, you will also be shown how to take a backup of a simple PV managed by a PersistentVolumeClaim (no matter the storage backend you are using on your cluster), and then how to perform disaster recovery from your backup.
Prerequisites
- Hetzner Storage Box of any tier.
- A running, working Kubernetes cluster (see "this tutorial"), as well as the tools to manage it (
kubectl,helm) installed on your local computer. - Some familiarity with the basics of Kubernetes (i.e. knowing what each resource is, as well as some familiarity with
kubectl). - Some familiarity with Restic (optional, the basics are explained in the tutorial).
Step 1 - Preparing your Storage Box
First of all, you will need to prepare your Storage Box. Navigate to it on your Hetzner Console, and make sure "External Reachability" and "SSH Support" are enabled. If not, click Actions > Change Settings, and activate them.
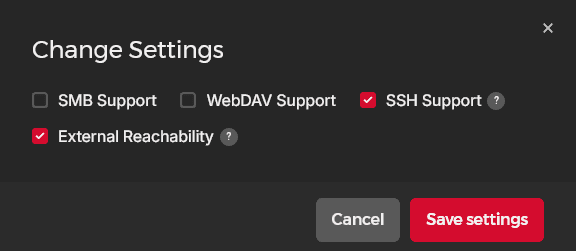
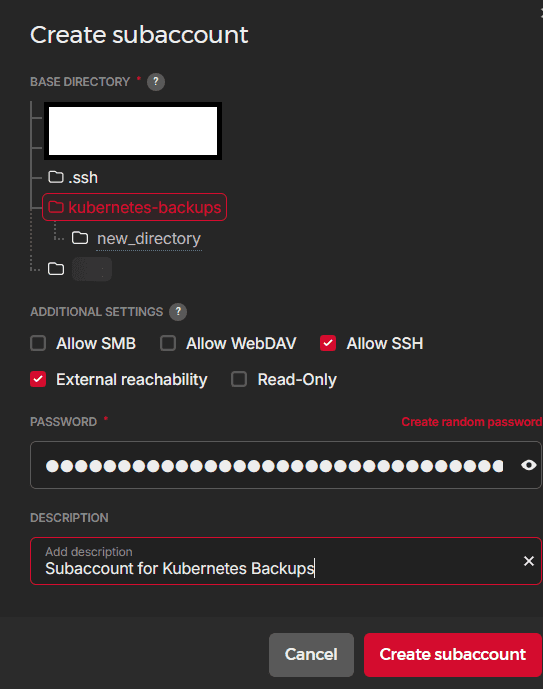
Once this is done, you can choose to either proceed storing your backups on your main account, or creating a subaccount with a subdirectory for them. In order to organize the file structure, and to reduce the attack surface, this tutorial will show using a subaccount (this way, if your credentials got compromised, it would only be for the subaccount, and you would still have access to the Storage Box, as well as all the data from all the sub-accounts and the main account).
If you have not already, create a new subaccount, activating "External reachability" and "Allow SSH". Generate a random password (make sure to copy it!), and input a description.
Step 2 - Setting up access
Once everything has been set up on the Hetzner Console, we will do the necessary setup that will be needed to connect k8up to the Storage Box.
k8up uses Restic to actually perform the data-moving. Restic supports a series of backends, but out of these, k8up is only straightforward to set up using Object Storage. However, as we are using a Storage Box (block storage), we cannot use them. We will be using a backend that is supported by restic, although not directly by k8up: the restic rest-server served by Rclone, over SSH. This may sound complicated but the reason to do it is that it is an overlap between the storage backends supported by restic, and the access methods supported by Hetzner.
If you are familiar with restic, you may question why use this and not restic's SFTP backend, which Hetzner also supports. The reason is that, by using rest-server over rclone, you may pass the --append-only argument to the server, so that deletions in your original data are not deleted in the backup, but only marked as such, so that older snapshots of deleted files are available. This, although not perfect, could be helpful in the case of an attacker gaining access to your Kubernetes cluster, deleting your data, and running a backup.
We have to access the rest-server via SSH (rather than HTTPS) as Hetzner only allows us to serve it to stdio, that is, the HTTP server really runs on stdio. The way to access it is via SSH, and hence the extra step. To do this, we will be using public key authentication, therefore the first step will be to generate a keypair that should have no password. Using OpenSSH:
$ ssh-keygen
Generating public/private ed25519 key pair.
Enter file in which to save the key (~/.ssh/id_ed25519): /home/<user>/.ssh/kube-backups # choose a name for the key
Enter passphrase (empty for no passphrase): # leave empty
Enter same passphrase again:
Your identification has been saved in kube-backups
Your public key has been saved in kube-backups.pub
cat ~/.ssh/kube-backups.pubOnce the keypair has been created, it is time to upload the public key to the Storage Box. Before doing so, we have to put together the authorized_keys file. Create a new file with the following content:
command="rclone serve restic --stdio --append-only /home" <content_of_your_key.pub_file>By doing this, we are telling the Storage Box to accept SSH connections authenticated with the key we have just created, and to force the rclone serve command to anyone connecting using this key. This means that this key will only be useful for restic remote connections, which is an added preventive measure (if a bad actor has the key, they will not be able to SSH or SFTP to the server and delete all your backups). In the file, the key must appear with the type prefix and the actual key, but you may remove the comment at the end (i.e. leave it like ssh-ed25519 AAAAC3NzaC1lZDI1NTE5AAAAIGFyZrQFYrN1OfU9DO3VHPvi70yRLkPjfEZ9AHiQA5XY). We are serving the repository on the root (/home) directory of our subaccount's folder, but you may choose any path inside it, and you can have multiple restic repositories per account, you would just have to add more lines to the authorized_keys file.
Now, we have to upload the authorized_keys file to our Storage Box. It is important to do so using the credentials (password) of the subaccount we just created. For instance, using sftp:
$ sftp -P 23 uXXXXXX-subX@uXXXXXX-subX.your-storagebox.de
uXXXXXX-subX@uXXXXXX-subX.your-storagebox.de\'s password: #paste the subaccount's password here
Connected to uXXXXXX-subX.your-storagebox.de.
sftp> mkdir .ssh
sftp> put authorized_keys .ssh/authorized_keys
Uploading authorized_keys to /home/.ssh/authorized_keys
authorized_keys                                                      100%  138     2.2KB/s   00:00
sftp> chmod 700 .ssh
Changing mode on /home/.ssh
sftp> chmod 600 .ssh/authorized_keys
Changing mode on /home/.ssh/authorized_keys
sftp>
As shown, the file must be uploaded to the .ssh folder, which must be created, too. In order to ensure the SSH server can read the keys properly, the .ssh folder must have 700 permissions, and the authorized_keys file itself 600, as shown in the chmod lines.
In order to test the setup has been done properly, we can try to SSH to the Storage Box:
$ ssh uXXXXXX-subX@uXXXXXX-subX.your-storagebox.de -p 23 -i ~/.ssh/kube-backups # the name of your key
The authenticity of host '[uXXXXXX-subX.your-storagebox.de]:23 ([10.0.0.1]:23)' can\'t be established.
ED25519 key fingerprint is SHA256:XqONwb1S0zuj5A1CDxpOSuD2hnAArV1A3wKY7Z3sdgM.
Are you sure you want to continue connecting (yes/no/[fingerprint])? yes
Warning: Permanently added '[uXXXXXX-subX.your-storagebox.de]:23' (ED25519) to the list of known hosts.
2026/10/05 17:55:13 NOTICE: Config file "/home/.config/rclone/rclone.conf" not found - using defaults
2026/10/05 17:55:13 NOTICE: Failed to restic: refusing to run HTTP2 server directly on a terminal, please let restic start rclone
Connection to uXXXXXX-subX.your-storagebox.de closed.
What the server is showing us are messages from the rclone server. As we have not given it any rest-server command (we have only connected), the rest-server stops execution, and therefore, the SSH session ends. Therefore, we confirm that by using this SSH key, we are accessing the restic rest-server served by rclone on stdio via SSH. Therefore, we are done with the configuration of the Storage Box and will proceed to the configuration of k8up in our Kubernetes cluster.
Checking the scoped key (Optional)
Optionally, we can also try to sftp to our server using this key, and we will be met with a connection closed message, proving the point stated earlier:
$ sftp -i ~/.ssh/kube-backups -P 23 uXXXXXX-subX@uXXXXXX-subX.your-storagebox.de
Connection closed
Step 3 - Configuring k8up in our cluster
Before creating any backups, we will need to install and configure the operator on our Kubernetes cluster.
In order to install it, we will be using the official Helm chart, as that is the recommended way to do it in the k8up install guide.
$ helm repo add k8up-io https://k8up-io.github.io/k8up
$ helm install k8up k8up-io/k8up -n k8up-system --create-namespace # you can install it on any namespace, including the default one.
NAME: k8up
LAST DEPLOYED: Mon Oct  5 20:34:09 2026
NAMESPACE: k8up-system
STATUS: deployed
REVISION: 1
TEST SUITE: None
NOTES:
#####################
! Attention !
#####################

This Helm chart does not include CRDs.
Please make sure you have installed or upgraded the necessary CRDs as instructed in the Chart README.

#####################
Despite the warning message after installing, the Custom Resource Definitions (CRDs) are now included in the helm chart, so there is no need to do any extra install steps after installing the helm chart.
We wait until all the pods of the operator are running and then proceed with the configuration.
$ kubectl get po -n k8up-system # or whichever namespace you have chosen to install the operator in
NAME                    READY   STATUS    RESTARTS   AGE
k8up-5c8d7c6757-q8nxz   1/1     Running   0          87s
Configuring the operator
Before performing any backups, we need to configure the operator for our specific use case. As has been stated earlier, our backend that we just set up (rest-server over rclone over stdio over SSH) is not one of the cases k8up supports out of the box. Therefore, we will need some general configuration.
First of all, we will need to provide the operator of the required information to connect to our Storage Box. We will also need to provide the restic repository password: before uploading the data to the remote repository (the Storage Box), restic encrypts the data using a password, which ensures that even if someone obtains the data, if they do not have the password, they would be unable to obtain any information from it. This also ensures Hetzner could not access your data, despite hosting the Storage Box, either. This also means that losing your password is equivalent to losing all your backups, so make sure you keep it safe!
This data will be provided to the operator using Kubernetes secrets. You may also use external secrets, if your infrastructure is deployed that way. As this tutorial shows a basic demonstration, we will use regular Kubernetes secrets in a yaml manifest. The structure of the secrets shown, however, is what you will have to reproduce no matter the source you use to provision the secrets (but remember the secrets will have to be in the same namespace as the app you want to back up).
As we will be deploying our test app and backing it up later on the default namespace, we will deploy the secrets and further configuration in said namespace. If you want to back up the contents of another one, make sure to specify it in the manifests.
apiVersion: v1
kind: Secret
metadata:
  name: "restic-repository-password" # The first secret. It holds the password of the repository. Make sure to keep this value safe!
stringData:
  password: "<your password>" # choose a strong password!
---
apiVersion: v1
kind: Secret
metadata:
  name: backup-ssh-config # The second secret, holding the SSH connection data that the operator will need in order to access the Storage Box.
stringData:
  config: |+ # This will be the SSH config in the pod that executes restic. To shorten the SSH command, we create a host with all the connection details in the SSH config.
    Host storagebox
      HostName uXXXXXX-subX.your-storagebox.de
      User uXXXXXX-subX
      Port 23
      PreferredAuthentications publickey
      IdentityFile /home/k8up/.ssh/ssh_key
      StrictHostKeyChecking no
  ssh_key: | # Here you must supply the SSH private key that was generated earlier, that restic will need to connect to the Storage Box. Make sure to also keep it safe!
    -----BEGIN OPENSSH PRIVATE KEY-----
    your private key here
    -----END OPENSSH PRIVATE KEY-----
type: Opaque
Once the secrets are deployed to your cluster (for instance, by filling the previous template with your particular connection information and then executing kubectl apply -f manifest.yaml), we may continue by storing the name of the repository. This is the connection string restic will use to refer to the remote repository. It does not contain actual connection information (we have already specified that on the secret above): what it contains is the connection method (rclone) and the chosen name for the repository. As this contains no sensitive information, it will be a ConfigMap with the following structure:
apiVersion: v1
data:
  repository: "rclone:backups" # You can use any name, but you must precede it by 'rclone:'
kind: ConfigMap
metadata:
  name: backup-restic-repo
Apply this as well. Now we can proceed to feed these secrets and the ConfigMap to the operator. This is the less straight-forward step, as we are doing a nonstandard k8up configuration: as k8up does not support this backend, we cannot use the regular backend configuration on the Backup CRD that k8up uses to perform the backups. We will need to pass the pod some specific environment variables as well as files (from our secrets and ConfigMaps) so that when it calls restic, it knows where to upload the data. The way to do this on k8up is by using the PodConfig CRD. You will only need to define a single PodConfig for each remote repository/Storage Box. If you used the same secret and ConfigMap names, you may directly copy and paste the PodConfig below and deploy it:
apiVersion: k8up.io/v1
kind: PodConfig
metadata:
  name: pod-config
spec:
  template:
    spec:
      containers:
        - env:
            - name: HOME
              value: /home/k8up
            - name: RESTIC_REPOSITORY_FILE
              value: /home/k8up/.job/repository
            - name: RESTIC_PASSWORD_FILE
              value: /home/k8up/.secret/password
            - name: RESTIC_OPTIONS
              value: "rclone.program=ssh -F /home/k8up/.ssh/config storagebox" # this defines the actual SSH connection command restic will invoke. It uses the SSH connection data we defined earlier.
          name: backup
          securityContext:
            runAsUser: 0 # This is important as the original image is rootless, and in order to execute the SSH command from the container, we must be using an actual user. Due to the limited scope of the backup containers, this should not imply a noticeable increase on the security risks.
          volumeMounts:
            - mountPath: /home/k8up/.ssh # mounting the SSH config and private key defined earlier
              name: ssh-config
            - mountPath: /home/k8up/.job # mounting the repo's name
              name: restic-repository
            - mountPath: /home/k8up/.secret  # mounting the repo's password
              name: backup-secret
      volumes:
        - name: ssh-config
          secret:
            defaultMode: 0600 #Just as we did for the authorized_keys file on the server, the private key and SSH config must have 0600 permissions. This is forced here.
            secretName: backup-ssh-config
        - configMap:
            name: backup-restic-repo
          name: restic-repository
        - name: backup-secret
          secret:
            secretName: restic-repository-password
Understanding the PodConfig (Optional)
Some of the fields on the PodConfig we just defined may not make sense at first. They are explained here.
- The
RESTIC_REPOSITORY_FILEandRESTIC_PASSWORD_FILEenvironment variables point to the path of the file holding the repo's name as well as its encryption password. Although we could define these as envs themselves, this is not possible in reality ask8upoverwrites them: on regular use cases, the operator populates it from the data given in thebackendsection of the backup related CRDs. In our special case we need to provide it. (Thisk8upGitHub issue helped figure this out). - The
RESTIC_OPTIONSenv holds the argument that will be passed to the actualresticinvocation in the backup container when a backup takes place. As we are servingrest-serveroverrcloneoverstdiooverssh, we need to invoke SSH instead ofrclone. This has the benefit of not needing to provisionrclonein the backup container itself. In thesshcommand, we just need to include the host we defined in the SSH config earlier, and point to said config. (More information on our particular connection method on the official restic documentation here)
Step 4 - Backup Time!
Now that we have configured the operator, we can finally go ahead and perform a backup!
...But, first we need actual data to back up. It is a good idea to test a simple example before starting to play with precious data. Therefore, we will define a very basic test scenario: a web application that will store some persistent data. Then, we will have k8up take a backup of it. And, once it has been done, we will test a disaster recovery scenario, simulating we have lost the full cluster: data and manifests.
Part 1 - Defining the test app
Our app will be a simple NGINX web server. We will download a test HTML page into the Pod for it to display, which will be stored in a Persistent Volume (which will be then backed up).
The manifest we will be deploying is as follows. Bear in mind we will be creating a Persistent Volume Claim, and of any potential cost or other implications doing so could have, depending on where your Kubernetes cluster is hosted. Also, in order to be provisioned, your Kubernetes cluster must be running an operator that can provision PVCs, or you should create the PV and associate it with the PVC (which is out of the scope of this tutorial).
apiVersion: apps/v1
kind: Deployment
metadata:
  name: test-deployment
spec:
  replicas: 1
  selector:
    matchLabels:
      app: nginx-test
  template:
    metadata:
      name: nginx-test
      labels:
        app: nginx-test
    spec:
      volumes:
        - name: pages
          persistentVolumeClaim:
            claimName: nginx-test-pvc
      containers:
        - name: nginx
          image: nginx
          imagePullPolicy: IfNotPresent
          ports:
            - containerPort: 80
              protocol: TCP
          volumeMounts:
            - mountPath: /usr/share/nginx/html
              name: pages
      restartPolicy: Always
---
apiVersion: v1
kind: PersistentVolumeClaim
metadata:
  name: nginx-test-pvc
spec:
  resources:
    requests:
      storage: 10Mi
  accessModes:
    - ReadWriteOnce
You can directly apply this manifest. It will create a Deployment which will run a single pod running NGINX. It will also mount a new empty PVC in the directory where NGINX serves files. Once it has been applied, you should see the Pod and PV:
$ kubectl get po
NAME                               READY   STATUS     RESTARTS       AGE
test-deployment-6569f7c78-45vp5    1/1     Running    0              12s

$ kubectl get pv
NAME                                       CAPACITY   ACCESS MODES   RECLAIM POLICY   STATUS   CLAIM                    STORAGECLASS   VOLUMEATTRIBUTESCLASS   REASON   AGE
pvc-7bfe0eda-f354-4ade-b846-dd838f3d01b1   10Mi       RWO            Delete           Bound    default/nginx-test-pvc   local-path     <unset>                          21s
You may have noticed we have not created any Services or any form of ingress. As this is a simple demonstration, we will port-forward using kubectl, although you may choose any other way to access the deployment if you prefer. Let's port-forward our Deployment and see what contents the server is serving.
Open a new terminal session, and execute the following command. Leave it running for now.
$ kubectl port-forward deploy/test-deployment 5555:80
Forwarding from 127.0.0.1:5555 -> 80
Forwarding from [::1]:5555 -> 80
Navigate to http://localhost:5555. You should see an NGINX error page:
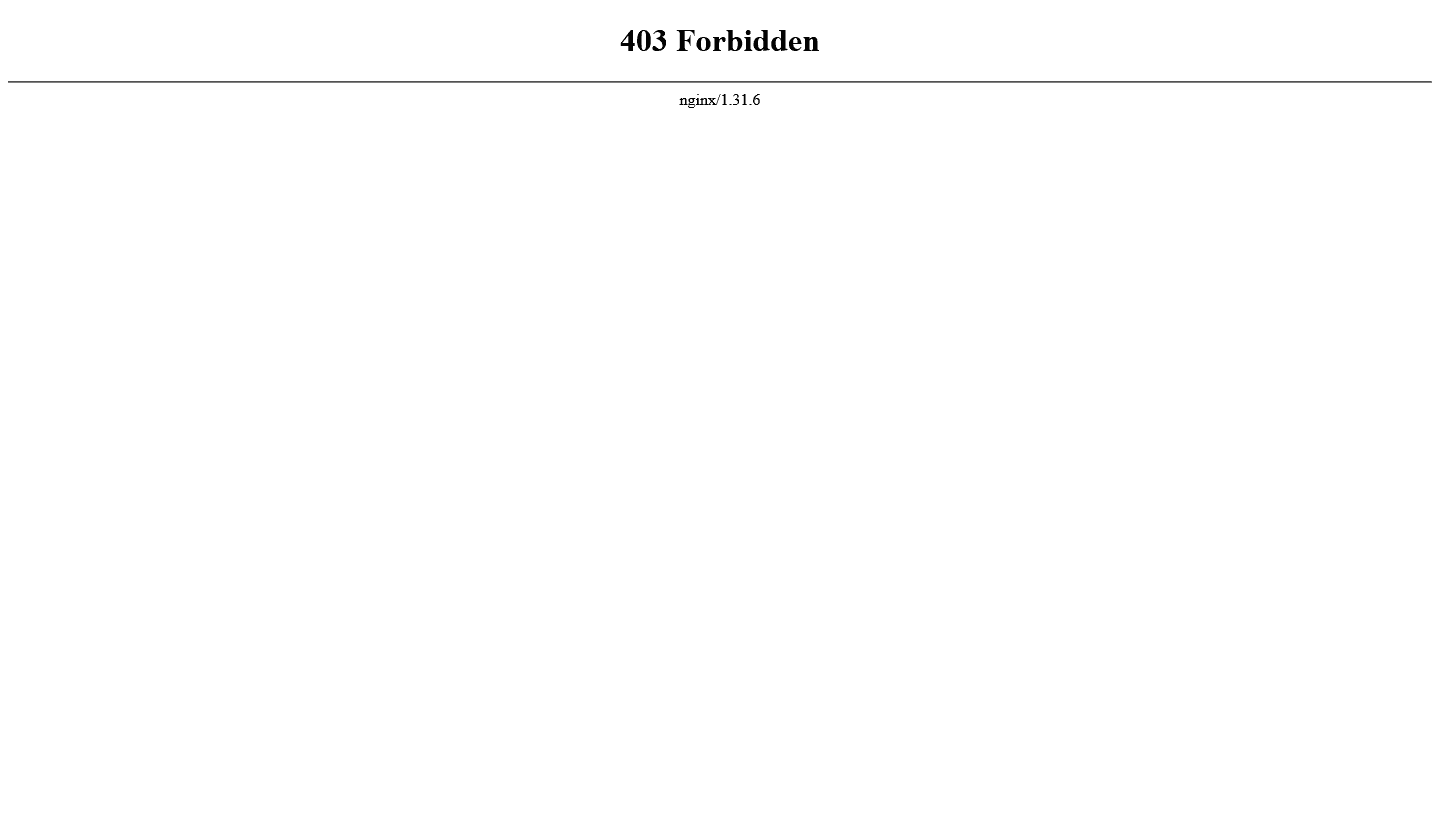
This is because of the fact that we have not uploaded any HTML page yet. Let's do this now. You can use any HTML file, the following one is provided as a sample for convenience:
<!DOCTYPE html>
<html lang="en">
<style>
  body {
    font-family: Arial, Helvetica, sans-serif;
  }
  h1 {
    text-align: center;
    text-decoration: underline;
  }
</style>
<head>
  <meta charset="utf-8">
  <title>Important website</title>
</head>
<body>
  <h1>Sample webpage</h1>
  <p>This is a sample webpage served by our NGINX pod, loaded from a Persistent Volume. It does not contain any interesting information or data. However, we will imagine this represents the data that a real web application stores and needs to work, and that you are interested on backing up.</p>
  <p style="text-align: center; font-family: monospace; font-size: xx-large; font-style: italic">[Important stuff here]</p>
</body>
</html>
This HTML file is also available on GitHub in hetzneronline/community-content/tutorials/backing-up-k8s-cluster-to-storagebox/files for convenience.
The easiest way to get it in the PV so the NGINX server serves it will be to open a shell in the pod and download the file:
$ kubectl get po
$ kubectl exec po/test-deployment-6569f7c78-45vp5 -it -- bash # Remember to replace the pod name with yours!
# you can use the gist link of the sample HTML file or whichever HTML file you wish to use.
root@test-deployment-6569f7c78-45vp5:/# curl https://raw.githubusercontent.com/hetzneronline/community-content/refs/heads/master/tutorials/backing-up-k8s-cluster-to-storagebox/files/sample.html -o /usr/share/nginx/html/index.html
  % Total    % Received % Xferd  Average Speed   Time    Time     Time  Current
                                 Dload  Upload   Total   Spent    Left  Speed
100   720  100   720    0     0   1602      0 --:--:-- --:--:-- --:--:--  1600
root@test-deployment-6569f7c78-45vp5:/# exit
exit
If you refresh the NGINX tab in your browser, you should see this, if you are using the sample HTML:
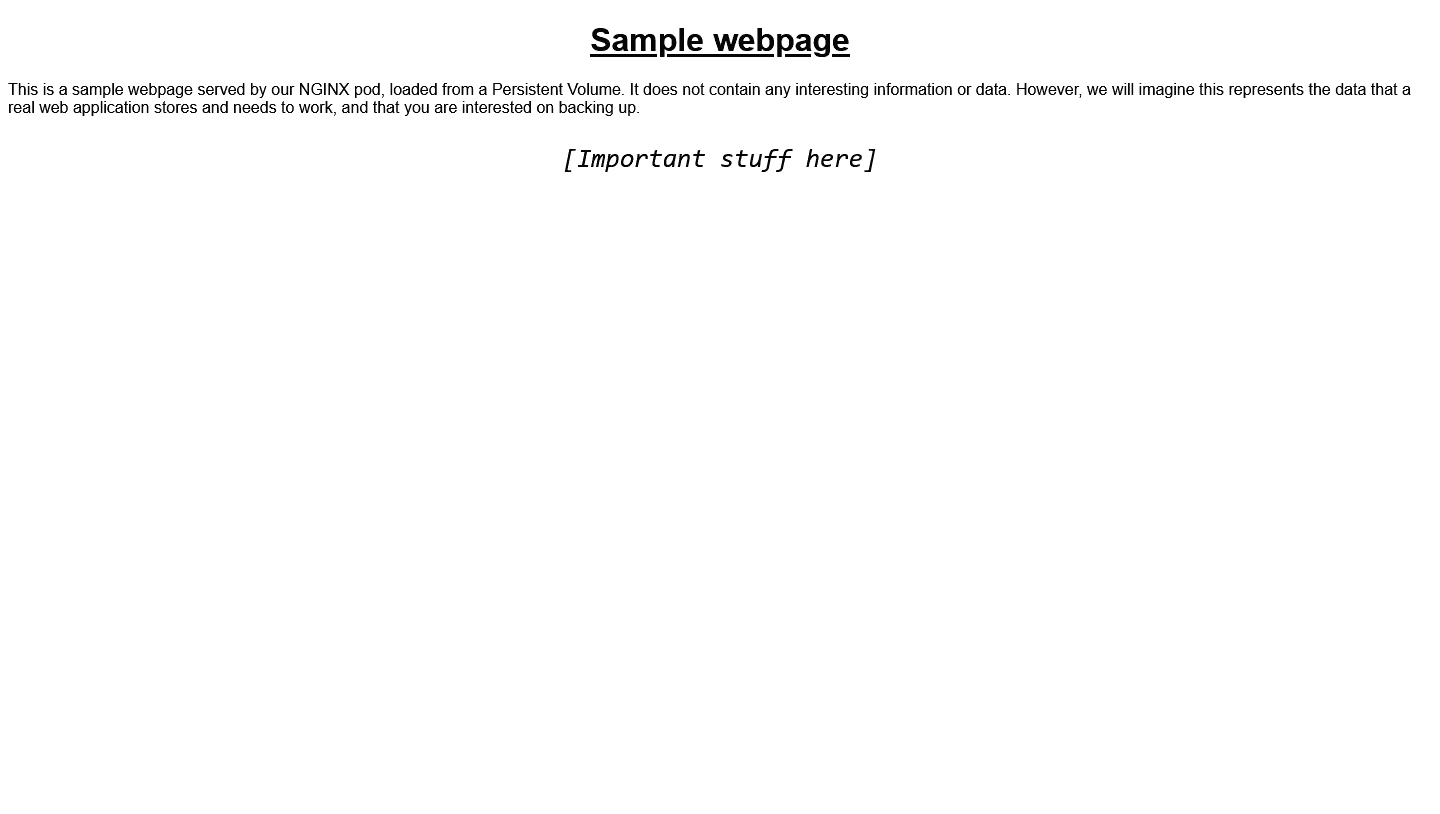
Now, our sample app is deployed! The HTML file is stored in a Persistent Volume, which we will back up next.
Part 2 - Backing up our test data
k8up has a few ways to create backups. First of all, you can create either full PV backups, or application-aware backups; and you can create either in a one-off or scheduled way.
The way the operator manages backups is by using CRDs, the two main ones being Backups and Schedules, the former for one-off backups and the latter for regularly scheduled backups. In this example, we will be creating a full-PV, one-off backup (therefore, we will create a Backup), although the other methods would be similar.
This is the Backup manifest. Make sure you deploy it onto the same namespace as the application and the general operator configuration we deployed earlier, if you have not deployed it all to the default namespace.
apiVersion: k8up.io/v1
kind: Backup
metadata:
  name: k8up-test # Set whichever name you wish
spec:
  podConfigRef:
    name: pod-config # IMPORTANT: This is the line that will link the backup to our previous config
  backend:
    repoPasswordSecretRef:
      name: "restic-repository-password"
      key: "password"
This manifest contains two critical pieces of information: first of all, the reference to the PodConfig we created earlier, which is where the specific configuration restic needs to access our Storage Box lives. Normally, the storage backend connection details would go in the spec.backend field, but as we are using a connection method that is not supported out-of-the-box, we need to specify the connection details in the PodConfig. We still need to include a spec.backend section, which is why we include the reference to the secret holding the restic repository password (as otherwise the operator would not let us deploy the Backup manifest, even if the secret is provided to the pod that actually runs restic via the PodConfig).
If you wanted to schedule recurrent backups creating a Schedule, you have to just add the same podConfigRef and backend blocks that we have here, otherwise the rest of the configuration (for Schedules and Backups) is the same.
You can read on to see all the possibilities k8up offers, including application-aware backups, in the official docs here.
Now, let's kubectl apply the Backup manifest and let k8up create our very first backup on the Storage Box! Once it has been applied, we can run kubectl get backup to check when it has actually been done.
$ kubectl apply -f backup.yaml
backup.k8up.io/k8up-test created

$ kubectl get backup --watch
NAME        SCHEDULE REF   COMPLETION   PREBACKUP              AGE
k8up-test                                                      10s
k8up-test                               NoPreBackupPodsFound   27s
k8up-test                  Succeeded    NoPreBackupPodsFound   1m
Backup succeeded! You can run kubectl describe backup/k8up-test and you will be shown the different events that happen from the creation till the execution of the backup. Now, our data (in this case, the HTML file) lives encrypted in the Storage Box. We can now proceed to the example disaster recovery scenario.
We can also list the snapshots taken by getting for the Snapshots in our cluster:
$ kubectl get snapshot
NAME       DATE TAKEN             PATHS                  REPOSITORY
3caa7061   2026-11-08T23:57:42Z   /data/foo-pvc
538f2212   2026-11-08T23:57:45Z   /data/nginx-test-pvc
This will show us all the snapshots taken, and the PVC they came from (after /data/). As you can see, using its default configuration, k8up takes a snapshot of all the PVCs in the same namespace as the Backup. This behavior can be changed, as you can see in the docs. This list does not show the repository, given we are not using the config options the operator has (again, it does not support our connection method), but our PodConfig (so the operator does not actually know where the remote repository lives).
Part 3 - Data and application loss!
Because having a disaster recovery plan is just as important as having backups, we will now demonstrate how to get our simple server back up and running after losing the data and application definitions. This would be the case if, for instance, you lost the servers where your Kubernetes cluster is hosted. For simplicity, we will, however, simply delete the PVC, PV, and the Deployment. If you fully lost your cluster, you would have to redo the k8up setup process we have done in step 3.
$ kubectl delete deploy/test-deployment
deployment.apps "test-deployment" deleted

$ kubectl delete pvc/nginx-test-pvc #NOTE: Depending on the provisioner you use for PVCs, your deletion process may differ.
persistentvolumeclaim "nginx-test-pvc" deleted
We can check there is indeed no PV and hence no data anymore: running kubectl get pv will show either no PV or unrelated ones. You may also check the actual location where the PV stored its data, which depends on which storage operator you are using.
Part 4 - Recovering from the disaster
Now it is time to do the actual disaster recovery. First of all we will recover the app itself, with no data. In our case, it is as easy as re-applying the manifests we applied on step 4 part 1:
$ kubectl apply -f test-deploy.yaml # or whatever you named the manifest
deployment.apps/test-deployment created
persistentvolumeclaim/nginx-test-pvc created
If we port-forward again:
$ kubectl port-forward deploy/test-deployment 5555:80
Forwarding from 127.0.0.1:5555 -> 80
Forwarding from [::1]:5555 -> 80
And we navigate once again to http://localhost:5555, we will find the NGINX 403 page again. This shows that, even if our application has been restored properly, its data has not. This first part of disaster recovery, restoring the actual applications, is simplified and, in a real-world scenario, would be done via a GitOps flow (such as using ArgoCD) or similar.
Restoring the data
Now, we have to actually restore the data back to the PVC, using another k8up CRD: a Restore. There are two main ways to restore a backup: manually, connecting to the restic repository from a computer and pulling all the data from a snapshot; or directly having k8up copy the data from a snapshot back to a PVC (or S3 bucket). Here we will be repopulating the newly-recreated PVC to have our web server serve the right file again.
The Restore you create should look like this:
apiVersion: k8up.io/v1
kind: Restore
metadata:
  name: restore-test
spec:
  restoreMethod:
    folder:
      claimName: nginx-test-pvc # name of your PVC (where the data will be restored)
  podConfigRef:                            #  ─┐
    name: pod-config                       #   |
  backend:                                 #   ├─  As has been said before, this is what you always have to
    repoPasswordSecretRef:                 #   ├─  include in your k8up manifests for this config.
      name: "restic-repository-password"   #   |
      key: "password"                      #  ─┘
Once you apply this manifest, your volume will be repopulated! The Restore CRD supports some more options, such as restoring a specific snapshot. You can check out all the possibilities on the docs.
$ kubectl apply -f restore.yaml
restore.k8up.io/restore-test created

$ kubectl get restore --watch
NAME           SCHEDULE REF   COMPLETION   AGE
restore-test                               8s
restore-test                  Succeeded    25s
restore-test                  Succeeded    25s
Now, let's go back to http://localhost:5555, and you will find our sample HTML file once again! Restored from the backup in the Storage Box.
Restic manual restore config (Optional)
Let's now see the setup required for manual restores. You would have to do a manual restore when using application-aware backups (such as dumping a database to a .sql file), where the operator cannot restore the data to a PVC. Then, you would manually connect to the new pod and restore the data.
This setup is very much setting up the same configuration that we provided to the PodConfig in our local machine. If you are doing a manual restore, you will need the restic CLI installed on your local machine.
You can either define the envs we defined in PodConfig or pass the arguments to the CLI. It could be simpler to just define the envs, to avoid having to always include the same args. In this example, we are using a mixed approach, and list the snapshots in the repo:
$ export RESTIC_REPOSITORY=rclone:backups

$ export RESTIC_PASSWORD=<your-repo-password>

$ restic -o "rclone.program=ssh -i ~/.ssh/kube-backups -p 23 uXXXXXX-subX@uXXXXXX-subX.your-storagebox.de" snapshots # make sure to point to your actual repo and private key
rclone: 2026/10/09 19:35:16 NOTICE: Config file "/home/.config/rclone/rclone.conf" not found - using defaults
repository 7d15fe3f opened (version 2, compression level auto)
created new cache in ~/restic
ID        Time                 Host        Tags        Paths                 Size
----------------------------------------------------------------------------------
3caa7061  2026-11-09 01:57:42  default                 /data/foo-pvc         93 B
538f2212  2026-11-09 01:57:45  default                 /data/nginx-test-pvc  720 B
----------------------------------------------------------------------------------
Timestamps shown in local time
2 snapshots
You can replace snapshots with any restic command. You could also include the rclone.program option in an env so as to avoid having to type it in every single command. You can read restic's docs for more information.
Part 5 - Cleaning up the test setup
Now we can clean up the test setup, by deleting all the manifests we have created:
$ kubectl delete backup/k8up-test
backup.k8up.io "k8up-test" deleted

$ kubectl delete restore/restore-test
restore.k8up.io "restore-test" deleted

$ kubectl delete deploy/test-deployment
deployment.apps "test-deployment" deleted

$ kubectl delete pvc/nginx-test-pvc
persistentvolumeclaim "nginx-test-pvc" deleted
Conclusion
We have successfully set up the k8up operator in our Kubernetes cluster, and tested it by executing a backup in our Storage Box and restoring it. Now, you can create Backups and Schedules of your actual production applications.
Remember k8up does not back up the state of the deployed applications (i.e. which Deployments are in a cluster, in order to be able to restore these, you could use GitOps or a similar system), but only the PVs or specific application-aware backups.
Make sure you read the docs of k8up and restic to know everything this operator and backup system can do for you.
Next steps:
- Read the docs of k8up to learn everything the operator is capable of (such as scheduled and application-aware backups): https://docs.k8up.io/k8up/2.16/index.html
- Read restic's docs to know how our backup operator works: https://restic.readthedocs.io/en/latest/045_working_with_repos.html
- Learn to install and use ArgoCD to preserve your application state: https://community.hetzner.com/tutorials/introduction-to-argocd/
Acknowledgement:
The blog post Append-only Restic backups on a Hetzner Storage Box was helpful to understand the rclone serve restic --stdio storage backend and the way Hetzner Storage Boxes work with it.