Introduction
In this tutorial we are looking at how to install and manage WordPress pages with the help of the Plesk WordPress Toolkit. I will describe how to install the WordPress Toolkit, install a WordPress website, update it and activate auto updates, create a staging instance and how to synchronize it back to the production page.
Prerequisites
- Server that has Plesk installed (see this tutorial)
- Domain added in Plesk
Step 1 - Install WordPress Toolkit
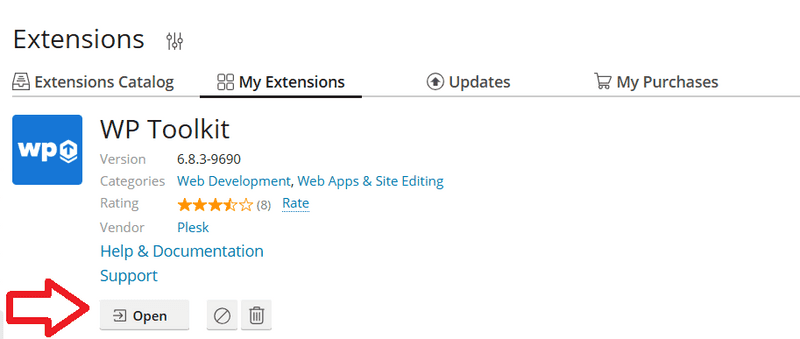
Login to your Plesk server and go to "Extensions". On the top right you will see a search bar. Type in "WordPress Toolkit" here. On the results page, you will see the corresponding description.
If the indicator says "Open", the extension is already installed. If it says "Get It Free" or "Update", you will have to click on it to trigger the installation of WordPress Toolkit. Then, you can click on "Open".
Step 2 - Install a WordPress instance
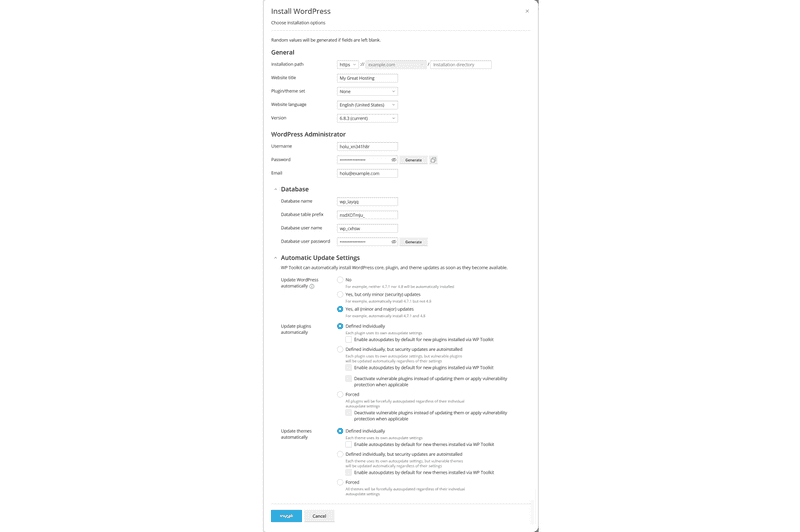
In the WordPress Toolkit, click on "Install". Note that the option "Install" is only shown if you have already added a domain in Plesk.
On the next page, you don't have to change anything, unless you want to have a specific version, a different language, username, database or auto update-settings. You can also set your website title directly.
By clicking "Install", WordPress will be installed, and you can then move on to install plugins in the next step.
Step 3 - Run and configure updates
In the WordPress Toolkit, you can choose to directly install updates if needed - either for a specific installation or for several instances at the same time.
If you want to manage several WordPress installations, you can click on "Updates" in the top.
To update one specific installation, you can also click on "View" for the specific WordPress installation. There, just select the updates you want to apply and click on "Update".
To be always up to date, you could expand the domain in the WordPress Toolkit and click on "Updates" in the bottom left. Then "Update Settings" and change the "Update WordPress automatically" setting to Yes.
Step 4 - Create a staging instance
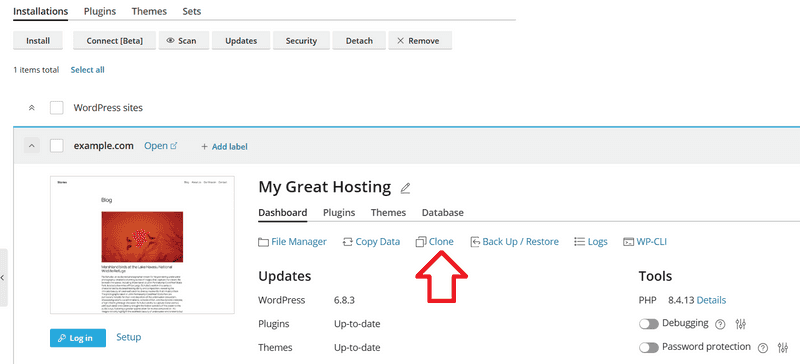
If you want to apply an update of WordPress, install a plugin or a theme, or if you want to change some content, it's best practice to test such changes first. For this, just click on "Clone" in the Dashboard section of the WordPress Toolkit.
On the next screen, you can either create a new subdomain or go for an existing domain or subdomain. If you are using e.g. the prefix staging make sure that DNS is also resolved to your server! After you cloned the website, you can start working on the cloned version.
Step 5 - Copy changes to your live environment
As soon as you are ready with your changes (be it updates of WordPress or context updates), you need to resync the data. Therefore, click on "Copy Data" at your staging instance.
As target you have to choose the original WordPress instance. Next you need to decide which data to copy - Files only, Database only or both. In addition, if the database is included, you need to specify which database(s). If you changed pages, posts or user data, make sure you uncheck the "Except postmeta, usermeta, users" checkbox!
Click on Start to proceed. After the copying is completed, you could either delete the staging instance or keep it for the future.
Conclusion
And you’re ready! Without using the WordPress Toolkit from Plesk, this process would have been significantly more complicated and would involve more steps then described above. As it is, you just have to sit back and enjoy your new WordPress page!


