Introduction
In this tutorial I will talk a little about images in the terminal. Probably everyone has had a problem at some point... when they were designing a page and wanted to see if a particular image was that particular image.... had to upload it to Apache or download it. Or they wanted to make the image smaller or crop it. What if I tell you that it is possible to do all this from a terminal? Two things are already enough for this: the imagemagick library and the tiv program.
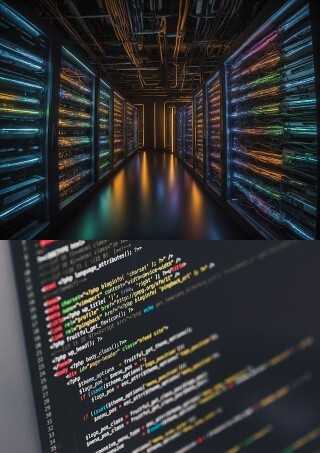
I will be using two example images throughout this tutorial:
Step 1 - Installing packages
To begin with, we will check if we have installed the make and g++ we need. To do this, type make --version — if we get a response about the version — it means that make is installed. We do the same with: g++ --version — if we get a version then we have this package installed. Below I will attach commands to install all packages — as if any of them is not installed.
-
Ubuntu
sudo apt update sudo apt install g++ make imagemagick -
Fedora
sudo dnf update sudo dnf install gcc-c++ make ImageMagick -
CentOS/RHEL
# epel-releases are additional packages that are not in the standard repositories but necessary to install ImageMagick sudo yum update sudo yum install gcc-c++ make ImageMagick sudo yum install epel-release -
Arch Linux
sudo pacman -Syu sudo pacman -S gcc make imagemagick -
openSUSE
sudo zypper refresh
sudo zypper install gcc-c++ make ImageMagick
Step 2 - View images in the terminal
Once we have gone through the installation of all the required packages, we can start by installing the tiv tool — TerminalImageViewer. With it we will be able to preview the image without leaving the terminal window.
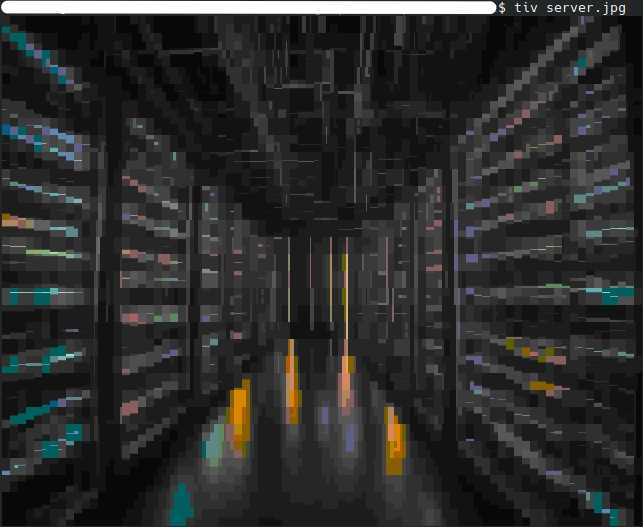
How does it work? The image that we point to tiv is divided into small segments. The color of these segments is averaged. Then these segments are displayed to us in the terminal as ▎▖ characters with previously taken colors. In practice, what comes out is a block of text that looks a bit like pixel-art. Below is a picture:
As you can see in the image above — you can easily see what the graphic shows.
Installing TerminalImageViewer
To install tiv, we need to type these commands in the terminal — one by one:
git clone https://github.com/stefanhaustein/TerminalImageViewer.git
cd TerminalImageViewer/src
make
sudo make install
Now we already have a preview of the images from the terminal. To test, you can run:
tiv <image_name>.jpgStep 3 - Editing images in the terminal using imagemagick
Below I will describe the main commands for imagemagick and show what they do.
-
Percentage reduction/enlargement of images
To increase or decrease the size of an image by a given percentage we will use:
convert INPUT_IMAGE.jpg -resize XX% OUTPUT_IMAGE.jpgIn the place where
XX%is, we specify the resize percentage. For example,50%or150%.
-
Changing the image to a specific dimension
Here we will also use the
-resizeflag but we will give specific dimensions:convert INPUT_IMAGE.jpg -resize WWWxHHH! OUTPUT_IMAGE.jpgIn the place of
WWWxHHH!we specify the dimensions to which the image should be scaled. For example:100x120!or800x600!(remember the exclamation point at the end).
-
Resize the image by specifying only one of the parameters
With the
-resizeflag we can also specify only one of the parameters (e.g. height) then the other parameter (e.g. width) will be calculated and the aspect ratio will be preserved.convert INPUT_IMAGE.jpg -resize xHHH OUTPUT_IMAGE.jpgIn the place of
xHHHwe specify the height of the image so that the width is adjusted proportionally — for example:x500. We can do it analogously with the height of the image — for example:200x.
-
Adding a border around an image
To add an outline to an image, use this command:
convert INPUT_IMAGE.jpg -bordercolor COLOR -border SSxDD OUTPUT_IMAGE.jpgIn the place where we see
COLORwe specify a color in words — for exampleredorblack(to display a list of available colors we use theconvert -list colorcommand). In place ofSSxDDwe specify the dimensions of the frame. The first size corresponds to the left and right sides. The second size corresponds to the top and bottom sides. For example, we can specify20x10or0x10. Our whole command can look like this:convert INPUT_IMAGE.jpg -bordercolor red -border 10x20 OUTPUT_IMAGE.jpg
-
Crop image in the middle
To crop the image to a specific size in the middle we use the command:
convert INPUT_IMAGE.jpg -gravity center -crop WWxHH+0+0 +repage OUTPUT_IMAGE.jpgIn this command we change
WWxHHto the size we are interested in — for example:100x150. We remember that the additions to the dimension+0+0must remain. That is, the whole command will look like:convert INPUT_IMAGE.jpg -gravity center -crop 100x150+0+0 +repage OUTPUT_IMAGE.jpg
-
Trim image from a specific point (x,y)
To crop the image to the required dimension from a specific point in the image (x,y coordinates) we use the command:
convert INPUT_IMAGE.jpg -crop WWxHH+XX+YY OUTPUT_IMAGE.jpgIn this command, as in the one above, we set the size of the crop using
WWxHH. In addition, the next parameters are+XX+YY. These are the coordinates from which the image will be cropped — for example:+34+100. The whole to complete in this command looks like this:100x150+34+100.
-
Invert X-axis image
To invert the image in the X axis, use the command:
convert INPUT_IMAGE.jpg -flop OUTPUT_IMAGE.jpg
-
Y-axis image inversion
To invert the image in the Y axis, use the command:
convert INPUT_IMAGE.jpg -flip OUTPUT_IMAGE.jpg
-
Combining multiple images into one horizontal
Convertalso allows us to combine images into one. With this procedure we can merge any number of images into one. This will be an X-axis (horizontal) merge.convert INPUT_IMAGE_1.jpg INPUT_IMAGE_2.jpg INPUT_IMAGE_n.jpg +append OUTPUT_IMAGE.jpg
-
Merging multiple images into one vertical
Merging Y-axis (vertical) images should be done with the command:
convert INPUT_IMAGE_1.jpg INPUT_IMAGE_2.jpg INPUT_IMAGE_n.jpg -append OUTPUT_IMAGE.jpg
-
Changing image colors to black and white
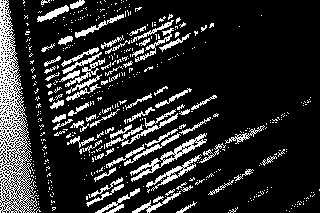
Convertalso allows us to perform color-based operations. Here we have a command to change the image to black and white colors:convert INPUT_IMAGE.jpg -monochrome OUTPUT_IMAGE.jpg
-
Change image colors to shades of gray
To change the image color palette to shades of gray we will use the command:
convert INPUT_IMAGE.jpg -colorspace Gray OUTPUT_IMAGE.jpg
-
Increase/decrease contrast and brightness
Increasing or decreasing the contrast and brightness is done with one command. The first value we specify in the command will be brightness, the second will be contrast. I point out that we can specify negative numbers in these values. The command itself looks like this:
convert INPUT_IMAGE.jpg -brightness-contrast BBxCC OUTPUT_IMAGE.jpgWith
BBwe specify the brightness, and withCCwe specify the contrast. E.g.10x12,-5x10or-10x-10.
-
Adding blur
Adding blur in a photo is possible and is controlled by a single value. The command looks like this:
convert INPUT_IMAGE.jpg -blur 0xBB OUTPUT_IMAGE.jpgIn the place where we have
0xBBwe specify the blur value. For a strong blur we specify0x10and for a light blur we specify0x2.
-
Rotate the image by a given angle
To rotate the image by a given angle we will use the command:
convert INPUT_IMAGE.jpg -rotate XX OUTPUT_IMAGE.jpgIn the place where there is
XXwe specify the angle by which we want to rotate the image — for example45or90.
-
Convert image to PNG with transparency settings
To convert a JPG file to a PNG file with settings to make a given color transparent, we will use the command:
convert INPUT_IMAGE.jpg -fuzz PP% -transparent CCCC OUTPUT_IMAGE.pngIn the place where we have
CCCCwe specify what color is to be transparent — for examplewhite,blackorredetc. In the place where we havePP%we specify what tolerance we want the given color to change to transparent — for example,10%or5%.
Conclusion
As you can see imagemagick is a very powerful library for image processing. There are many more such commands, which allow you to make, for example, a collage or insert text.... but I decided that here I will discuss the basic ones. I hope that now the processing of images on your server will be more pleasant!


