Introduction
SSH hardening is the first step in setting up a server but often times we underestimate the importance of monitoring the SSH logins. This is especially important if the server is accessed by multiple developers or by a service like GitHub that logs into the server via SSH to deploy your app. Monitoring SSH logins can be useful for keeping track of who is accessing your server and when. It can also help you flag any unauthorized access attempts.
The tutorial contains instructions to use the open-source notification service ntfy to send notifications to your phone and desktop whenever a user or a service logs into your server via SSH along with their IP address and geolocation by taking advantage of Pluggable Authentication Modules (PAM) in Linux. For geolocation we will use IP info API, this step is completely optional.
In this tutorial, we will be using the hosted and free version of the ntfy service. If you wish to self-host the service, you can follow the instructions here. It is a free service that allows you to send notifications to your phone or desktop via a simple HTTP API. You can also use other notification services like Gotify, Pushover, or even email if you prefer.
Prerequisites
On the server that should be monitored:
- This tutorial was tested on a server with Ubuntu 24.04 but it should also work on other Linux distributions.
- SSH key
- jq, install with:
sudo apt update && sudo apt install jq -y
Step 1 - Create a topic on ntfy.sh
-
Sign up
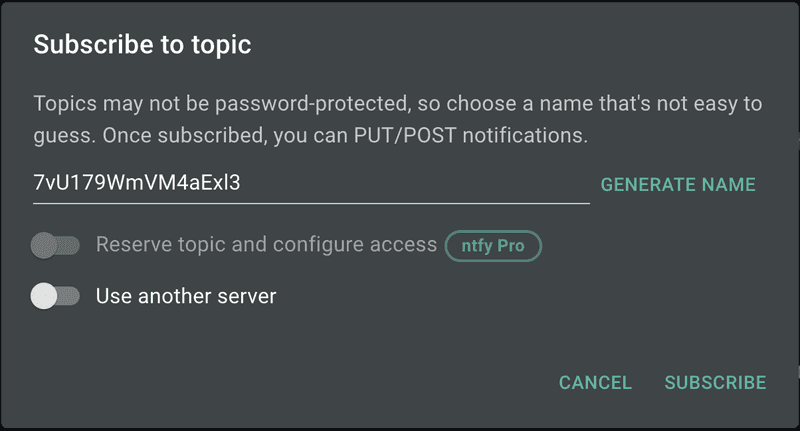
Sign up on Ntfy app. In the left menu bar, select
+ Subscribe to topic. Note down the randomly generated topic name. Keep it safe like a secret token, as this token name will be used to send notifications.
-
Set up notificationss
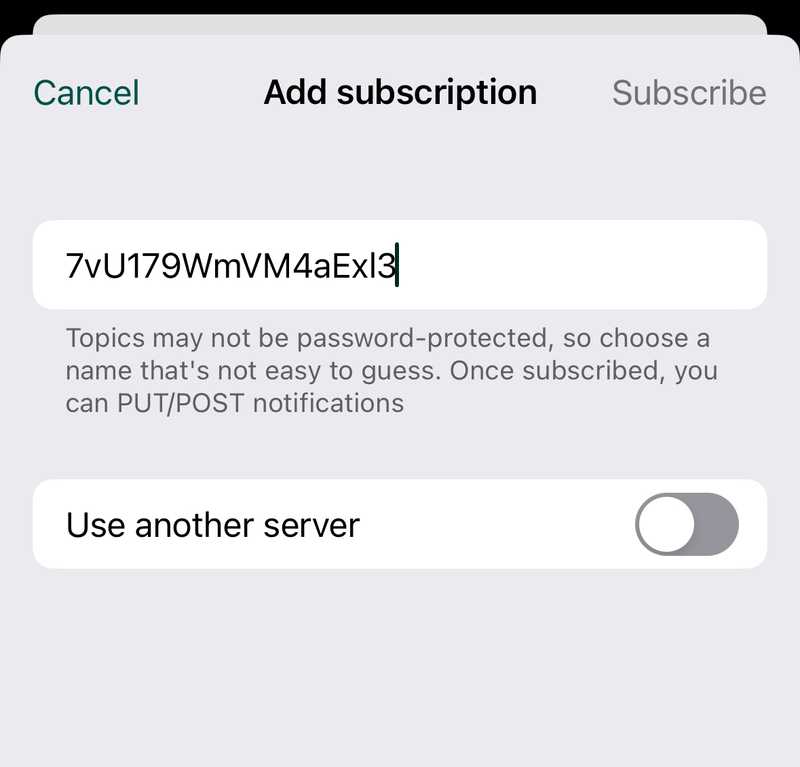
Download and install ntfy.sh on your phone. You can find links to ntfy in app stores here. Once installed, add the topic to your phone and subscribe to it.
Step 2 - Testing the topic
Before integrating the topic into your scripts, you can perform a quick test to ensure it is working correctly. Use the following curl command to send a test notification:
Replace
7vU179WmVM4aExl3with your own token name.
export NTFY_TOPIC=7vU179WmVM4aExl3
curl -s -d "Hetzner is :sparkles:" https://ntfy.sh/$NTFY_TOPIC | jq
# {
#   "id": "uWimBFI2ritm",
#   "time": 1744145059,
#   "expires": 1744188259,
#   "event": "message",
#   "topic": "7vU179WmVM4aExl3",
#   "message": "Hetzner is :sparkles:"
# }
If the topic is working, you should receive a notification on your subscribed devices. This step ensures that the topic is functional before proceeding with further configurations.
Step 3 - Echoing the IP address on login
To display the IP address upon login, connect to the server who's SSH access you plan to monitor, and create a new script called ssh-login-notify.sh in the /etc/profile.d/ directory. Make the script executable using this command:
sudo touch /etc/profile.d/ssh-login-notify.sh
sudo chmod +x /etc/profile.d/ssh-login-notify.sh
Now add the content:
Replace
7vU179WmVM4aExl3with your own token name.
#!/bin/bash

USER_NAME=$(whoami)
HOST_NAME=$(hostname)
TIME_NOW=$(TZ=Europe/Amsterdam date "+%a, %b %d, %I:%M %p CEST")
NTFY_TOPIC="7vU179WmVM4aExl3"

IP_ADDRESS=$(who | awk '{print $5}' | tr -d '()' | head -n 1)

if [ -z "$IP_ADDRESS" ]; then
    IP_ADDRESS=${SSH_CONNECTION%% \*}
fi

[ -z "$IP_ADDRESS" ] && IP_ADDRESS="unknown"

MESSAGE=":rotating_light: $USER_NAME logged in from $IP_ADDRESS on $HOST_NAME at $TIME_NOW"

echo "$MESSAGE"
Once set up, this script will automatically display a notification in the terminal with the IP address of the user that connected to the server. This notification is shown each time a user logs in via SSH.
Last login: Sun Apr 6 20:25:14 2025 from 203.0.113.1
:rotating_light: holu logged in from 203.0.113.1 on hetzner at Mon, Apr 07, 10:45 AM CEST
Step 4 - IP geolocation - Where is the login coming from? (Optional)
To get the geolocation of the IP address, we will use a third party API as show below. This step is optional, and you can skip it if you don't want to use geolocation.
Edit /etc/profile.d/ssh-login-notify.sh and add the following content right above MESSAGE=:
GEO_INFO=""

if [[ "$IP_ADDRESS" != "unknown" && "$IP_ADDRESS" != "127.0.0.1" && "$IP_ADDRESS" != ::1 ]]; then
  GEO_JSON=$(curl -s "https://ipinfo.io/$IP_ADDRESS/json")
  CITY=$(echo "$GEO_JSON" | jq -r '.city')
  REGION=$(echo "$GEO_JSON" | jq -r '.region')
  COUNTRY=$(echo "$GEO_JSON" | jq -r '.country')
  ORG=$(echo "$GEO_JSON" | jq -r '.org')

  GEO_INFO=":earth_africa: Location: $CITY, $REGION, $COUNTRY"
fi
Step 5 - Sending the notification on login
To send the notification via ntfy.sh, we will use curl.
Edit /etc/profile.d/ssh-login-notify.sh and remove these two lines at the very bottom of the file:
MESSAGE=":rotating_light: $USER_NAME logged in from $IP_ADDRESS on $HOST_NAME at $TIME_NOW"

echo "$MESSAGE"
Now replace them with the following lines:
MESSAGE="$USER_NAME logged in from $IP_ADDRESS on $HOST_NAME at $TIME_NOW
$GEO_INFO"

curl -s -o /dev/null \
      -X POST -H "Title: SSH Login" \
      -d "$MESSAGE" \
      https://ntfy.sh/$NTFY_TOPIC
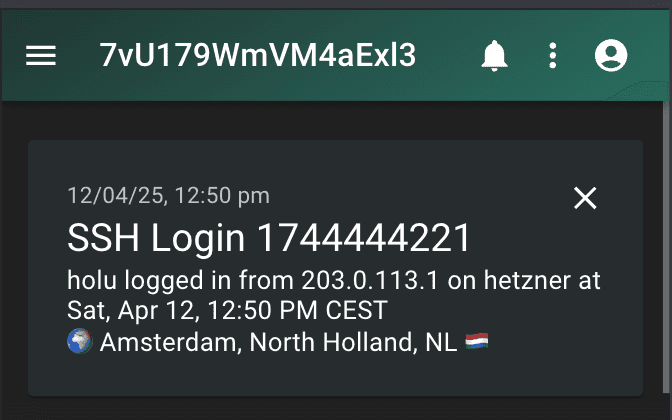
Next time you login, you should receive a notification via ntfy.
Step 6 - PAM configuration for Non-interactive logins (Optional)
The script we have written till now will work on interactive sessions. But if you want notifications for non-interactive logins as well, such as scp or running a remote command via SSH like ssh hetzner "cat /etc/issue", there is one additional step.
Instead of placing the file in /etc/profile.d/, where it runs for all interactive sessions, we need to move it to the /usr/local/bin/ directory that contains all the user defined scripts:
sudo mv /etc/profile.d/ssh-login-notify.sh /usr/local/bin/After moving the script to the /usr/local/bin/ directory, add the following line at the end of /etc/pam.d/sshd. You need to add the file to the pam.d configuration for it to run for system-wide SSH notifications.
session optional pam_exec.so /usr/local/bin/ssh-login-notify.shThis line tells PAM to execute the script every time a user logs in via SSH. The session keyword indicates that this is a session management module, and optional means that the login will still succeed even if the script fails.
After this, don't forget to restart the SSH service.
sudo systemctl restart sshdComplete Script with non-interactive logins
Now update the script. This will execute the script every time a user logs in via SSH, including non-interactive logins. The script will send a notification to the ntfy topic with the user's name, IP address, hostname, and geolocation information.
We use $PAM_USER instead of whoami to get the username of the user logging in. whoami would return the user who is executing the script, which will always be root. We also include early exit condition based on $PAM_TYPE to check if the session is closing or opening. Without the check, it would send a notification every login as well as logout.
Replace
7vU179WmVM4aExl3with your own token name.
#!/bin/bash

USER_NAME=$PAM_USER
HOST_NAME=$(hostname)
TIME_NOW=$(TZ=Europe/Amsterdam date "+%a, %b %d, %I:%M %p CEST")
NTFY_TOPIC="7vU179WmVM4aExl3"

# Get IP address
IP_ADDRESS=$(who | awk '{print $5}' | tr -d '()' | head -n 1)

# Fallback to SSH_CONNECTION if IP is empty
if [ -z "$IP_ADDRESS" ]; then
  IP_ADDRESS=${SSH_CONNECTION%% *}
fi

[ -z "$IP_ADDRESS" ] && IP_ADDRESS="unknown"

# echo ":rotating_light: $USER_NAME logged ($close_session) from $IP_ADDRESS on $HOST_NAME at $TIME_NOW"

# Function to convert country code to flag emoji
flag() {
  local code="${1^^}"
  local first=$(( $(printf "%d" "'${code:0:1}") - 65 + 0x1F1E6 ))
  local second=$(( $(printf "%d" "'${code:1:1}") - 65 + 0x1F1E6 ))
  printf '%b' "$(printf '\\U%08X\\U%08X' "$first" "$second")"
}

if [[ $PAM_TYPE == 'close_session' ]]; then
  exit 0
fi
# Get geolocation information
GEO_INFO=""
if [[ "$IP_ADDRESS" != "unknown" && "$IP_ADDRESS" != "127.0.0.1" && "$IP_ADDRESS" != ::1 ]]; then
  GEO_JSON=$(curl -s "https://ipinfo.io/$IP_ADDRESS/json")
  CITY=$(echo "$GEO_JSON" | jq -r '.city')
  REGION=$(echo "$GEO_JSON" | jq -r '.region')
  COUNTRY=$(echo "$GEO_JSON" | jq -r '.country')
  ORG=$(echo "$GEO_JSON" | jq -r '.org')

  GEO_INFO=":earth_africa: $CITY, $REGION, $COUNTRY $(flag $COUNTRY)"
fi

MESSAGE="$USER_NAME logged in from $IP_ADDRESS on $HOST_NAME at $TIME_NOW
$GEO_INFO"

if [ -n "$SSH_CONNECTION" ]; then
  curl -s -o /dev/null \
	  -X POST -H "Title: SSH Login $(date +%s)" \
	  -d "$MESSAGE" \
	  -H "Markdown: yes" \
	  https://ntfy.sh/$NTFY_TOPIC
fi
Conclusion
With this script, you can build a lightweight audit trail for all logins on your server or across the entire fleet. You can also customise notifications for different channels distinguishing between a deploy script and a developer. Since the login IP is available, you can flag logins from outside trusted regions (e.g., outside the Netherlands) or maintain a whitelist of trusted IPs that bypass notifications entirely. The possibilities are endless and this can be extended to notify services like email, Slack, Telegram or even a custom webhook.
Knowing these basics, opens the door to all kinds of monitoring; whether it’s tracking login origins, highlighting unexpected locations, or just staying informed. Not too dissimilar to the smart bell we all have at home, but for your server.


