Introduction
Zabbix is an open-source monitoring software tool for diverse IT components, including networks, servers, virtual machines (VMs) and cloud services. Zabbix provides monitoring metrics, such as network utilization, CPU load and disk space consumption. Zabbix monitoring configuration can be done using XML based templates which contain elements to monitor. The software monitors operations on Linux, Hewlett Packard Unix (HP-UX), Mac OS X, Solaris and other operating systems (OSes); however, Windows monitoring is only possible through agents. Zabbix can use MySQL, MariaDB, PostgreSQL or Oracle to store data. Its backend is written in C and the web frontend is written in PHP. Zabbix offers several monitoring options.
Prerequisites
- Server with CentOS Stream 9
- Access to the root user or user with sudo permissions
- SELinux is disabled or in permissive mode. To disable SELinux use the below command:
sudo sed -i 's/SELINUX=.*/SELINUX=disabled/g' /etc/selinux/config
sudo setenforce 0
Step 1 - Install Apache Web Server and PHP
We need to install Apache Web Server and PHP. To do so, we can use the default package installer dfn.
sudo dnf update -y
sudo dnf install httpd php php-{gd,bcmath,ctype,mbstring,gettext,xml,xmlreader,xmlwriter,session}
Once this process is done, run the command below to start and enable the web server:
sudo systemctl restart httpd
sudo systemctl enable httpd
Step 2 - Install MariaDB
MariaDB is a community-developed, commercially supported fork of the MySQL relational database management system.
Install MariaDB with:
sudo dnf install mariadb-serverThis will automatically install MariaDB on your server. Once this process is done, run the command below to start and then enable the database server:
sudo systemctl start mariadb
sudo systemctl enable mariadb
systemctl status mariadb
Now that our MariaDB database is running, we want to run a simple security script that will remove some dangerous defaults and lock down access to our database system a little bit. Start the interactive script by running:
sudo mysql_secure_installation| Settings | Description |
|---|---|
| Current MYSQL root password | At this stage you won’t have one yet, so just leave it blank by hitting enter. |
| Set a root password | Type Y and follow the instructions to set up your root password and make note of it. |
| The rest of the questions | You should simply hit the "ENTER" key through each prompt to accept the default values. This will remove some sample users and databases, disable remote root logins, and load these new rules so that MariaDB immediately respects the changes we have made. |
Step 3 - Install Zabbix Repository
Zabbix isn't available in our package manager by default, so we will install a repository configuration package using the official Zabbix repository package on the Official Zabbix Website for CentOS:
Disable Zabbix packages provided by EPEL
Rundnf repolist. If the output includes theepel-releasepackage, edit the file/etc/yum.repos.d/epel.repoand addexcludepkgs=zabbix*in a new line.
sudo rpm -Uvh https://repo.zabbix.com/zabbix/7.0/centos/9/x86_64/zabbix-release-7.0-4.el9.noarch.rpm
sudo dnf clean all
Step 4 - Install Zabbix Server, Frontend, Agent
Use the following command to install Zabbix server along with MySQL database support package on your system.
sudo dnf install zabbix-{server-mysql,web-mysql,apache-conf,sql-scripts,selinux-policy,agent}Step 5 - Create initial database
This installation is using MySQL as the backend of Zabbix, So we need to create a MySQL database and User for the Zabbix installation.
mysql -u root -pMariaDB [(none)]> create database zabbix character set utf8mb4 collate utf8mb4_bin;
MariaDB [(none)]> create user zabbix@localhost identified by 'your_password';
MariaDB [(none)]> grant all privileges on zabbix.* to zabbix@localhost;
MariaDB [(none)]> set global log_bin_trust_function_creators = 1;
MariaDB [(none)]> quit;Step 6 - Import initial schema and data
After creating a database, restore the default mysql database provided by zabbix. You can find these files in the /usr/share/doc/zabbix-server-mysql-<version>/ directory.
zcat /usr/share/zabbix-sql-scripts/mysql/server.sql.gz | mysql --default-character-set=utf8mb4 -uzabbix -p zabbixWhen it asks about a password, enter the MariaDB password you just set for zabbix@localhost.
Disable log_bin_trust_function_creators:
mysql -uroot -p
MariaDB [(none)]> set global log_bin_trust_function_creators = 0;
MariaDB [(none)]> quit;
Edit zabbix_server.conf to use their respective databases.
sudo vi /etc/zabbix/zabbix_server.confDBHost=localhost
DBName=zabbix
DBUser=zabbix
DBPassword=your_passwordFor DBPassword, enter the password you set in "Step 5" above.
Step 7 - Start Zabbix server process
It's time to start and enable the Zabbix server process:
sudo systemctl restart zabbix-server zabbix-agent httpd php-fpm
sudo systemctl enable zabbix-server zabbix-agent httpd php-fpm
Step 8 - Complete Zabbix Web Installer Wizzard
You can access the Zabbix webinstaller by adding /zabbix at the end of your server's IP address or domain. Change FQDN as per your setup and access Zabbix.
-
IP address
http://<your_ip>/zabbix/ -
Domain
http://example.com/zabbix/
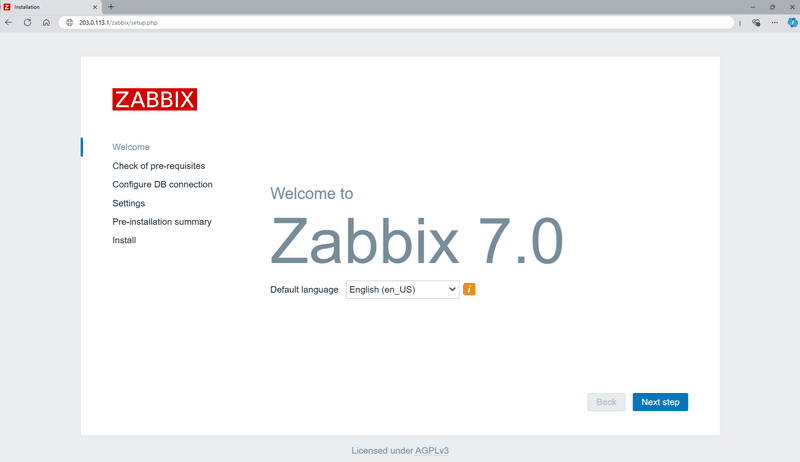
Zabbix Setup Welcome Screen
This is the welcome screen of Zabbix web installer. Select a language and continue by clicking on Next Step.
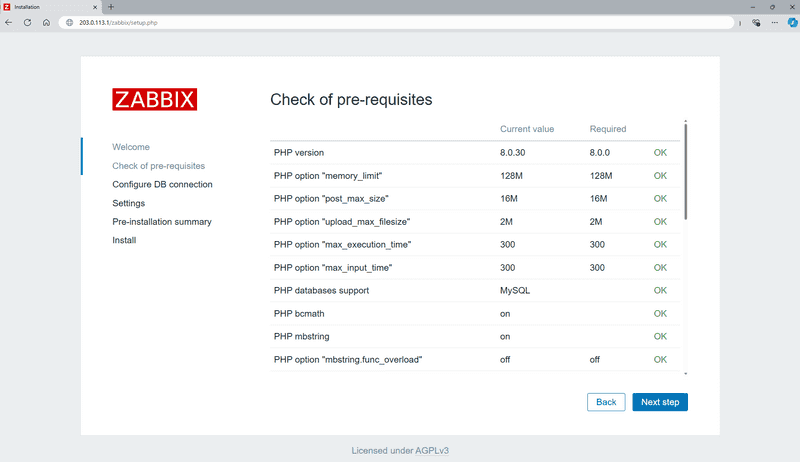
Check for pre-requisities
Check if your system has all required packages. If everything is ok, click Next Step.
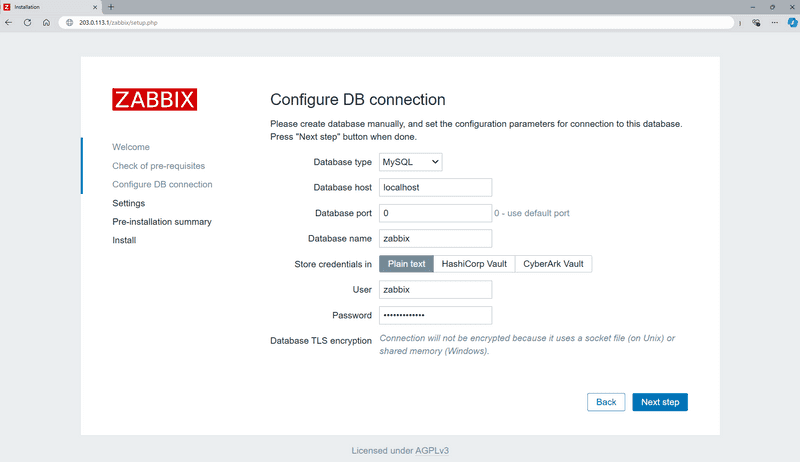
Configure DB Connection
Enter the database details created in "Step 5" and click Next Step to continue.
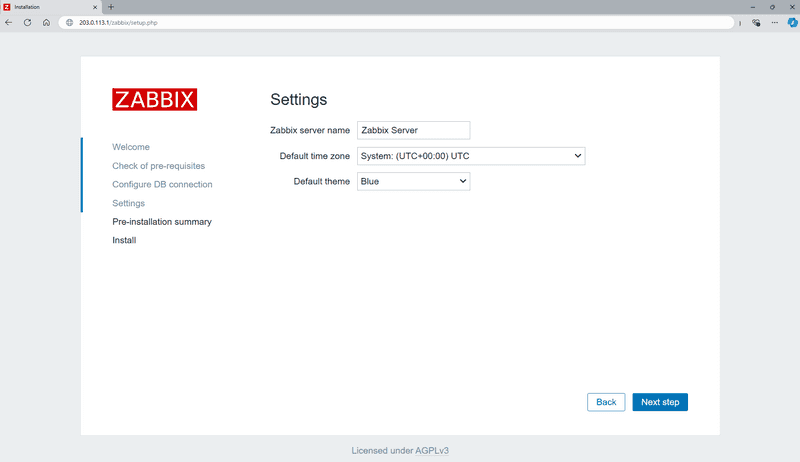
Zabbix Server Details
Give your instance a name, select a time zone and a theme, and click Next Step.
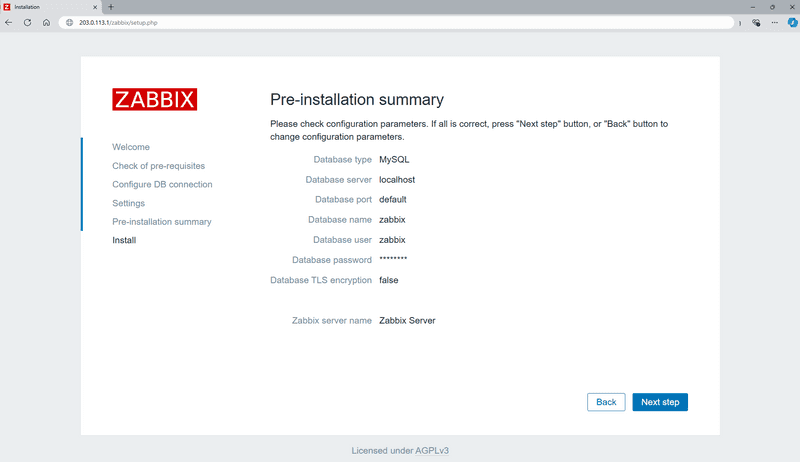
Pre-Installation Summary
This step is a summary of everything you set in the previous steps. If everything is correct, click Next Step.
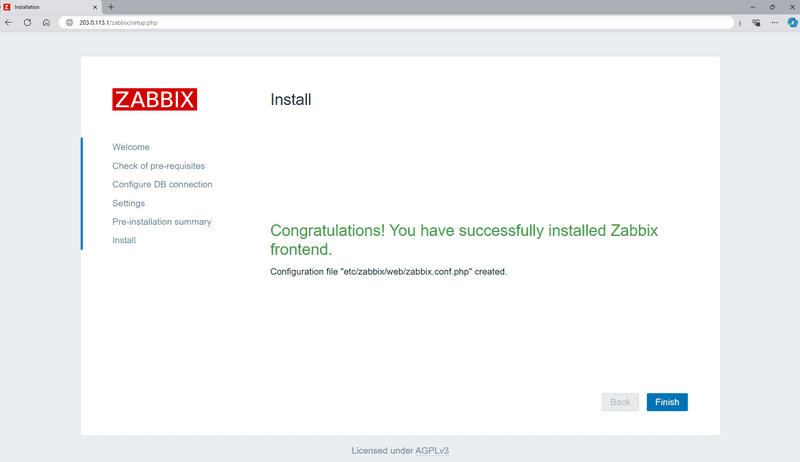
Install Zabbix
If everything goes correctly, you will see a successful installation message on this page. This will also show you a message about the newly created configuration file.
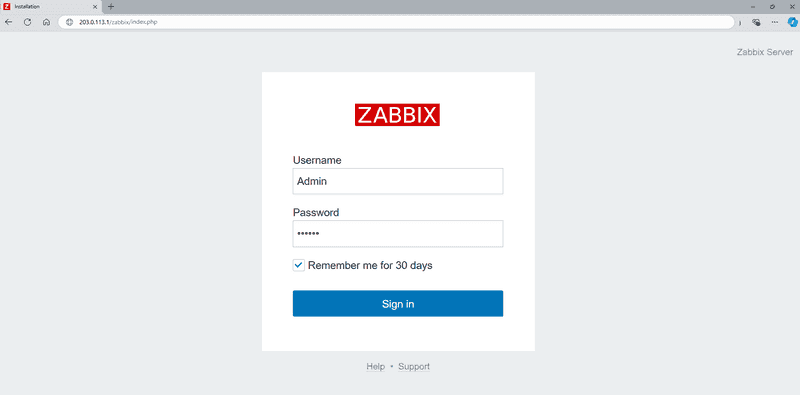
Zabbix Login Screen
Login to Zabbix using the default credentials.
Username: Admin
Password: zabbix
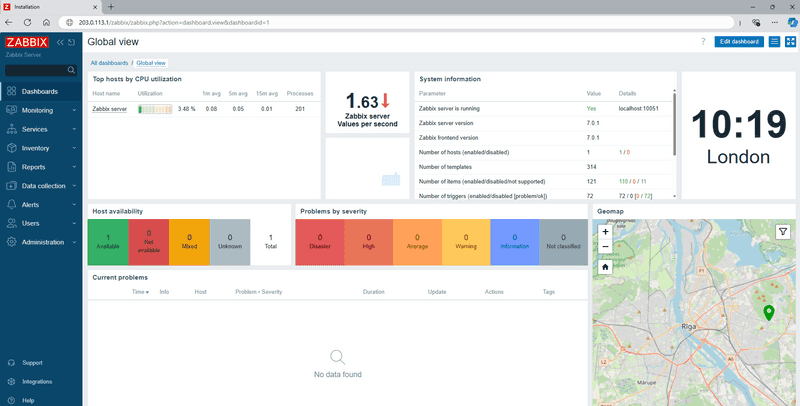
After successful login, you will get a Zabbix dashboard like below.
Conclusion
You have successfully installed the latest Zabbix on your CentOS system.
You can now check the Zabbix Documentation and learn more about how to configure and use Zabbix.
