This tutorial explains how to install the PrestaShop web shop.
What is PrestaShop?
PrestaShop is an open source e-commerce platform. For further information and help, please visit: https://prestashop.com
Example terminology
- Username:
prestashop - Database name:
prestashop_db - Database username:
prestashopuser - Database password:
abcde*1234#XYZ - Hostname / Database host:
<xyz.your-database.de> - Domain:
<example.com> - Subdomain:
<prestashop.example.com> - FTP client:
FileZilla - FTP/SSH user:
exampleuser - Public SSH key:
id_<type>.pub - Storage amount:
256M - Directories:
public_html - Terminal commands:
CD,SCP,RM
Prerequisites
- A Web Hosting plan M or higher at Hetzner
- Activated SSL certificate for your domain
- PHP version 7.2 or higher for the latest version of PrestaShop
- Activated FTP or SSH access
- Set
allow_url_fopento "On"PHP-Memory-Limitto at least 256 MB - If necessary, generate an SSH key with the following specifications
- If necessary, use an FTP client like FileZilla.
Installing PrestaShop
Step 1 - Preparing for installation
1.1 Create database on konsoleH
- Log onto konsoleH.
- Navigate to
Services->Databases->MariaDB/MySQL ». - Go to
MariaDB/MySQL Databasesand click onAdd.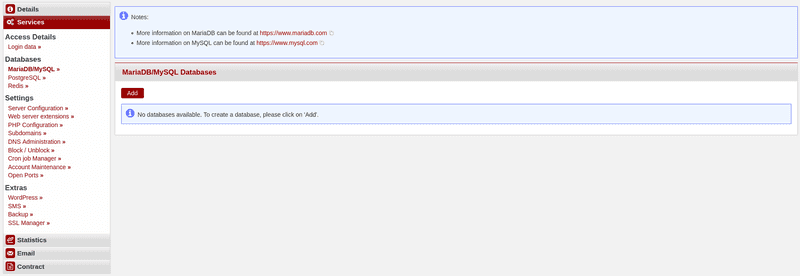
- If you want, you can now customize the name of the
database, thelogin, and thepassword.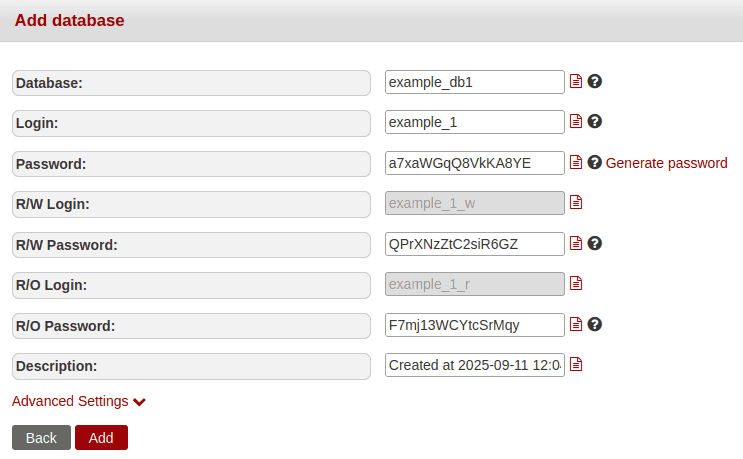
- Click on
Save. TheConnection IDshould now be displayed above the database access data. - Now copy these into a text file on your computer, for example. You will need them later for the setup.
1.2 PHP settings on konsoleH
- On konsoleH, navigate to
Services->Settings->PHP Configuration ».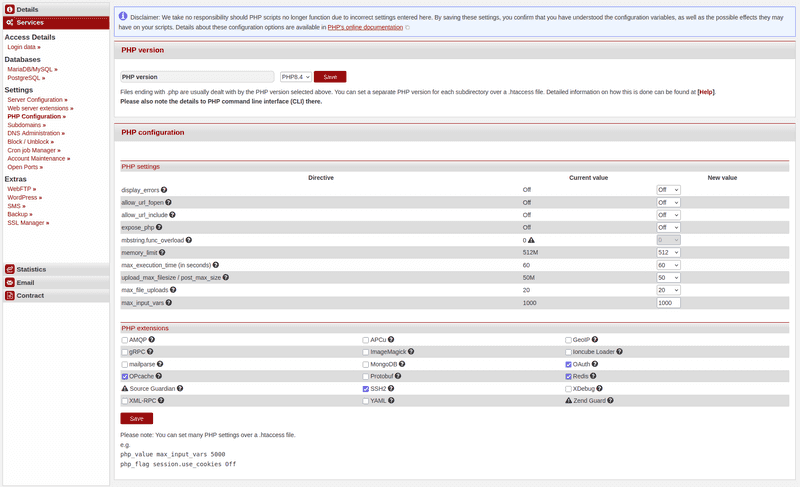
- Go to
PHP-Versionand select the latest PHP version. PrestaShop needs to bePHP 7.2or newer. - Click on
Save. - On the same page, navigate to the
PHP settingsand verify thatallow_url_fopenis set toonand thememory_limitminimum to256M. - If there is a lower value there, select
256in the field to the right and click onsaveat the bottom left of the page.
1.3 Generate SSH key
- Generate an SSH key pair with the following specifications https://docs.hetzner.com/konsoleh/account-management/access-details/login-data#additional-ftp-users and https://community.hetzner.com/tutorials/howto-ssh-key.
- On konsoleH, navigate to
Services->Access Details->Login data ».
Install your public key via an FTP client:
- Upload your public key
id_<type>.pubthere underPublic SSH Keysby clicking onAdd. Then copy the content into the window that you see after that. - Then click on
Add. Your public key and a comment should now appear underPublic SSH Keys->Key Type.
Step 2 - Upload PrestaShop to the web directory
2.1 Option 1 - Via an SSH connection
-
Download the latest version of PrestaShop from the official website: https://prestashop.com/prestashop-offers/classic/.
-
On Linux, you can unzip the ZIP file using
unzipin your terminal or by double-clicking it in your file manager. -
On Windows/macOS, you can unzip the ZIP file by double-clicking it in your file manager.
-
Now open a terminal and navigate to the directory where you extracted the PrestaShop archive:
cd /pathToPrestashop/ -
On konsoleH, navigate to
Settings->Access Details->Login dataand copy the SSH connection command by clicking on the red page icon. -
Upload the required files to the web hosting server by pasting the copied command and adjust it as follows:
scp index.php prestashop.zip testuser@wwwxyz.your-server.de:public_html/ -p 222 -
You may need to refer to your previously created private SSH key here. To do this, simply add the following line to your SCP command:
-i <PathToYourSSH-Key/id_<type> -
Now you can continue with the installation of PrestaShop as described in step 3.
2.2 Option 2 - Via a FTP client
-
Download the latest version of PrestaShop from the official website: https://prestashop.com/prestashop-offers/classic/.
-
On Linux, you can unzip the ZIP file using
unzipin your terminal or by double-clicking it in your file manager. -
On Windows/macOS, you can unzip the ZIP file by double-clicking it in your file manager.
-
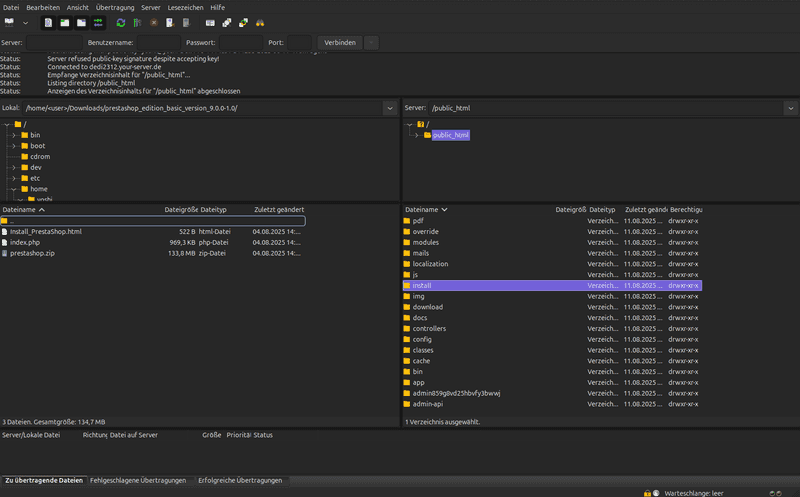
Now open your FTP client. We used
FileZillafor the installation. -
Click on
File->Site Manager->New siteand name the server, for example:PrestashopTest.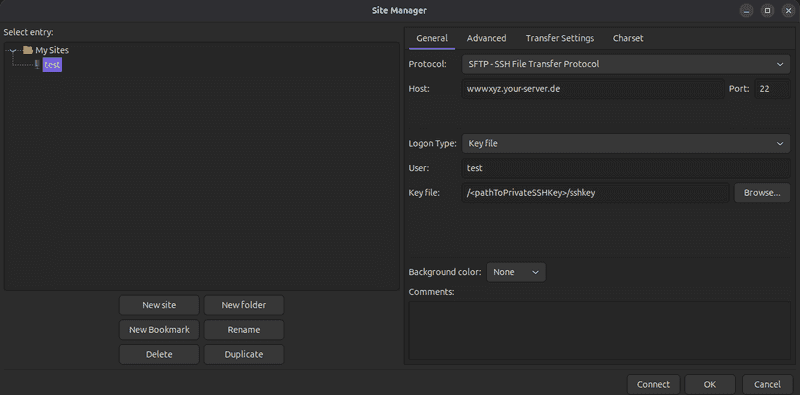
-
Go to
Protocoland selectSFTP-SSH File Transfer Protocol. Go toHostand enter your web hosting serverwwwxyz.your-server.de. Then go toPortand enter22. -
Go to
Logon Type, and selectKey file. Go toUserand enter your login name from konsoleH. -
Go to
Key fileand click onBrowse. -
In the now-open window, navigate to the directory where you saved your SSH key pair.
-
Now select your private key:
id_<type> -
Add it to
Filezillaby double-clicking it, and connect to the web directory on the web hosting server by clicking onconnect. -
In
FileZilla, navigate to the directory on the left where you extracted the downloaded file and to yourpublic_htmldirectory on the right. -
Now drag the two files
index.php&prestashop.zipfrom the left window to the right window and wait until FileZilla has completed the transfer.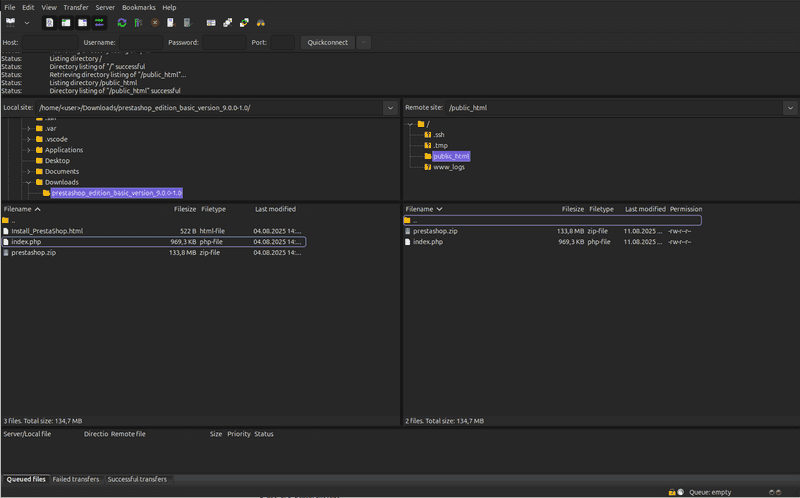
Step 3 - PrestaShop Installation Wizard
-
In your browser, navigate to the domain address where you uploaded the PrestaShop files
https://example.de/.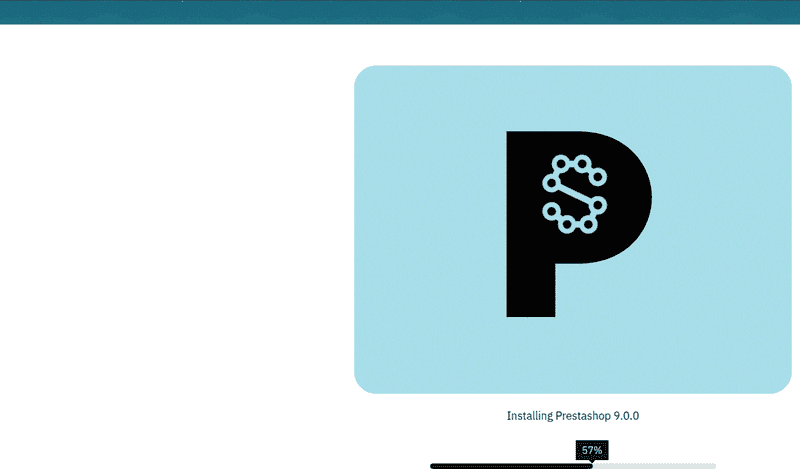
-
Now wait a moment until the installation wizard has unpacked the archive.
-
You should now be on the installer's welcome page. You can select the language under
Continue the Installation in: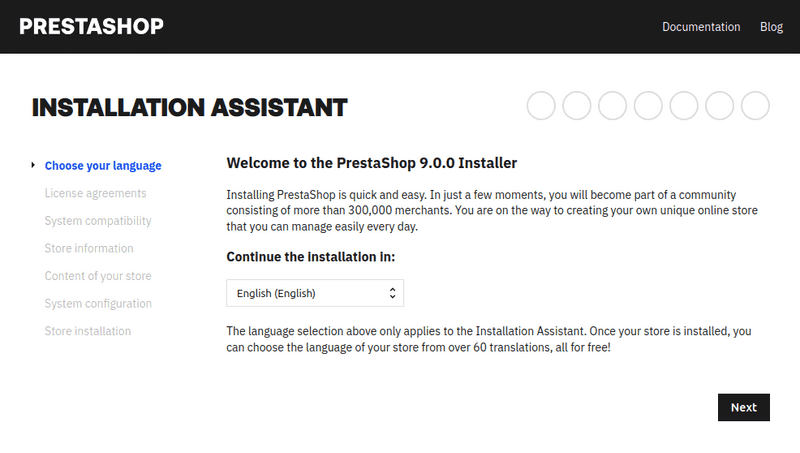
-
Click on
Nextand you will be taken to the license agreement. Check the boxI agree to the above terms and conditions.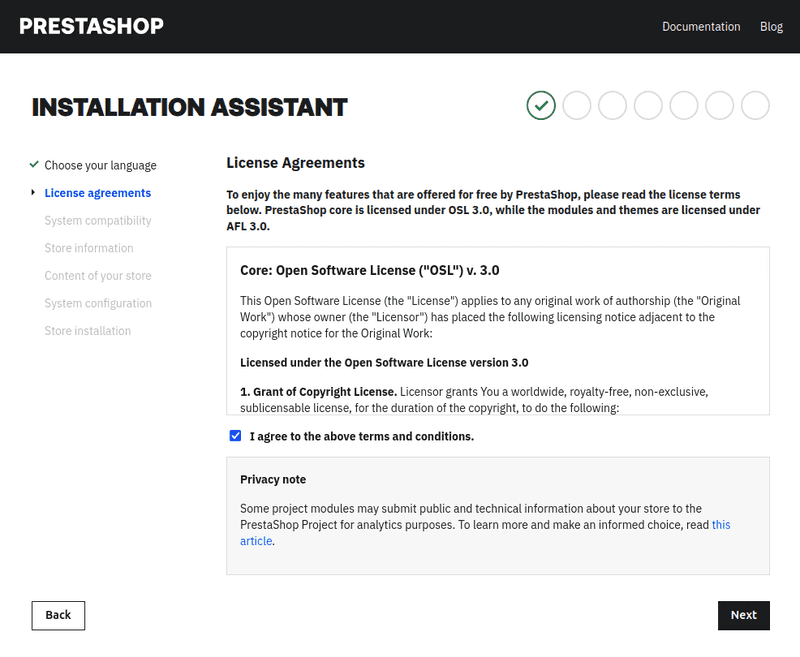
-
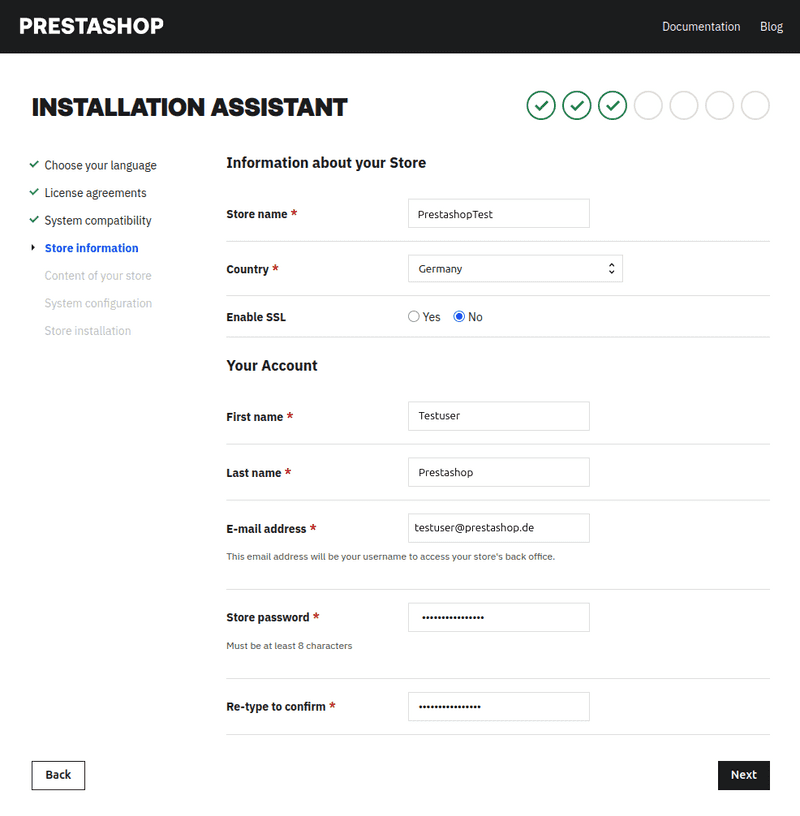
On the following page, enter your website name, your login details for the web interface, and your time zone.
-
By clicking on
Next, you will be taken to the pre-configuration of your PrestaShop.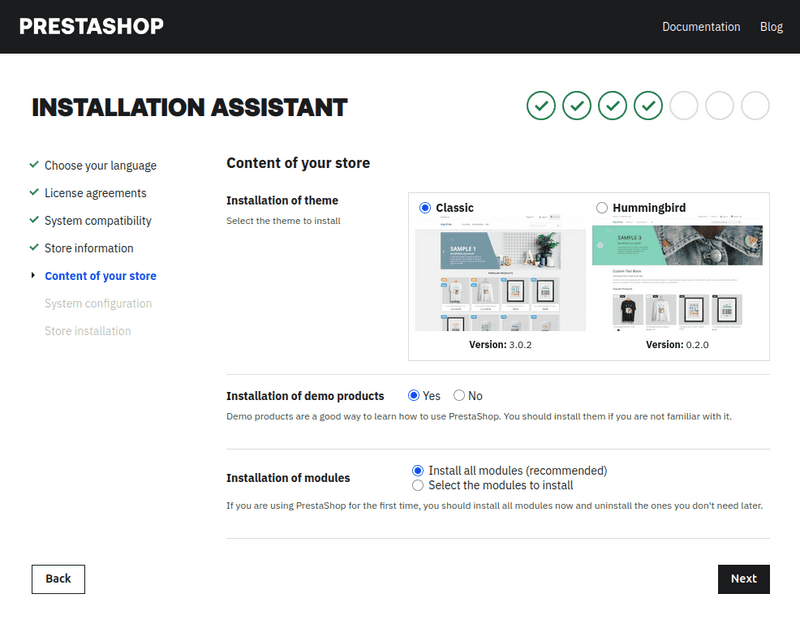
-
By clicking
Next, you will be taken to the setup for the database. Here, you need to fill in the data from konsoleH: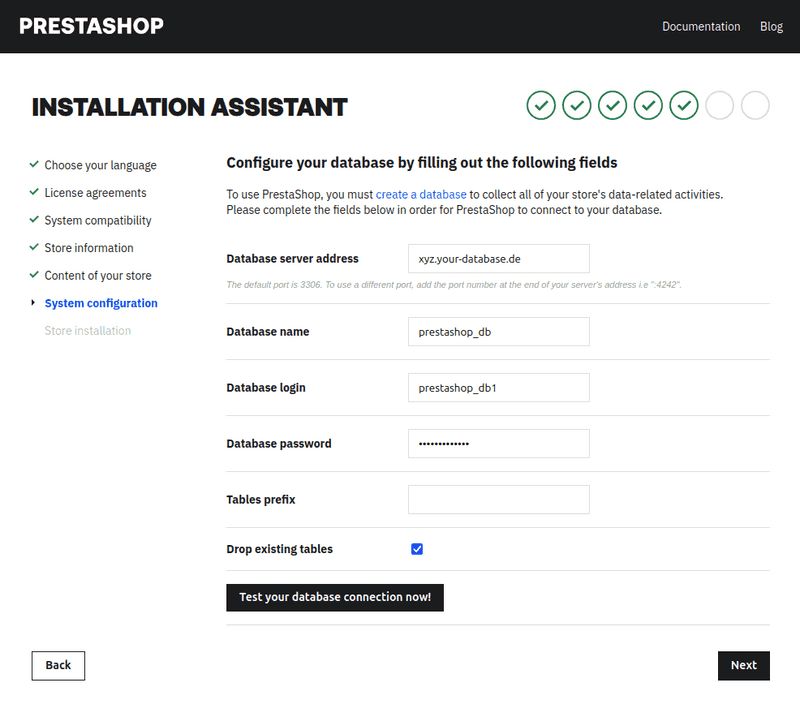
-
Click on
Test you databse connection nowto check that the data is correct and that a connection to the database can be established. Below this, you should now see a green field with a green check mark and the textDatabase connected. -
Click on
Nextto complete the PrestaShop setup. The wizard will now create the necessary tables in the database, install all the required modules and plugins, and make the final configurations. -
You should now be on the last page of the wizard, where you will be informed that you must delete the
Installfolder.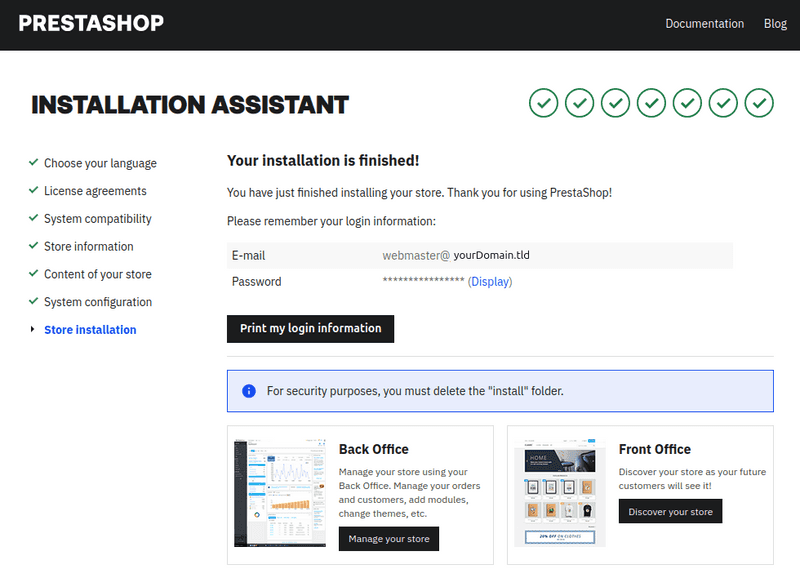
-
The easiest way to do this is via the FTP client as follows:
- Select the
Installfolder by right-clicking on it and then click onDelete.
- Select the
-
This works as follows via
SSH. Please note, however, that you should only execute this command in the PrestaShop installation directory. Make sure you copy it correctly; otherwise, you may delete other directories with the same name or your entire web directory.-
Navigate to the installation directory of PrestaShop:
cd <PathToInstallationDirectory/> -
Delete the PrestaShop
Installfolder:rm -fr Install/
-
-
You should now be done with the installation and setup of PrestaShop and should be able to log in to the administration interface of your online store.
