Introduction
In this tutorial we will learn how to install a rootless Nagios Core monitoring system with a basic configuration on a Managed Server. Before we can run Nagios, we need to compile it from source. After the installation of Nagios, a few small special adjustments in its configurations are necessary to make it work with the Managed Server.
Prerequisites
- Managed Server with enabled SSH access
- Hetzner Development Package (hos-dev) -> please ask the support
Step 1 - Install Nagios Core and Monitoring Plugins
First we need to download and compile various sources.
Before we start, create a directory for the sources to keep the home directory clean.
cd
mkdir src
cd src
Step 1.1 - Nagios Core source installation and security preparation
Create a directory in public_html for installation and secure it with .htaccess.
# Replace "holu" with your own username
mkdir -p /usr/www/users/holu/example_com/nagios
echo "Require all denied" > /usr/www/users/holu/example_com/nagios/.htaccess
Proceed with the compilation of Nagios.
- Always check here for newer stable versions
wget https://downloads.sourceforge.net/project/nagios/nagios-4.x/nagios-4.5.9/nagios-4.5.9.tar.gz
tar xzvf nagios-4.5.9.tar.gz
cd nagios-4.5.9
# Replace "holu" with your own username
./configure --prefix=/usr/www/users/holu/example_com/nagios --with-cgiurl=/cgi-bin --with-htmurl=/ --with-nagios-user=holu --with-nagios-group=holu --with-command-group=holu
make all -j $(($(grep ^cpu\ cores /proc/cpuinfo | uniq | sed s/[^0-9]//g)+1))
make install
make install-commandmode
make install-config
# Replace "holu" with your own username
cp -r contrib/eventhandlers/ /usr/www/users/holu/example_com/nagios/libexec/
cd ..
Step 1.2 - Monitoring Plugins source installation
Finally compile the Monitoring Plugins.
- Always check here for newer stable versions
wget https://www.monitoring-plugins.org/download/monitoring-plugins-2.4.0.tar.gz
tar xzvf monitoring-plugins-2.4.0.tar.gz
cd monitoring-plugins-2.4.0
# Replace "holu" with your own username
./configure --prefix=/usr/www/users/holu/example_com/nagios --with-nagios-user=holu --with-nagios-group=holu
make -j $(($(grep ^cpu\ cores /proc/cpuinfo | uniq | sed s/[^0-9]//g)+1))
make install
Step 2 - Basic configuration of Nagios
Step 2.1 - Set a valid recipient email address in contacts.cfg for notifications
To receive email notifications and avoid undeliverable emails from your Nagios server, you should replace the default recipient address with a valid address.
# Replace "holu" with your own username
vim /usr/www/users/holu/example_com/nagios/etc/objects/contacts.cfg
Hit i to switch to "insert mode" and replace the nagiosadmin email holu@localhost with recipient@example.com.
###############################################################################
#
# CONTACTS
#
###############################################################################

# Just one contact defined by default - the Nagios admin (that's you)
# This contact definition inherits a lot of default values from the
# 'generic-contact' template which is defined elsewhere.

define contact {

    contact_name            nagiosadmin             ; Short name of user
    use                     generic-contact         ; Inherit default values from generic-contact template (defined above)
    alias                   Nagios Admin            ; Full name of user
    email                   recipient@example.com ; <<***** CHANGE THIS TO YOUR EMAIL ADDRESS ******
}
Step 2.2 - Set a valid sender email address in commands.cfg for notifications
By default Nagios uses a default address to send email notifications. This may lead to blacklistings and spam detection of the emails. We will set a From/envelope-from with a valid address to avoid this.
# Replace "holu" with your own username
vim /usr/www/users/holu/example_com/nagios/etc/objects/commands.cfg
Hit i to switch to "insert mode" and add the -r sender@example.com between the /usr/bin/mail and the -s in the command_line for the command_names notify-host-by-email and notify-service-by-email.
################################################################################
#
# SAMPLE NOTIFICATION COMMANDS
#
# These are some example notification commands.  They may or may not work on
# your system without modification.  As an example, some systems will require
# you to use "/usr/bin/mailx" instead of "/usr/bin/mail" in the commands below.
#
################################################################################

define command {

    command_name    notify-host-by-email
    command_line    /usr/bin/printf "%b" "***** Nagios *****\n\nNotification Type: $NOTIFICATIONTYPE$\nHost: $HOSTNAME$\nState: $HOSTSTATE$\nAddress: $HOSTADDRESS$\nInfo: $HOSTOUTPUT$\n\nDate/Time: $LONGDATETIME$\n" | /usr/bin/mail -r sender@example.com -s "** $NOTIFICATIONTYPE$ Host Alert: $HOSTNAME$ is $HOSTSTATE$ **" $CONTACTEMAIL$
}


define command {

    command_name    notify-service-by-email
    command_line    /usr/bin/printf "%b" "***** Nagios *****\n\nNotification Type: $NOTIFICATIONTYPE$\n\nService: $SERVICEDESC$\nHost: $HOSTALIAS$\nAddress: $HOSTADDRESS$\nState: $SERVICESTATE$\n\nDate/Time: $LONGDATETIME$\n\nAdditional Info:\n\n$SERVICEOUTPUT$\n" | /usr/bin/mail -r sender@example.org -s "** $NOTIFICATIONTYPE$ Service Alert: $HOSTALIAS$/$SERVICEDESC$ is $SERVICESTATE$ **" $CONTACTEMAIL$
}
Step 3 - Final preparation for webserver and go live
Step 3.1 - Create public directory
Create the public directory. Later it will contain all files and scripts for the Nagios web gui.
# Replace "holu" with your own username
mkdir /usr/www/users/holu/example_com/public
Step 3.2 - konsoleH settings for password protection and document root
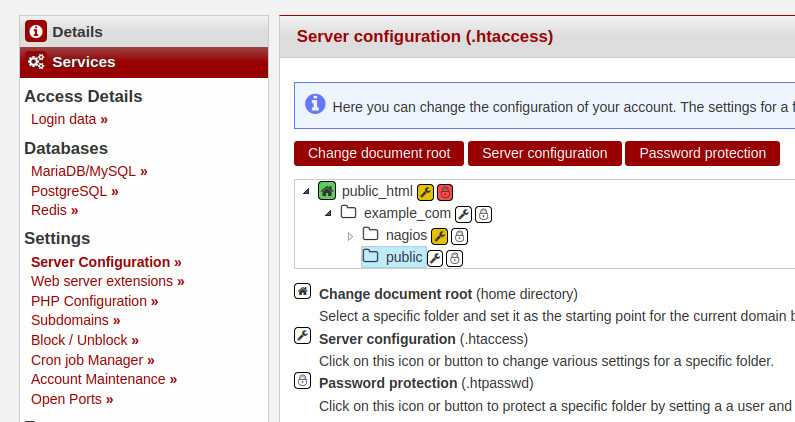
Log into konsoleH, click on "Products", select your domain "example.com" and go to "Services" -> "Server Configuration". Now select the public directory in the list and click on the red button "Password protection".
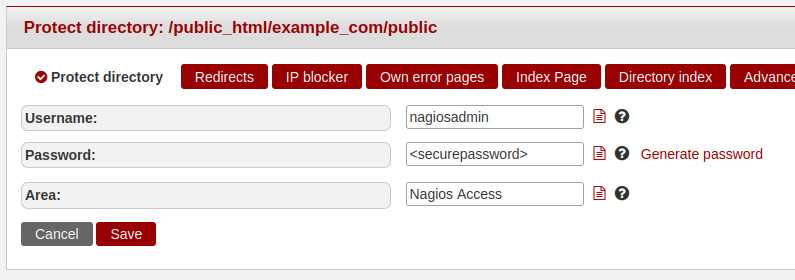
Click on the red button "Add user".
For the password protection, please set the user "nagiosadmin" (literally), set a secure password and an Area/AuthName, then click on the red button "Save".
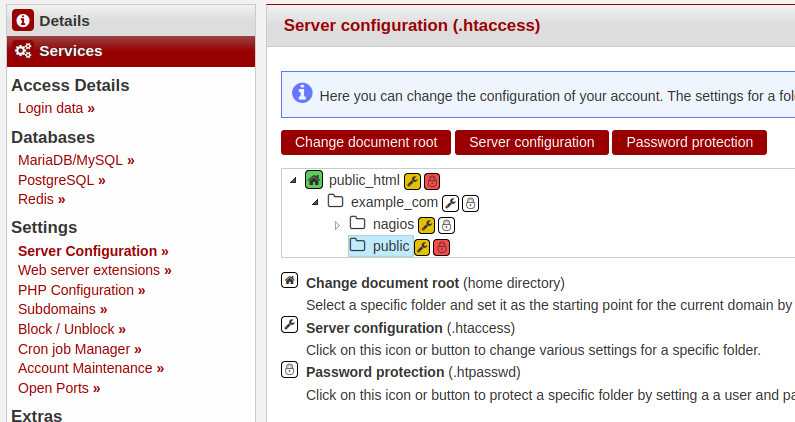
Go back to "Services" -> "Server Configuration", select the public directory in the list and click on the red button "Change document root".
Step 3.3 - Add symlinks for public directory
Create symbolic links to fill the public directory with the required content.
# Replace "holu" with your own username
ln -s /usr/www/users/holu/example_com/nagios/share/* /usr/www/users/holu/example_com/public/
ln -s /usr/www/users/holu/example_com/nagios/sbin /usr/www/users/holu/example_com/public/cgi-bin
Step 3.4 - Start Nagios service
Start the Nagios service in background.
# Replace "holu" with your own username
/usr/www/users/holu/example_com/nagios/bin/nagios /usr/www/users/holu/example_com/nagios/etc/nagios.cfg &
If you want to run the process as permanent service, please consider to ask the support for process releases of nagios.
If you want to start Nagios automatically on system boot, please add a "@reboot" Cronjob in konsoleH (Hetzner Docs: Cron Job Manager).
Step 3.5 - Test Nagios web gui
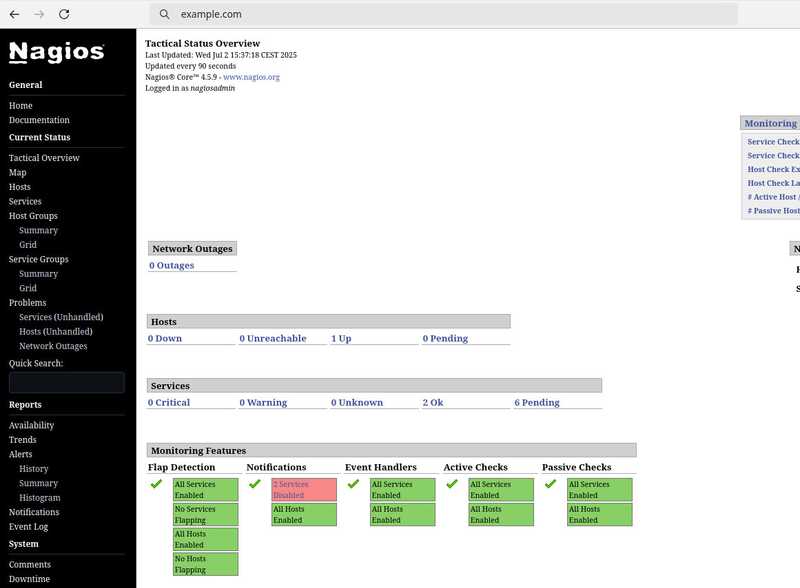
Open the website and login with the "nagiosadmin" user.
Conclusion
Now you have a solution to start your rootless Nagios Core monitoring system on a Managed Server. Please read the following documentation for further information.


