This tutorial explains how to install the Matomo analytics platform.
What is Matomo?
Matomo is a widely used open-source web analytics platform similar to Google Analytics. It lets website and online store operators evaluate a wide range of visitor data, such as: region of origin, which websites were visited previously, how much revenue the customer is responsible for, etc...
For further information and help, please visit: https://matomo.org
Example-Terminology
- Username:
matomo - Database name:
matomo_db - Database username:
matomouser - Database password:
abcde*1234#XYZ - Hostname / Database host:
<xyz.your-database.de> - Domain:
<example.com> - Subdomain:
<matomo.example.com> - FTP client:
FileZilla - FTP/SSH user:
exampleuser - Public SSH key:
id_<type>.pub - Storage amount:
256M - Directories:
public_html - Terminal Commands:
SSH
Prerequisites
- A Web Hosting plan M or higher at Hetzner
- Activated SSL certificate for your domain
- PHP version 8 or higher for the latest version of Matomo with deactivated
mod_pagespeed - Activated FTP or SSH access
- Set
allow_url_fopento "On"PHP-Memory-Limitto at least 256 MB. - If necessary, generate an SSH key with the following specifications
- If necessary use an FTP client, like FileZilla.
Install Matomo
Step 1 - Preparing for installation
1.1 Create a database on konsoleH
- Log onto konsoleH.
- Navigate to
Services->Databases->MariaDB/MySQL ». - Go to
MariaDB/MySQL Databasesand click onAdd.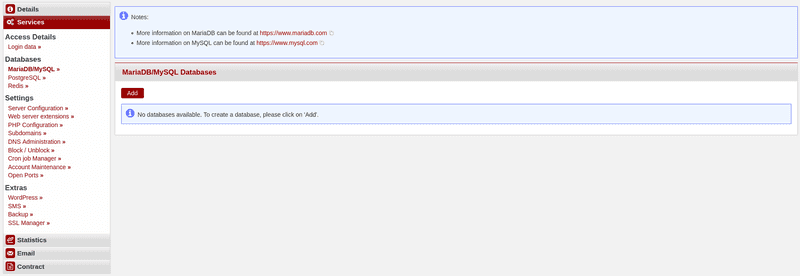
- If you want, you can now customize the name of the
database, thelogin, and thepassword.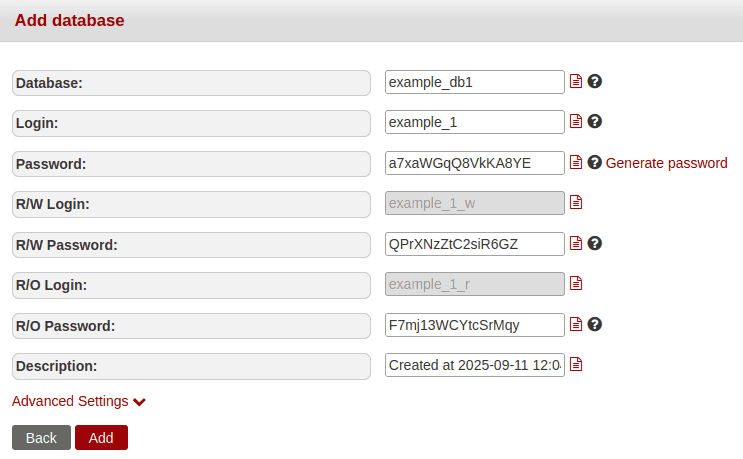
- Click on
Save. TheConnection IDshould now be displayed above the database access data. - Now copy these into a text file on your computer, for example. You will need them later for the setup.
1.2 PHP settings on konsoleH
- On konsoleH, navigate to
Services->Settings->Web server extensions ».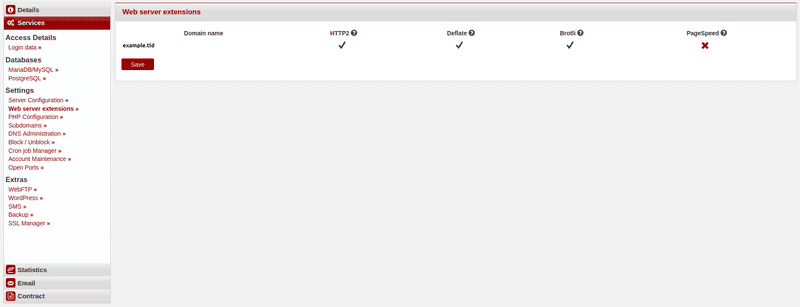
- On the far right, a red cross should be displayed under
mod_pagespeedas shown in the screenshot. If there is a green check mark there, click on it once and then clickSaveunder your domain name on the left. - Now navigate to
PHP configurationbelow.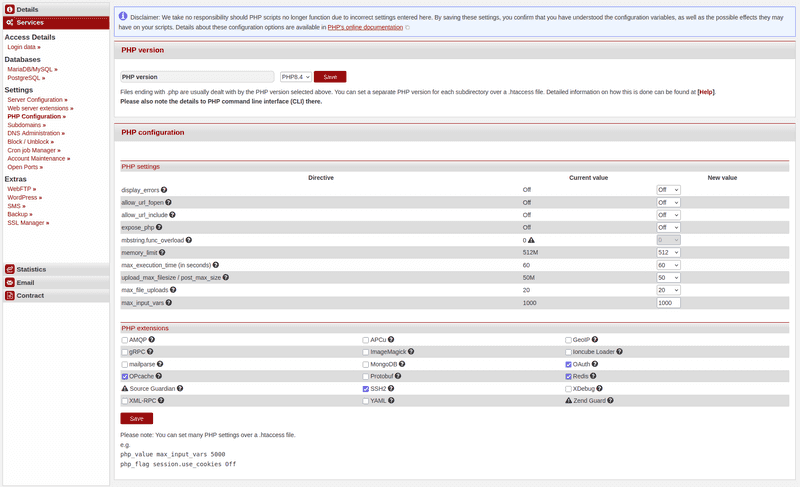
- Go to
PHP versionand select the latest PHP version. Fromversion 5.0onwards, Matomo requires at leastPHP 8.0. - Click on
Save. - Navigate to
PHP Settingson the same page and check thatmemory_limitis set to at least256M. - If the value is lower, select
256in the field to the right and click onSaveat the bottom left of the page.
1.3 Generate an SSH key
- Generate an SSH key pair with the following specifications https://docs.hetzner.com/konsoleh/account-management/access-details/login-data#additional-ftp-users and https://community.hetzner.com/tutorials/howto-ssh-key.
- On konsoleH, navigate to
Services->Access Details->Login data ».
Install your public key via an FTP client:
- Upload your public key
id_<type>.pubthere underPublic SSH Keysby clicking onAdd. Then copy the content into the window that you see after that. - Then click on
Add. Your public key and a comment should now appear underPublic SSH Keys->Key Type.
Install your public key via an SSH connection:
- Upload your public key
id_<type>.pubthere underPublic SSH Keysby clicking onAdd. Then copy the content into the window that you see after that. - Then click on
Add. Your public key and a comment should now appear underPublic SSH Keys->Key Type.
Step 2 - Upload Matomo into your web directory
2.1 Option 1 - Via an SSH connection
-
Navigate to
Settings->Access Details->Login Detailson konsoleH and copy theSSH connection commandby clicking on the red page icon. -
Connect to your account on the web hosting server by opening your local terminal and pasting the copied command:
ssh exampleUser@wwwxyz.your-server.de -p 222 -
You may need to refer to your previously created private SSH key here. To do this, simply add the following line to your SSH command:
-i <PathToYourSSH-Key/id_<type> -
Go to your
public_htmldirectory, download Matomo using the following command, and unzip the file:example@<wwwxyz>:~$ cd public_html/ example@<wwwxyz>:~$ wget https://builds.matomo.org/matomo.zip && unzip matomo.zip
2.2 Option 2 - Via a FTP client
-
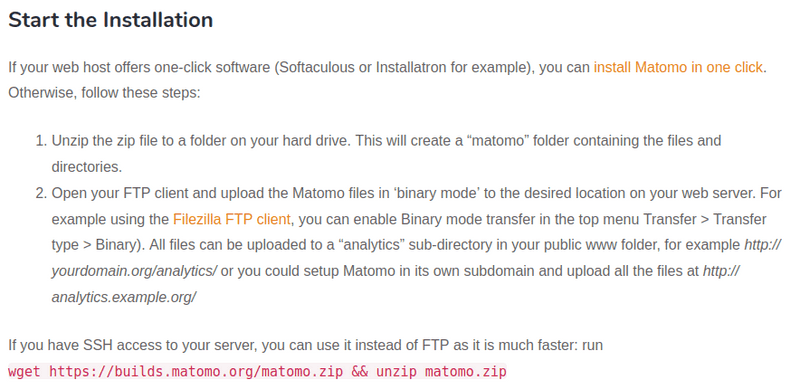
Download the latest version of Matomo from the official website: https://builds.matomo.org/matomo.zip.
-
On Linux, you can unzip the ZIP file using
unzipin your terminal or by double-clicking it in your file manager. -
On Windows/macOS, you can unzip the ZIP file by double-clicking it in your file manager.
-
Now open your FTP client. We used
FileZillafor the installation. -
Click on
File->Site Manager->New siteand name the server, for example:MatomoTest.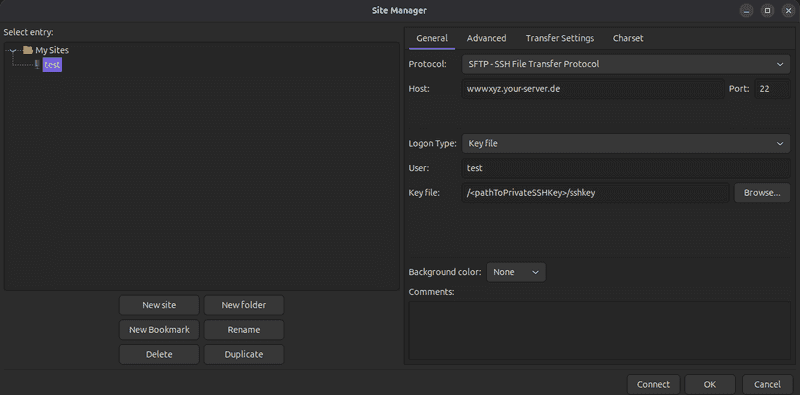
-
Go to
Protocoland selectSFTP-SSH File Transfer Protocol; the go toHostand enter your web hosting serverwwwxyz.your-server.de. Then go toPortand select22. -
Go to
Logon Typeand selectKey file. Then go toUserand enter your login name from konsoleH. -
Under
Key file, click onBrowse. -
In the now-open window, navigate to the directory where you saved your SSH key pair.
-
Now select your private key:
id_<type> -
Add it to
Filezillaby double-clicking it, and connect to the web directory on the web hosting server by clicking onconnect. -
In
FileZilla, navigate to the directory on the left where you extracted thematomo.zipfile and to yourpublic_htmldirectory on the right. -
Now drag the
matomofolder from the left window to the right window and wait until FileZilla has completed the transfer.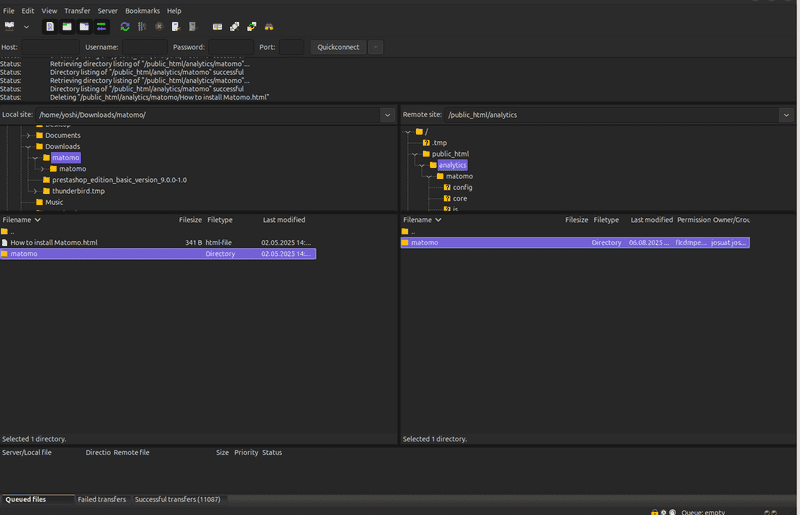
Step 3 - Matomo installation wizard
- In your browser, navigate to the domain address and specify the Matomo directory:
https://example.de/matomo/.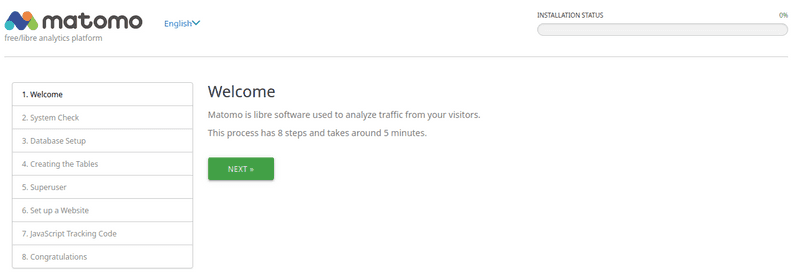
*You should now be on the installer's welcome page. You can select the language in the top right next to the Matomo logo.
- Click on
NEXT, and you will be taken to the system check. Here, you will find a list of all the requirements for Matomo.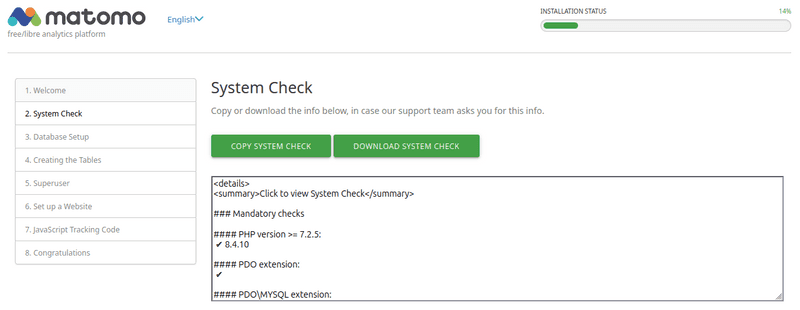
- By clicking on
NEXT, you will be taken to the database setup. Here, you need to fill in the data from konsoleH: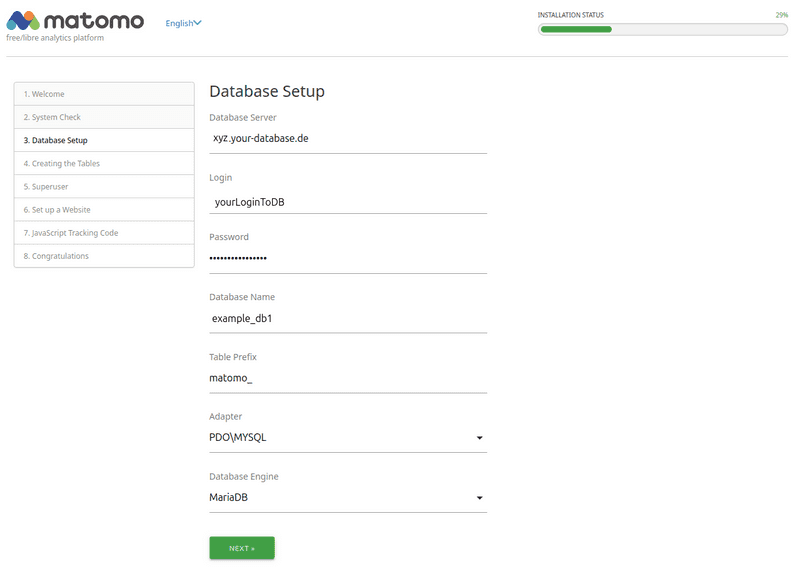
- Click on
NEXTto check that the data is correct and that a connection to the database can be established: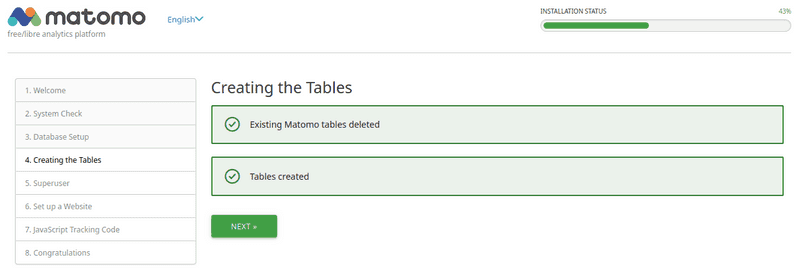
- On the next page, set your login details for the Matomo web interface. Please note the best practices of Matomo.
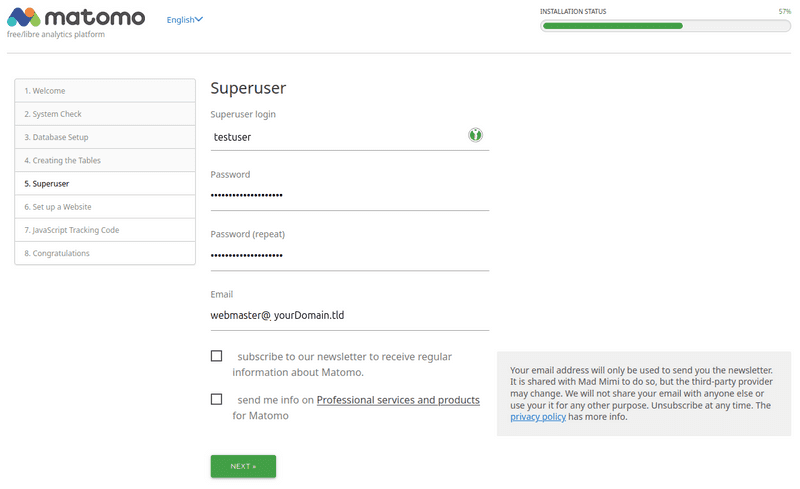
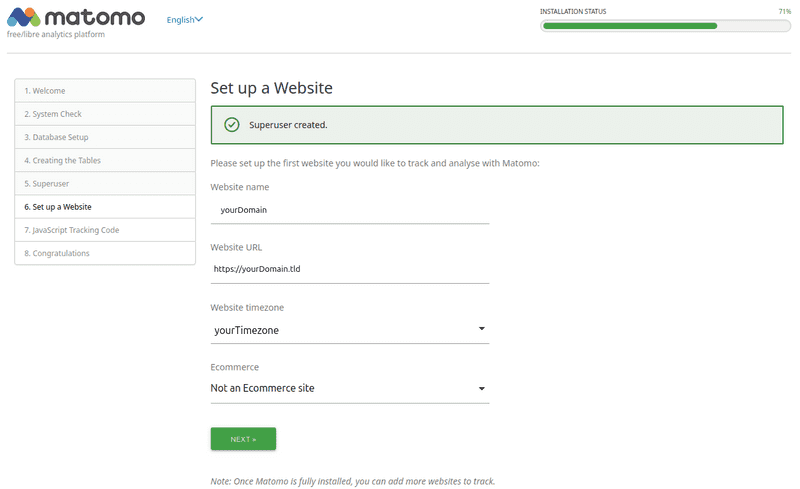
- On the following page, enter your website name, URL, and time zone.
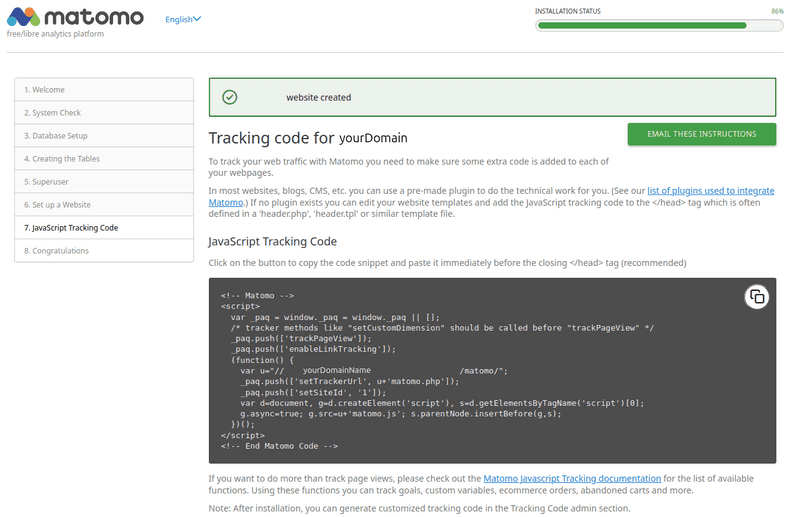
- Under 7., you will now find the Matomo tracking code, which you need to insert into the pages of your website or web shop. For some websites, blogs, CMSes, and web shops, a plugin already exists for this purpose. You can find a list of available plugins at: https://matomo.org/guide/tracking-data/integrations/.
- On the last page, you will find an overview of additional possible steps, and you can access the administration interface of your Matomo installation by clicking on
CONTINUE TO MATOMO.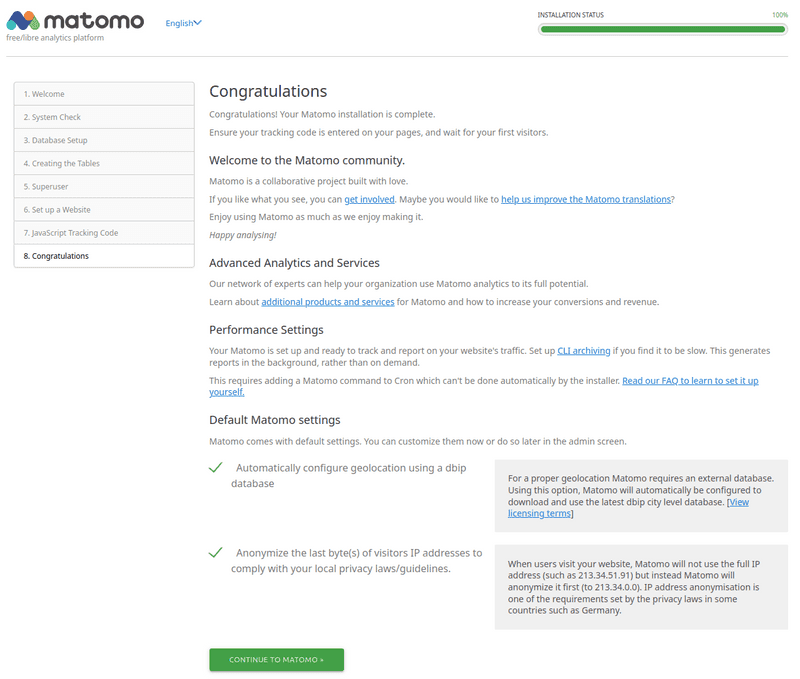
- Congratulations, you should now be done with the installation and setup of Matomo.