Introduction
This tutorial explains how to create a remote desktop on a server with Ubuntu. This tutorial uses Ubuntu 24.04, however this should also work on other versions.
It is explained how to install an xubuntu desktop. In addition, a new user will be created who can access his desktop encrypted via X2Go.
X2Go is a free terminal server solution for connecting to various desktop environments like XFCE, LXDE, Mate etc.
Prerequisites
- A new server (e.g. with Hetzner Cloud
- With Ubuntu 24.04
- With public IP
- Access to the root user or a user with sudo permissions
Example terminology
- Username:
holu - Public IP:
203.0.113.1
Step 1 - Activate a Firewall
Set up a firewall and make sure you allow SSH connections (e.g. with ufw or the Hetzner Cloud Firewall).
-
ufw
sudo ufw allow OpenSSH sudo ufw enable sudo ufw status -
Hetzner Cloud Firewall
Open your newly created server in the corresponding project in the Hetzner Cloud Console.
Create a new Firewall. The default settings in the Firewall are ok. This will open SSH port 22 to your server and close the other, not needed ports.
Sources Protocol Port 0.0.0.0/0 ::/0 TCP 22 0.0.0.0/0 ::/0 ICMP
Step 2 - Configure your server
Step 2.1 - Update your System and install the required packages
Update and install updates:
sudo apt update && sudo apt upgrade -yInstalling the packages for xubuntu and X2Go:
sudo apt install xubuntu-desktop x2goserver x2goserver-xsessionDo you want to continue? [Y/n] yDuring installation, you might be asked to choose between gdm3 and lightdm. Select lightdm as default.
Step 2.2 - Create the new X2Go user
For our connection to our remote desktop, we will not use root. We create a new user. In this example, the user will be named holu
sudo adduser holuAdding user `holu' ...
Adding new group `holu' (1000) ...
Adding new user `holu' (1000) with group `holu' ...
Creating home directory `/home/holu' ...
Copying files from `/etc/skel' ...
New password:
Retype new password:
passwd: password updated successfully
Changing the user information for holu
Enter the new value, or press ENTER for the default
Full Name []: Ho Lu
Room Number []:
Work Phone []:
Home Phone []:
Other []:
Is the information correct? [Y/n] YNow, we add the new user holu to the sudo group.
sudo usermod -aG sudo holuStep 2.3 - Reboot your server
sudo rebootStep 3 - Configure your client
To connect to the xubuntu-desktop, install the X2Go client on the local Workstation.
Use the instructions on the project website to install the client on your local machine.
When the installation is finished, we can set up the client software.
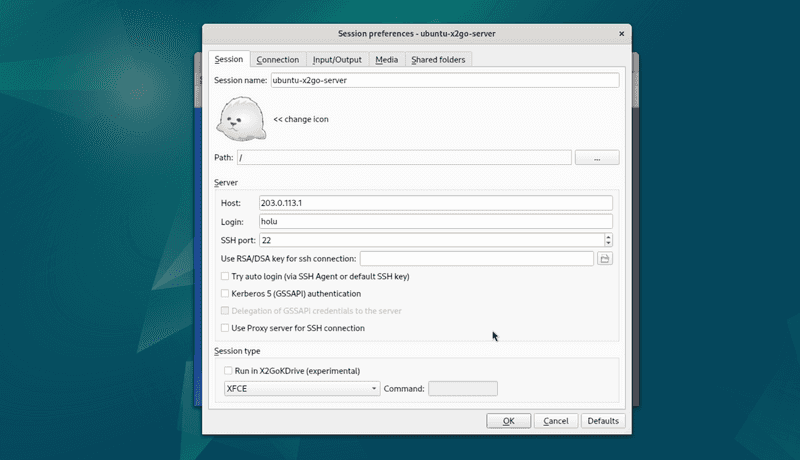
Create a new session in the client and insert the parameters for your server.
- Login: holu
- Host: 203.0.113.1 (replace with your server IP)
- Session type: XFCE
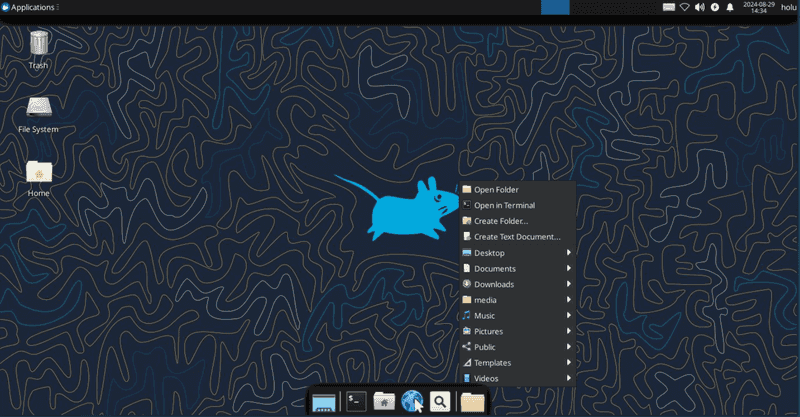
Now you can save your session preferences and connect to your server. Once you're connected to your server, it should look like this:
Conclusion
If you have followed all the steps in this tutorial, you can connect to the server via an SSH-encrypted connection and use a remote desktop with an XFCE interface.

