Introduction
Jenkins is a free and open source automation server.
In this tutorial, we'll be setting up an extra build executor for an already set up Jenkins installation. If you don't have a Jenkins installation set up yet, we recommend following our tutorial on how to install and configure Jenkins.
There can be many reasons for setting up an extra executor, for example for security (not wanting the builds to be ran on the same machine that also handles jenkins authentication), or simply to add more capacity.
Prerequisites
- a cloud server
- a Jenkins installation, set up on a different machine
Step 1 - Installing the Java Runtime Environment
Just like Jenkins itself, Jenkins executors also require a Java Runtime Environment, JRE for short, to run. The latest version of Jenkins requires either Java 8 or 11. First, we'll update the local package lists.
sudo apt updateNow, we can install OpenJDK. In this tutorial we'll use Java 11. If you want to, you can use Java 8 instead. When using Java 8, simply replace openjdk-11-jre with openjdk-8-jre in the command below.
Note: If you're planning on building Java applications on this executor, you should install the JDK (
openjdk-11-jdk), rather than the JRE.
sudo apt install openjdk-11-jreStep 2 - Creating the executor
Now that we've installed a Java Runtime Environment, it's time to create our executor in Jenkins.
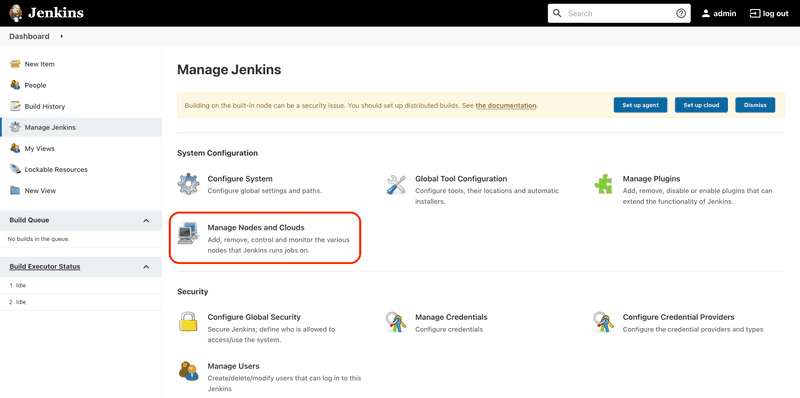
In your Jenkins installation, go to the Manage Jenkins section and click on Manage Nodes and Clouds.
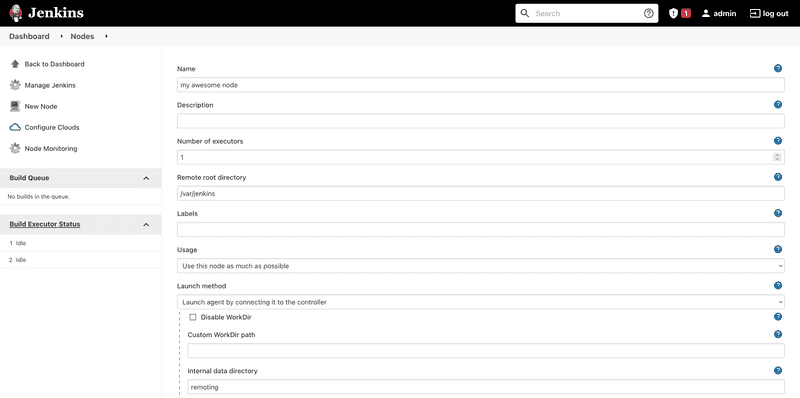
Then, click on the New Node button in the sidebar and give your node a name. Select the type Permanent Agent.
Now, you'll have to decide on a remote root directory. This is the directory Jenkins will use to cache workspaces and other tools. In this tutorial we'll use /var/jenkins.
If you want to be able to run more than one build simultaneously, you can increase the Number of executors value to a higher number.
If you don't want to open an additional port on your Jenkins master node, or are behind a service like Cloudflare, check the Use websocket checkmark.
Now, scroll down and hit Save.
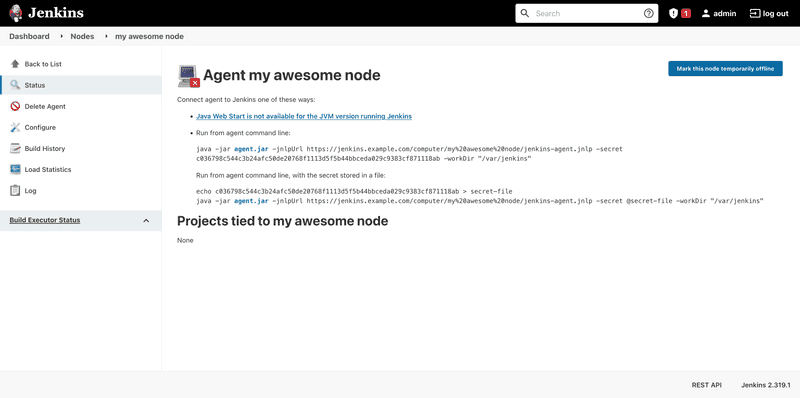
You'll now see a list of your nodes. As you can see, the node we just created is offline. Click the node to see the agent launch command.
Note: If instead of a launch command you see the error message "JNLP agent port is disabled and agents cannot connect this way.", you will have to click the link to the security settings and set either a fixed or random TCP port for inbound agents (in the Agents section).
Keep this page open, since we'll need it in the next step.
Step 3 - Setting up the executor
Now that we've installed a JRE and created the executor in Jenkins, it's finally time to actually set up the executor machine. In this tutorial, we'll create a systemd service for our executor.
First, we'll create a user account for our executor to run on.
sudo useradd jenkinsexecutorNow, we'll create the working directory we chose earlier. We'll also make our jenkinsexecutor user own it.
sudo mkdir /var/jenkins
sudo chown jenkinsexecutor:jenkinsexecutor /var/jenkins
After we've created our directory, we can download the JNLP agent. To copy the download URL, right click agent.jar (highlighted in blue) on the page with the agent launch command, and hit copy link. You should get a link like this:
https://jenkins.example.com/jnlpJars/agent.jarWe'll now save this agent to /var/jenkins/agent.jar
curl https://jenkins.example.com/jnlpJars/agent.jar -o /var/jenkins/agent.jarNow, we can create a systemd service for the Jenkins executor.
sudo nano /etc/systemd/system/jenkins-executor.serviceCopy and paste the following service config into the file you just created. Replace /var/jenkins with your working directory (if using a different one). You'll also need to replace the command in ExecStart with the command shown in the page with the agent launch command (at the end of step two).
[Unit]
Description=Jenkins Executor service
After=network.target

[Service]
Type=simple
User=jenkinsexecutor
WorkingDirectory=/var/jenkins
ExecStart=java -jar agent.jar -jnlpUrl https://jenkins.example.com/computer/my%20awesome%20node/jenkins-agent.jnlp -secret c036798c544c3b24afc50de20768f1113d5f5b44bbceda029c9383cf871118ab -workDir "/var/jenkins"
Restart=always
RestartSec=30s

[Install]
WantedBy=multi-user.target
Now, we can start the systemd service we just created.
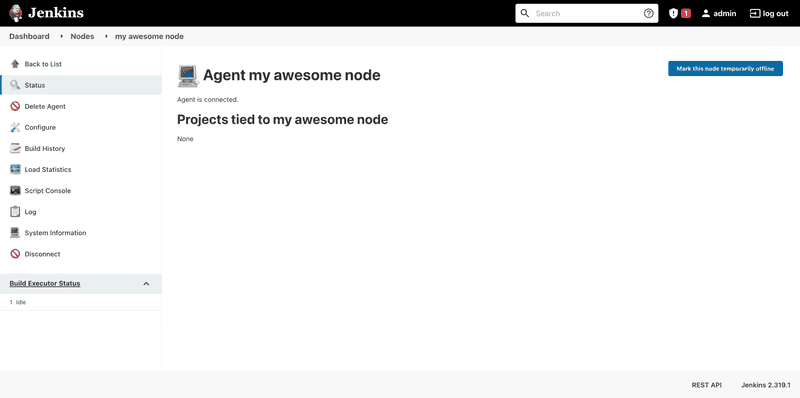
sudo systemctl enable --now jenkins-executorIf you did everything correctly, the executor page should no longer show the launch command after refreshing.
Step 3 - Disabling job execution on the built-in node (optional)
For security reasons, Jenkins recommends disabling job execution for the built-in executor on the master node.
To do this, go to the Manage Jenkins section and click on Manage Nodes and Clouds.
Then, click the cog icon next to Built-In Node. Set Number of executors to zero and save.
Conclusion
Congratulations, you have now set up an additional Jenkins build executor!
You can repeat the steps in this guide for as many times as you want, if you want to add even more executors.
If you haven't already, try creating a new job using the New Item button.


