Introduction
AppFlowy is an open-source alternative to Notion. In this tutorial we are going to setup our own AppFlowy Cloud server using the official documentation by AppFlowy. We will connect AppFlowy to the Hetzner Object Storage. When you add images or videos to a document, AppFlowy will save them in your Object Storage Bucket and access them from there. This tutorial won't cover how you create a new Hetzner Console project called "AppFlowy" or a new server. We will purely focus on setting up AppFlowy, setting up a Bucket and connecting it to our AppFlowy Cloud server.
Prerequisites
-
Server
- git, Docker and docker-compose already installed
Verify withgit -v,docker -v,docker compose version - Access via SSH
- git, Docker and docker-compose already installed
-
DNS entry for your desired (sub-)domain to your server
-
Optional: Dedicated Hetzner Console project called "AppFlowy" to pool your resources together
Step 1 - Create a Bucket
First, create a new Bucket in the Hetzner Console. For a step-by-step guide, see "Creating a Bucket".
As the name of the Bucket, we choose appflowy and add a UUID after it to make it unique. We can create the Bucket with private visibility, as the access will happen via the server.
Example:
LOCATION
NurembergNAME/URL
appflowy-<random_uuid>.nbg1.your-objectstorage.comVISIBILITY
⊙ Private
After successfully creating the Bucket, open it and copy the name and URL of the Bucket, by clicking on them.
Paste the Bucket name and URL into a file for later.
Next, click on "Manage credentials" on the same screen to access the page for S3 credential creation. For a step-by-step guide, see "Generating S3 keys".
Choose a description for your new credentials, for example "AppFlowy". Copy and store your access key and secret key for later usage.
Step 2 - Set up your AppFlowy Cloud server
SSH into your server or use the Hetzner Console VNC console to access your server via the web frontend.
Step 2.1 - Clone the AppFlowy Cloud repository
Clone the AppFlowy Cloud repository to your desired location and cd into the cloned repository:
git clone https://github.com/AppFlowy-IO/AppFlowy-Cloud
cd AppFlowy-Cloud
Step 2.2 - Setup the nginx proxy of AppFlowy Cloud to use your SSL certificate
The AppFlowy-Cloud directory should include the following files:
AppFlowy-Cloud
├─ docker-compose.yml
└─ nginx/ssl/
   ├─ certificate.crt
   └─ private_key.key
docker-compose.yml points to the SSL certificate like this:
    volumes:
      - ./nginx/nginx.conf:/etc/nginx/nginx.conf
      - ./nginx/ssl/certificate.crt :/etc/nginx/ssl/certificate.crt
      - ./nginx/ssl/private_key.key :/etc/nginx/ssl/private_key.key
Put your SSL certificate and private key into the files in AppFlowy-Cloud/nginx/ssl/ or adjust the location in the docker-compose.yml to point to your own certificates.
Alternatively you can create a Let's Encrypt SSL certificate via DNS challenge on the Hetzner Console DNS by using lego:
-
Create SSL certificate
go install github.com/go-acme/lego/v4/cmd/lego@latest
sudo ~/go/bin/lego --domains="appflowy.example.com" --email="admin@example.com" --http run
You should now have the following files:
AppFlowy-Cloud ├─ docker-compose.yml └─ .lego/certificates/ ├─ appflowy.example.com.crt └─ appflowy.example.com.key -
Adjust the
docker-compose.ymlto point to the output folder of lego:nginx: restart: on-failure image: nginx ports: - ${NGINX_PORT:-80}:80 # Disable this if you are using TLS - ${NGINX_TLS_PORT:-443}:443 volumes: - ./nginx/nginx.conf:/etc/nginx/nginx.conf - ./.lego/certificates/appflowy.example.com.crt:/etc/nginx/ssl/certificate.crt - ./.lego/certificates/appflowy.example.com.key:/etc/nginx/ssl/private_key.key
Step 3 - Edit docker-compose.yml
Open docker-compose.yml with you favourite text editor and make the following changes:
-
Remove the minio service
Remove the minio service by deleting the following lines:
# You do not need this if you have configured to use your own s3 file storage minio: restart: on-failure image: minio/minio environment: - MINIO_BROWSER_REDIRECT_URL=http://localhost/minio - MINIO_ROOT_USER=${APPFLOWY_S3_ACCESS_KEY:-minioadmin} - MINIO_ROOT_PASSWORD=${APPFLOWY_S3_SECRET_KEY:-minioadmin} command: server /data --console-address ":9001" volumes: - minio_data:/data -
Remove the minio_data volume
Don't forget to remove the
minio_datavolume from the volumes at the end of thedocker-compose.yml. Only thepostgres_datavolume should remain:volumes: postgres_data: -
Edit or remove the ai service
If you have an openai api key, add it in the ai service.
If you don't have an openai api key, comment out the ai service.ai: restart: on-failure image: appflowyinc/appflowy_ai:${APPFLOWY_AI_VERSION:-latest} environment: - OPENAI_API_KEY=${APPFLOWY_AI_OPENAI_API_KEY} - APPFLOWY_AI_SERVER_PORT=${APPFLOWY_AI_SERVER_PORT} - APPFLOWY_AI_DATABASE_URL=${APPFLOWY_AI_DATABASE_URL}
Step 4 - Edit deploy.env
Now we need to adjust the deploy.env file to use our own passwords and point to the Hetzner Object Storage. I recommend to keep the order of values identical, as we are going to commit our changes locally. This makes rebasing easier.
-
At the time of creation of this tutorial you should adjust the following values with your own password and SMTP configuration:
# replace the value of ${POSTGRES_PASSWORD} with a secure password # change the secret # change your database name if needed POSTGRES_PASSWORD="securepassword" GOTRUE_JWT_SECRET=hello456 # replace with your own SMTP configuration # you will need this to send out magic links for login GOTRUE_SMTP_HOST=smtp.gmail.com GOTRUE_SMTP_PORT=465 GOTRUE_SMTP_USER=email_sender@some_company.com GOTRUE_SMTP_PASS=email_sender_password GOTRUE_SMTP_ADMIN_EMAIL=comp_admin@some_company.com APPFLOWY_MAILER_SMTP_HOST=smtp.gmail.com APPFLOWY_MAILER_SMTP_PORT=465 APPFLOWY_MAILER_SMTP_USERNAME=email_sender@some_company.com APPFLOWY_MAILER_SMTP_PASSWORD=email_sender_password # configure your admin account GOTRUE_ADMIN_EMAIL=admin@example.com GOTRUE_ADMIN_PASSWORD=password # input your (sub-)domain, which you configured in the Hetzner Console DNS API_EXTERNAL_URL=https://appflowy.example.com -
Remove the following lines, as we won't use those services:
# PgAdmin # Optional module to manage the postgres database # You can access the pgadmin at http://your-host/pgadmin # Refer to the APPFLOWY_DATABASE_URL for password when connecting to the database PGADMIN_DEFAULT_EMAIL=admin@example.com PGADMIN_DEFAULT_PASSWORD=password # Portainer (username: admin) PORTAINER_PASSWORD=password1234 # Cloudflare tunnel token CLOUDFLARE_TUNNEL_TOKEN= -
And finally configure your Object Storage:
APPFLOWY_S3_USE_MINIO=true
APPFLOWY_S3_MINIO_URL=https://appflowy-5d3f1744a2494fb5b49c983e3eff3e17.nbg1.your-objectstorage.com # this is where the previously copied Object Storage URL is pasted
APPFLOWY_S3_ACCESS_KEY=<your access key> # paste your previously generated access key from the S3 credentials
APPFLOWY_S3_SECRET_KEY=<your secret key> # paste your previously generated secret key from the S3 credentials
APPFLOWY_S3_BUCKET=appflowy # this isn't really the name of your Bucket, but the root folder in your Bucket
#APPFLOWY_S3_REGION=us-east-1
Step 5 - Start AppFlowy Cloud
Now that docker-compose.yml and deploy.env are ready, you can commit your changes and start the Docker containers.
-
Add and commit your changes
optionalWe use git to store our changes in the git log and make it easier to pull updates from upstream. By using this method every change of defaults in the
deploy.envanddocker-compose.ymlwill result in merge conflicts when pulling an update, which you need to resolve before restarting/updating your server.git add deploy.env docker-compose.yml git commit -m "my own AppFlowy deployment on Hetzner Cloud" -
Start the AppFlowy Cloud server
Start your AppFlowy Cloud server via
docker compose(ordocker-compose, depending on your installation method):docker compose --env-file deploy.env up -d
You should now be able to access the web UI via your domain:
https://appflowy.example.comUse docker ps to check the status of the Docker containers. If you run into any issues, run docker compose logs.
Step 6 - Install and configure AppFlowy Application
Go to appflowy.io and download the AppFlowy Application on your local device.
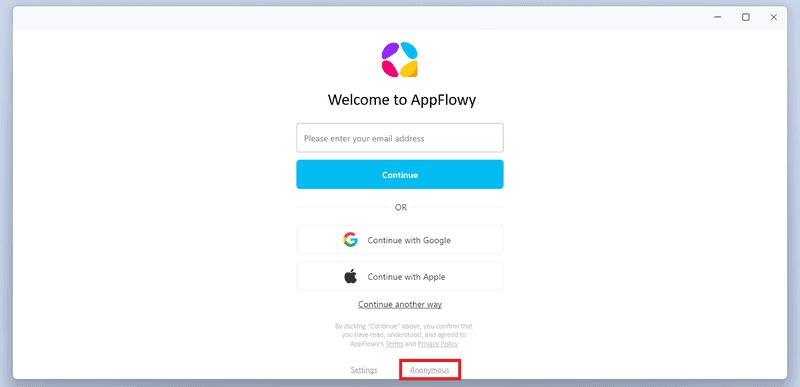
After the AppFlowy Application is installed on your local device, open the application and log in as "Anonymous".
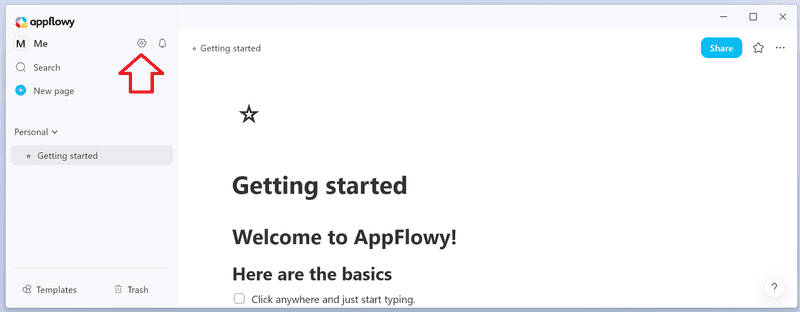
Now click on the gear icon to open the settings.
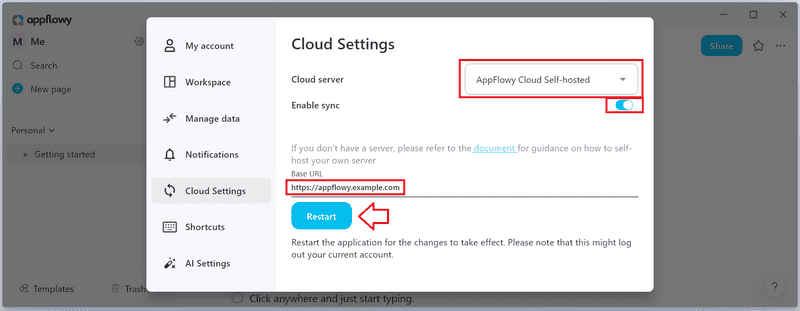
In the settings:
- Navigate to "Cloud Settings"
- Change the value of Cloud server to "AppFlowy Cloud Self-hosted"
- Enable the sync
- Enter the URL of your cloud server as "Base URL"
- Restart AppFlowy.
After the restart, you might not be able to login again. To login again, you will need the magic link as explained in the next step.
Step 7 - User creation and login
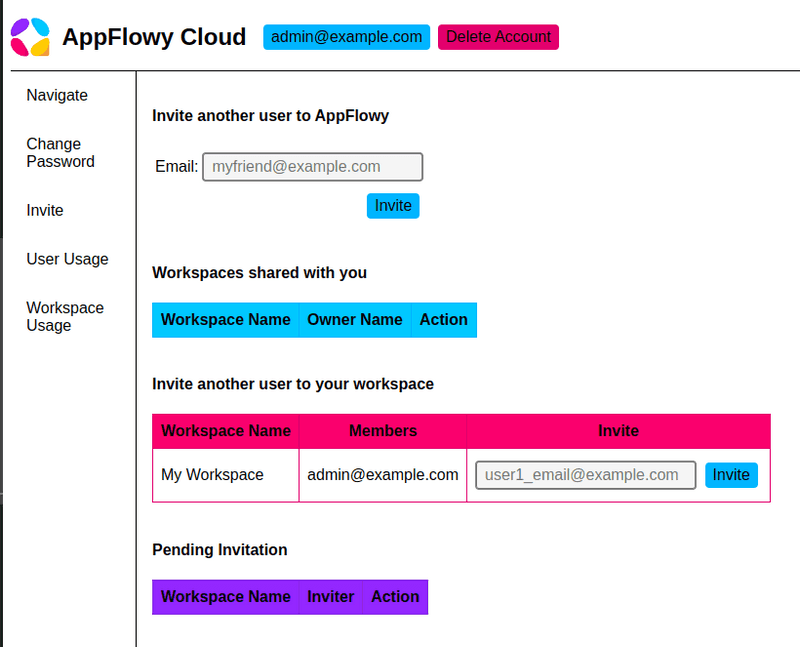
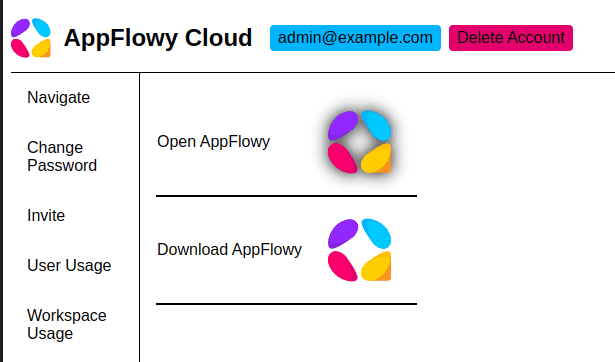
Open a browser and navigate to the URL of your server. The admin frontend will open up and you can login with the admin credentials you previously defined in deploy.env. Via the invite page, you can now create/invite new users:
When you invite a new user, they will receive a magic link for login. If they didn't receive a mail, you can manually create a magic link by clicking "Admin" in the top right and navigating to "List Users". Click "More Info" next to the user you just invited and select "Generate Invite Link".
When you follow the magic link, it will automatically log into the local AppFlowy Application. Your AppFlowy Application should now save images and videos in your Hetzner Object Storage Bucket.
In the web frontend, you also have the option to directly open AppFlowy with the account you logged into the web frontend with.
Step 8 - Check if Object Storage works
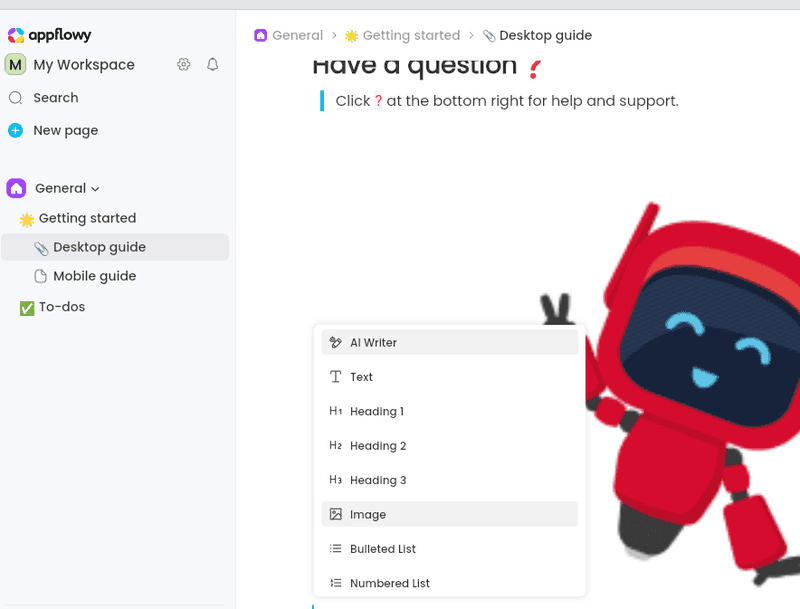
AppFlowy should use the Object Storage for storing your images and videos. Open up the AppFlowy Application on your local device and add an image in a random page.
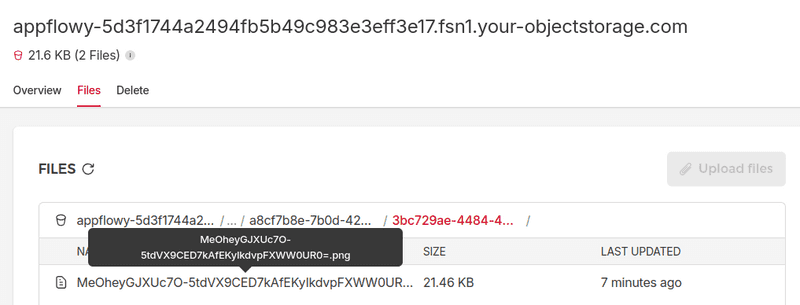
You can now check in your Hetzner Console if the file got created in the Bucket.
Conclusion
We have setup our own AppFlowy Cloud server using the Hetzner Object Storage.

