Introduction
We installed a Kubernetes Cluster on Hetzner Cloud and used its Cloud Load Balancer to serve traffic. After some experimentation, we wanted to protect our deployed services with some authentication. Adding basic auth was no problem. But as soon as we tried to bypass some source addresses, it wasn't working.
Therefore, in this tutorial, I´ll demonstrate how we managed to configure this. Our use-case is as follows: we want to restrict access to deployed services with a password prompt (basic auth). However, some source addresses (eg. our office) should bypass this check for convenience reasons.
Prerequisites
- A working Kubernetes Cluster on Hetzner Cloud. You may refer to this tutorialfor installation.
- Some familiarity with Kubernetes.
This tutorial was tested on Ubuntu 20.04 Hetzner Cloud servers and Kubernetes version v1.21.0
Step 1 - Configure Ingress
We used the official config to deploy our ingress service.
First download the official config file:
wget https://raw.githubusercontent.com/kubernetes/ingress-nginx/controller-v0.45.0/deploy/static/provider/cloud/deploy.yamlAdd use-forwarded-headers, compute-full-forwarded-for and use-proxy-protocol to the data definition, like this:
# Source: ingress-nginx/templates/controller-configmap.yaml
apiVersion: v1
kind: ConfigMap
metadata:
  labels:
    helm.sh/chart: ingress-nginx-3.27.0
    app.kubernetes.io/name: ingress-nginx
    app.kubernetes.io/instance: ingress-nginx
    app.kubernetes.io/version: 0.45.0
    app.kubernetes.io/managed-by: Helm
    app.kubernetes.io/component: controller
  name: ingress-nginx-controller
  namespace: ingress-nginx
data:
  use-forwarded-headers: "true"
  compute-full-forwarded-for: "true"
  use-proxy-protocol: "true"
Step 1.1 - Create and connect the Load Balancer
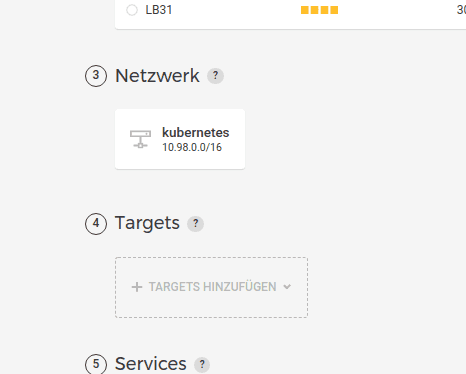
Create a Load Balancer in your Hetzner cloud console. It is important to select the correct internal network. We did not need to define any services at this step, this was done automatically after deploying the ingress service.
The name of the load balancer must match the annotation load-balancer.hetzner.cloud/name like this:
---
# Source: ingress-nginx/templates/controller-service.yaml
apiVersion: v1
kind: Service
metadata:
  annotations:
    load-balancer.hetzner.cloud/name: "kubelb"
Another description on how to enable the Load Balancer for Kubernetes can be found here.
After you made the described modifications to the deploy.yaml, apply the config with:
kubectl -f deploy.yamlFull configuration example can be found here.
Step 2 - Enable Proxy Protocol in Load Balancer
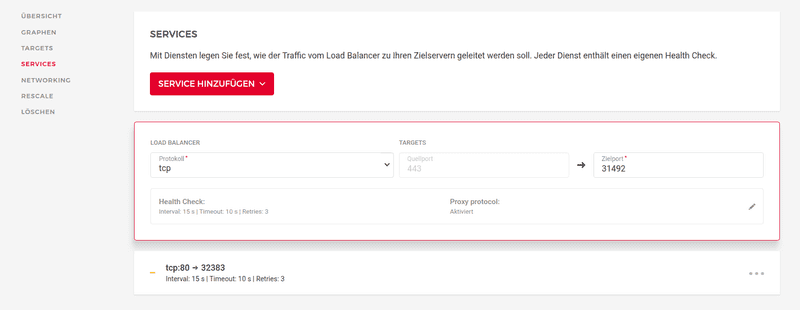
Switch over to your Hetzner cloud console and configure the Load Balancer. Open the tab services. It may take some minutes before services become present in the cloud console. Enable Proxy Protocol for the used services.
Please note: at this point all your services may become unreachable, unless you configured ingress correctly. If this happens, don't worry. This setting can be easily deactivated again.
Step 3 - Add authentication to the service
Create a service.yaml for your service. You may use this example service definition as a starting point.
Now it's time to add the authentication part. Here are the annotations we used to protect our service. It configures a basic auth which can be bypassed by some whitelisted addresses.
Add following annotations to your service, especially the whitelist-source-range needs to be changed to your needs.
...
apiVersion: extensions/v1beta1
kind: Ingress
metadata:
  name: example
  annotations:
    kubernetes.io/ingress.class: nginx
    nginx.ingress.kubernetes.io/whitelist-source-range: 4.8.15.16/32,23.42.0.0/32
    nginx.ingress.kubernetes.io/satisfy: "any"
    nginx.ingress.kubernetes.io/auth-type: basic
    nginx.ingress.kubernetes.io/auth-secret: basic-auth
    nginx.ingress.kubernetes.io/auth-realm: "Authentication Required - Registry"
...
But wait? How to define accounts for basic auth? Well this is done with the secret called basic-auth in this example. It was created with htpasswd:
$ htpasswd -c ./auth userThe file can then be imported into kubernetes as a secret like this. Please note the name basic-auth it must match auth-secret in the service definition.
kubectl create secret generic basic-auth --from-file=authFinally, deploy the service with:
kubectl -f service.yamlProblem discussion
Source IP filtering relies on the fact that the correct client IP is present in HTTP Header X-Forwared-For and X-Real-IP. At first, this was not the case for our set up. We validated this using a phpinfo service. Please note the private network IP. No surprise that our IP whitelist was not working, it could not determine the real IP of the visitor.
You may validate this for yourself using this deployment example.
Conclusion
You are now able to enable authentication for services in your Kubernetes Cluster. This can be a password prompt which can optionally be bypassed by some source addresses.


