Introduction
This article is about getting SmartOS up and running on a new Hetzner server. Remark that I intentionally avoid using the word "installing" in the previous phrase, because SmartOS is more like a live image that just gets loaded in memory to run it. It was actually one of the SmartOS design principles to not install the operating system, which has its advantages but it creates the dependancy on external media to boot.
In the past, a strict requirement for running SmartOS on a Hetzner server was the presence of a USB flash drive to boot the operating system from. Other boot options for SmartOS are CDROM or network boot, but those aren't valid options when hosting SmartOS at Hetzner. (except if I missed something)
Today, there is another option to boot SmartOS: booting SmartOS of a ZFS pool.
In practice this means that the boot image will be present on the internal hard disks of the server, however the challenge remains to get it in place without the need for any external boot media as mentioned above. In other words, we still have to overcome the challenge of its very first boot, and the typical SmartOS configuration at first boot.
For me, the motivation behind this procedure was to be able to run SmartOS on a server of the "server auctions" at Hetzner, which don't allow you to connect a USB flash drive since nothing can be changed to these servers.
BEWARE: this procedure will overwrite all data on the disks!
Prerequisites
These are the prerequisites in order to be able to follow this procedure:
- A SmartOS compatible Hetzner server, I believe most are compatible (maybe all).
I successfully tested SmartOS on:
- EX42: Intel® Core™ i7-6700
- SB82: Intel Xeon E5-1650V3
- PX92: Intel Xeon W2145 Octa-Core Skylake
- A remote console ordered via a Hetzner support request
- Hetzner server networking configuration
- The knowledge to operate your server via Hetzner robot
- Basic Linux command-line knowledge
Hardware RAID is not required. ZFS eliminates the need for hardware RAID, however it might imply preliminary steps to disable it!
Approach
In summary, the following steps are needed to prepare the system to boot SmartOS:
- Boot the Linux rescue system facilitated via the Hetzner robot
- Install Linux from the rescue boot (single command)
- Adapt the Linux grub configuration to add an entry to boot SmartOS
- Load the SmartOS media onto the Linux file system /boot
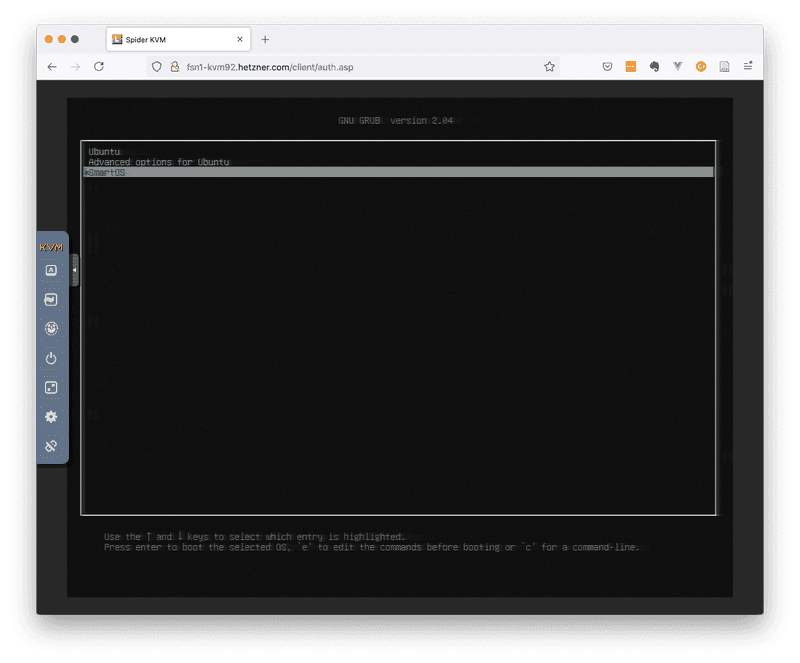
- Reboot, at boot time select "SmartOS" from the grub menu
- Complete the SmartOS configuration at first boot, and
- prepare a bootable ZFS file system via piadm
- install boot media via piadm
- Reboot into SmartOS (only boot option left, the Linux installation was overwritten)
- Optionally, change the root password (for increased password complexity)
This procedure might not seem the most efficient way as we first install Linux to overwrite it immediately with SmartOS, but at least this approach is close to "bullet proof". It is really easy and doesn't leave much room for mistakes.
Step 1 - Install Linux via the Hetzner rescue system
So, to start off, we boot the server in Linux rescue mode via Hetzner Robot.
Once at the UNIX prompt, we launch the installimage command to start the Linux installation.
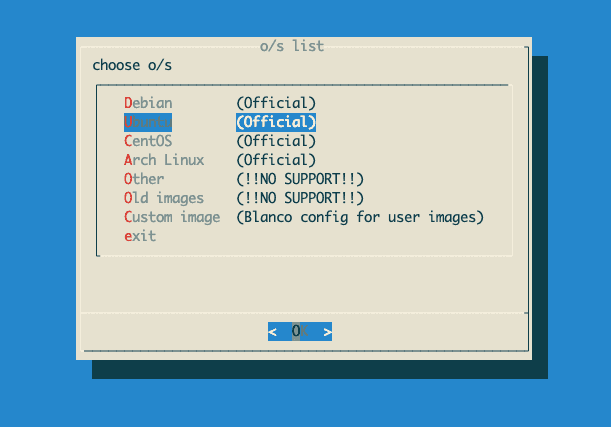
For the purpose of this procedure I always select Ubuntu, as shown below:
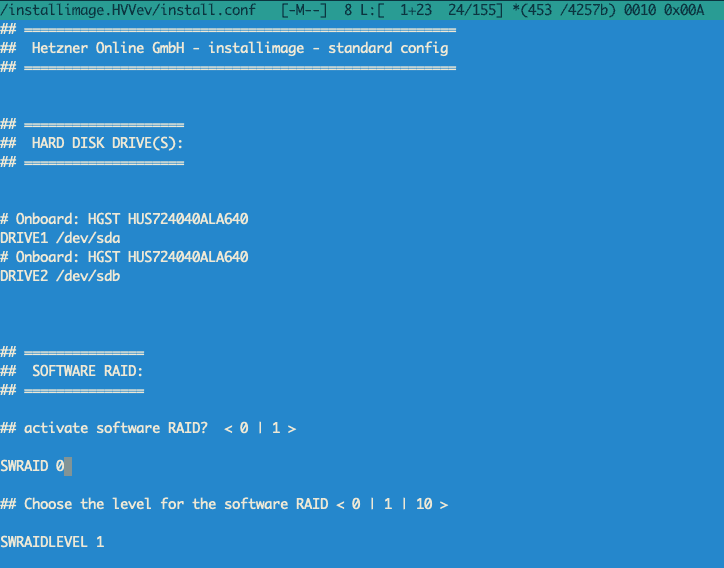
As part of the installation procedure, you will have the possibility to edit the install.conf file. I recommend to disable the software RAID by changing the 1 into 0 at the end of the line that starts with SWRAID.
Follow along with the default options to complete installation and reboot the server. Reconnect to the console once the installation is finished and the server has rebooted.
Step 2 - Adapt the Linux Grub configuration
At this step we will add an entry to boot SmartOS from a local copy that we will load onto the /boot directory.
Edit the grub custom entries file:
root@Ubuntu-2010-groovy-64-minimal ~ # vi /etc/grub.d/40_customAdd a new menuentry into /etc/grub.d/40_custom, here I used the root='hd0,gpt2' parameter which refers to the third partition on the first hard disk. (indeed, we start counting from 0)
It's easy to figure out the correct parameters, just copy the set root='...' line from the existing menu entries in the /boot/grub/grub.cfg.
root@Ubuntu-2010-groovy-64-minimal ~ # cat  /etc/grub.d/40_custom
#!/bin/sh
exec tail -n +3 $0
# This file provides an easy way to add custom menu entries.  Simply type the
# menu entries you want to add after this comment.  Be careful not to change
# the 'exec tail' line above.

menuentry "SmartOS" {
    insmod multiboot
    set root='hd0,gpt2'
    multiboot /platform/i86pc/kernel/amd64/unix /platform/i86pc/kernel/amd64/unix -B smartos=true
    module /platform/i86pc/amd64/boot_archive /platform/i86pc/amd64/boot_archive type=rootfs name=ramdisk
}
Optionally, you could also adapt some default values for grub in the /etc/default/grub file.
In this file I'm setting GRUB_DEFAULT=2 to select SmartOS as default boot option on 3rd position. (again counting from 0)
I comment out the GRUB_TIMEOUT_STYLE=hidden line to avoid hidden messages and I choose to set GRUB_TIMEOUT=20 to give myself 20 seconds the time to make a selection at the grub menu.
So the /etc/default/grub looks like this:
root@Ubuntu-2010-groovy-64-minimal ~ # cat  /etc/default/grub
# If you change this file, run 'update-grub' afterwards to update
# /boot/grub/grub.cfg.
# For full documentation of the options in this file, see:
#   info -f grub -n 'Simple configuration'

GRUB_DEFAULT=2
#GRUB_TIMEOUT_STYLE=hidden
GRUB_TIMEOUT=20
GRUB_DISTRIBUTOR=`lsb_release -i -s 2> /dev/null || echo Debian`
GRUB_CMDLINE_LINUX_DEFAULT=""
GRUB_CMDLINE_LINUX=""

# Uncomment to enable BadRAM filtering, modify to suit your needs
# This works with Linux (no patch required) and with any kernel that obtains
# the memory map information from GRUB (GNU Mach, kernel of FreeBSD ...)
#GRUB_BADRAM="0x01234567,0xfefefefe,0x89abcdef,0xefefefef"

# Uncomment to disable graphical terminal (grub-pc only)
#GRUB_TERMINAL=console

# The resolution used on graphical terminal
# note that you can use only modes which your graphic card supports via VBE
# you can see them in real GRUB with the command `vbeinfo'
#GRUB_GFXMODE=640x480

# Uncomment if you don't want GRUB to pass "root=UUID=xxx" parameter to Linux
#GRUB_DISABLE_LINUX_UUID=true

# Uncomment to disable generation of recovery mode menu entries
#GRUB_DISABLE_RECOVERY="true"

# Uncomment to get a beep at grub start
#GRUB_INIT_TUNE="480 440 1"
root@Ubuntu-2010-groovy-64-minimal ~ #
Now we are ready to update the grub configuration with the update-grub2 command.
root@Ubuntu-2010-groovy-64-minimal ~ # update-grub2
Sourcing file `/etc/default/grub'
Sourcing file `/etc/default/grub.d/hetzner.cfg'
Sourcing file `/etc/default/grub.d/init-select.cfg'
Generating grub configuration file ...
Found linux image: /boot/vmlinuz-5.8.0-59-generic
Found initrd image: /boot/initrd.img-5.8.0-59-generic
done
Once the configuration is updated after a few seconds, we are ready for the next step: downloading the boot image to put it in place as documented here below:
Step 3 - Load the SmartOS media onto the Linux file system
We will download a recent SmartOS release in the /var/tmp directory by using the wget command:
root@Ubuntu-2010-groovy-64-minimal ~ # cd /var/tmproot@Ubuntu-2010-groovy-64-minimal /var/tmp # wget \
https://us-east.manta.joyent.com/Joyent_Dev/public/SmartOS/20210408T001154Z/platform-release-20210408-20210408T001154Z.tgz
--2021-08-09 22:15:36-- https://us-east.manta.joyent.com/Joyent_Dev/public/SmartOS/20210408T001154Z/platform-release-20210408-20210408T001154Z.tgz
Resolving us-east.manta.joyent.com (us-east.manta.joyent.com)... 64.30.136.21, 64.30.136.19, 64.30.136.18, ...
Connecting to us-east.manta.joyent.com (us-east.manta.joyent.com)|64.30.136.21|:443... connected.
HTTP request sent, awaiting response... 200 OK
Length: 185240033 (177M) [application/octet-stream]
Saving to: ‘platform-release-20210408-20210408T001154Z.tgz’
platform-release-20210408-20210408T001154Z.tgz 100%[=====================================================>] 176.66M 22.6MB/s in 9.9s
2021-08-09 22:15:47 (17.9 MB/s) - ‘platform-release-20210408-20210408T001154Z.tgz’ saved [185240033/185240033]Once the image is downloaded, we will unpack the compressed tar archive into the /boot directory:
root@Ubuntu-2010-groovy-64-minimal ~ # cd /bootroot@Ubuntu-2010-groovy-64-minimal /boot # tar zxvf \
/var/tmp/platform-release-20210408-20210408T001154Z.tgz
platform-20210408T001154Z/
platform-20210408T001154Z/i86pc/
platform-20210408T001154Z/i86pc/amd64/
platform-20210408T001154Z/i86pc/amd64/boot_archive.manifest
platform-20210408T001154Z/i86pc/amd64/boot_archive.gitstatus
platform-20210408T001154Z/i86pc/amd64/boot_archive
platform-20210408T001154Z/i86pc/amd64/boot_archive.hash
platform-20210408T001154Z/i86pc/kernel/
platform-20210408T001154Z/i86pc/kernel/amd64/
platform-20210408T001154Z/i86pc/kernel/amd64/unix
platform-20210408T001154Z/root.password
platform-20210408T001154Z/etc/
platform-20210408T001154Z/etc/version/
platform-20210408T001154Z/etc/version/platformThen we have to rename the directory name. This is important, so don't skip this step or the boot will fail!
root@Ubuntu-2010-groovy-64-minimal /boot # mv platform-20210408T001154Z/ platformWe can now reboot the system, and select "SmartOS" in the grub boot menu.
root@Ubuntu-2010-groovy-64-minimal ~ # reboot
Connection to xeon1.globalz.one closed by remote host.
Connection to xeon1.globalz.one closed.
Step 4 - Complete the SmartOS configuration
Once booted, the server with SmartOS comes up with an interactive configuration session to provide a minimum of parameters, like:
- the network and DNS configuration
- the NTP configuration
- the zpool configuration (here ZFS software mirror), which we will make bootable upon creation
- the root password (don't make it too complex to avoid lock out at this stage)
- the system hostname
These steps are shown in the following screen captures.
To start with, two screens with some information will be shown, just pass them by pressing Enter twice:
Provide the IP address and netmask for your server, this information is obtained from Hetzner Robot:
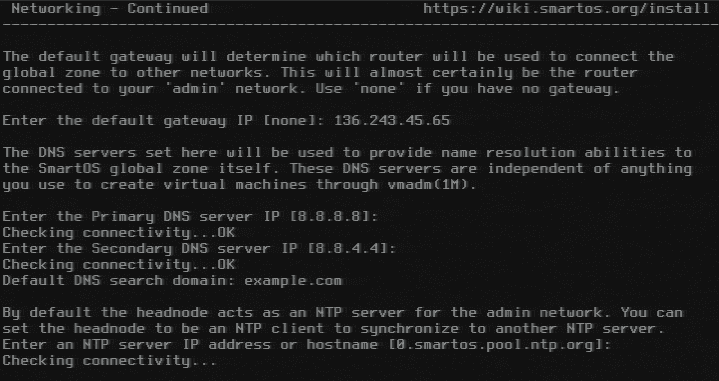
Enter the default gateway IP address for your server:
Specify DNS servers and your domain name:
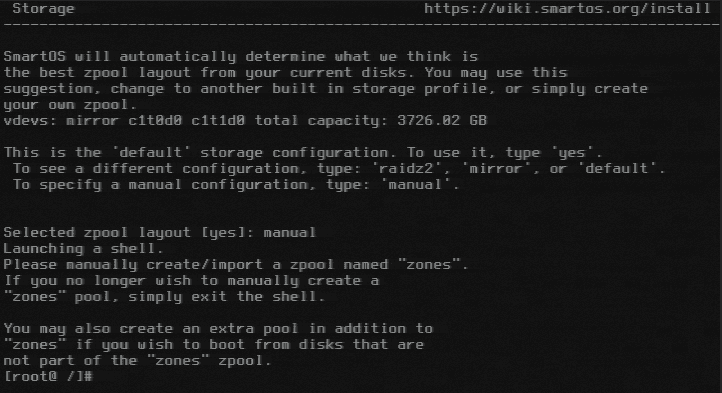
In case the proposed zpool layout does not fit your needs, type "manual" in order to initiate the manual creation of the zpool. Otherwise, just accept the default "Yes" and follow along with the "Self-booting" step in the wizard (below the exit command of this procedure):
The manual approach will get us in a shell session, first let's list the disks with the format command. Exit from the format command by typing the ctrl-d key combination.
At this stage we opt to create the zpool manually, this will give us the opportunity to define the ZFS RAID configuration and to make it bootable. Indeed, this is the key functionality that facilitates the goal of the procedure documented on this page: "making the system bootable from the zones zpool".
The manual step is done in a shell session, where we first create the zones zpool with a mirror of two disks, the -B option instructs the creation of a whole disk pool with EFI System partition to support booting system with UEFI firmware. The default size is 256MB, if desired another size can be specified with the -o option.
For readability, I provide the command snippets here below as text instead of the actual console screenshots.
[root@ /]# zpool create -f -B zones mirror c1t0d0 c1t1d0Upon success, we can list the zpools with the zpool command:
[root@ /]# zpool list
NAME    SIZE  ALLOC   FREE  CKPOINT  EXPANDSZ   FRAG    CAP  DEDUP  HEALTH  ALTROOT
zones  3.62T   104K  3.62T        -         -     0%     0%  1.00x  ONLINE  -
From here we will use the piadm command to enable the "zones" zpool as bootable, and at the same time we request the latest image to be installed with the -i option.
[root@ /]# piadm bootable -e -i latest zonesNow that the zones zpool is created and ready to boot SmartOS we go back to the configurator by executing the exit command.
[root@ /]# exitSpecify the zpool layout zones, and specify media as the source for the boot as shown in the screenshot below.
BEWARE In case you didn't follow the manual step, you should specify latest instead of media, otherwise the wizard will complain that it can't find the install media. At least, this is the behaviour on recent SmartOS versions, with the version used in this procedure it still worked by specifying media:
Specify a root password and a hostname:
Finally, confirm the shown configuration summary with "y" and the system will reboot.
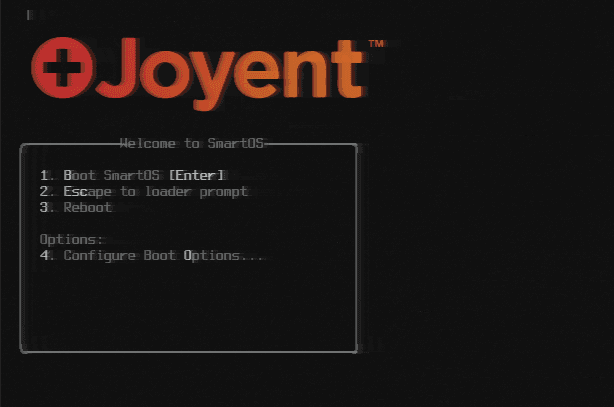
At the SmartOS boot menu, just wait a few seconds or press Enter and watch it booting. A few seconds later you will see the SmartOS login prompt.
Mission completed -- Wait a minute... how strong is your root password? In the next step the password change is explained.
Step 5 - Change root password (Optional)
In case the chosen password was not complex enough, we could set a new password with following command sequence. Beware that this can be done through an SSH session, which allows you to copy/paste a long and complex password.
[root@myhost ~]# umount /etc/shadow; cp /usbkey/shadow /etc/shadow; passwd root; cp /etc/shadow /usbkey/shadow
New Password:
Re-enter new Password:
passwd: password successfully changed for root
We need to do this in this manner, because /etc is actually on a read-only ramdisk, and /etc/shadow is mounted onto /usbkey/shadow.
The zones/usbkey ZFS file system is read-writable and is mounted onto /usbkey.
Of course, another option would be to edit the /usbkey/shadow directly, at least if you know how to handle the password hash.
[root@myhost ~]# df -h /etc/shadow
Filesystem             Size   Used  Available Capacity  Mounted on
/usbkey/shadow        1.20T   148K      1.20T     1%    /etc/shadow
stefan@macbook:~$ ssh -F /dev/null -o PubkeyAuthentication=no root@myhost.example.com
Password:
SmartOS (build: 20210701T204427Z)Conclusion
This procedure explains the steps necessary to install SmartOS on the ZFS zpool on the local hard drives. The installation of the Linux Rescue system was only an intermediate step in order to boot SmartOS for the first time, thanks to an entry that we added in he Linux grub configuration.
If all went well we now have a system that automatically boots SmartOS without the need for any external media.
Future upgrades are as simple as installing a new image with the piadm install command followed by the piadm activate command, the new OS image will become active upon reboot.
