Introduction
Static websites are making a comeback: they are convenient to develop, easy to deploy and perform well on minimal hardware.
Yet, when it comes to adding third party tools, most people think a static site limits you to using services hosted by third parties only. These third party services often come with serious privacy and performance implications. Which is especially true when it comes to analytics.
If you care about your user's privacy, you should consider using self-hosted software instead, giving you full ownership and control over the data you collect.
This guide will walk you through the steps needed for deploying a static website alongside an Offen analytics instance to a VPS (Virtual Private Server). The tutorial assumes you are using Ubuntu 24, other distributions will work too though with some differences.
The commands in this tutorial assume you are logged in as a non-root sudo user. If you are logged in as root instead, you do not have to use sudo in front of certain commands at all.
When following this guide you will use Docker and docker-compose for deploying your site and Offen. Caddy is used as a lightweight server in front of your setup handling free and automated SSL, serving static content and routing to subdomains.
All of the used software is free and using permissive licenses, so there are no usage restrictions or hidden costs in any of the tools used by this tutorial.
Prerequisites
This tutorial assumes you already have chosen a setup for creating your static site and know how to build the assets required for serving your site. In case you are still looking for a tool, there are a lot of great choices out there, e.g. Hugo (Golang ecosystem), Pelican (Python ecosystem) or Gatsby (NodeJS ecosystem). It's also still totally possible to write your HTML by hand.
To be able to follow this tutorial correctly, you are expected to complete the following tasks before:
- Setup
www.<example.com>(your site) andoffen.<example.com>(your Offen instance) subdomains that point to your new VPS. This can be either aA Recordor aCNAME Record. - Offen needs to be able to send transactional email in case you want to invite another user, or you have forgotten your password. To do this you will need to provide a set of SMTP credentials (host, username and password). If you don't want to figure this out right now, you can always add these at a later point. Be aware that there is no possibility to reset your password without it though.
Step 1 - Install Docker and the compose plugin
The easiest and recommended way of installing Docker and the compose plugin on a new system is by using the official apt repository. To do so, run the following commands:
# Add Docker's official GPG key:
$ sudo apt-get update
$ sudo apt-get install ca-certificates curl
$ sudo install -m 0755 -d /etc/apt/keyrings
$ sudo curl -fsSL https://download.docker.com/linux/ubuntu/gpg -o /etc/apt/keyrings/docker.asc
$ sudo chmod a+r /etc/apt/keyrings/docker.asc

# Add the repository to Apt sources:
$ echo \
  "deb [arch=$(dpkg --print-architecture) signed-by=/etc/apt/keyrings/docker.asc] https://download.docker.com/linux/ubuntu \
  $(. /etc/os-release && echo "$VERSION_CODENAME") stable" | \
  sudo tee /etc/apt/sources.list.d/docker.list > /dev/null
$ sudo apt-get update

$ sudo apt-get install docker-ce docker-ce-cli containerd.io docker-buildx-plugin docker-compose-plugin

# The next step is not needed if you are logged in as root
# sudo usermod -aG docker $USER

# you can now use docker version to check whether your install was successful
# depending on when you install, this might print a newer version
$ docker version --format "{{ .Client.Version }}"
27.3.1
$ docker compose version
Docker Compose version v2.29.7
$
In case you have trouble using the above instructions or are using a different host OS, refer to the official documentation on installing Docker and installing compose.
Step 2 - Serve your static site using Caddy
For the purpose of this tutorial, you can create a simple HTML file as our static site in a directory called ~/site:
$ cd && mkdir -p site
$ cat > ./site/index.html <<EOF
<!DOCTYPE html>
<html lang="en">
<head>
    <meta charset="UTF-8">
    <title>Tutorial site</title>
</head>
<body>
    <h1>Hello world!</h1>
</body>
</html>
EOF
$
If you already have your static site at hand, copy it into the site directory. If you are not sure how to do this, you can use tools like scp or rsync to do so.
Next, create a file called docker-compose.yml in your home directory and populate it with the following content:
services:
  caddy:
    image: caddy:2.8.4-alpine
    ports:
      - 80:80
      - 443:443
    volumes:
      - ./Caddyfile:/etc/caddy/Caddyfile
      - ./site:/usr/share/caddy
      - caddy_data:/data

volumes:
  # this is where Caddy caches SSL certificates, so it's important to the setup
  caddy_data:
The configuration for Caddy goes into a file called Caddyfile that you can create in your VPS' home directory (next to site). It is expected to contain the following content (replacing the domain with the one you already configured):
www.example.com {
  root * /usr/share/caddy
  file_server
}
You are now ready to start serving your static site by running:
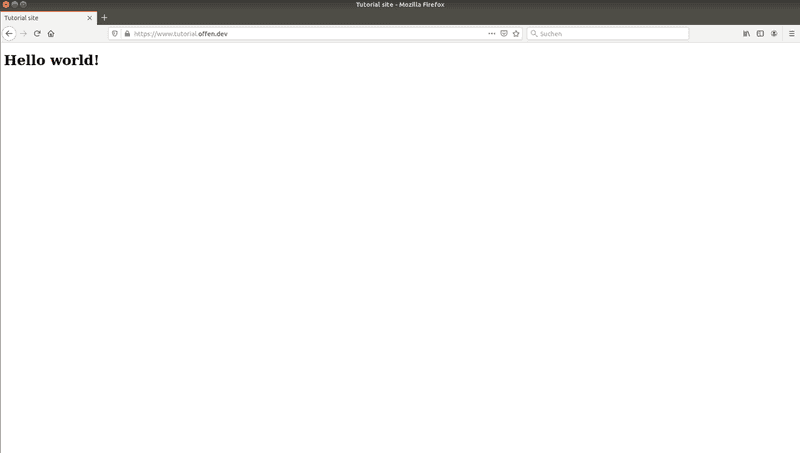
docker compose up -dCaddy will now automatically acquire a free SSL certificate from Let's Encrypt for you, so you should be able to access your site at https://www.example.com already.
Step 3 - Install Offen
Now that your site is up and running, you are ready to add the Offen container to your compose setup, configure Offen and add the Offen script to your site.
Step 3.1 - Add an Offen container to your Docker setup
Offen is available as a lightweight Docker image (~25MB) on Docker Hub. At the time of writing, the latest version is v1.4.2, but it is a good idea to check the official releases page for the latest version before you start.
Configuration for Offen is stored in a file called offen.env that you can create in your home directory. Start configuring your instance by adding a random secret:
$ echo "OFFEN_SECRET=\"$(docker run --rm offen/offen:v1.4.2 secret -quiet)\"" >> offen.env
$
Next, add your SMTP credentials to the offen.env file so that it looks like this (you can do this at a later point in time as well, but remember you won't be able to reset your password or invite other users before you have done so):
OFFEN_SECRET="<some-secret>"
OFFEN_SMTP_HOST="example.com"
OFFEN_SMTP_PASSWORD="<some-password>"
OFFEN_SMTP_USER="email@example.com"
# this is the sender displayed in outbound email
OFFEN_SMTP_SENDER="email@example.com"
Now, add an offen service to your docker-compose.yml so that it looks like this:
services:
  caddy:
    image: caddy:2.8.4-alpine
    ports:
      - 80:80
      - 443:443
    volumes:
      - ./Caddyfile:/etc/caddy/Caddyfile
      - ./site:/usr/share/caddy
      - caddy_data:/data

  offen:
    image: offen/offen:v1.4.2
    volumes:
      - offen_data:/var/opt/offen
      - ./offen.env:/etc/offen/offen.env

volumes:
  caddy_data:
  # this is where Offen stores the SQLite database
  offen_data:
As a last step, Caddy needs to know to route requests to offen.example.com to your Offen instance. Edit your Caddyfile appending your real-world domain to look like this:
offen.example.com {
  reverse_proxy offen:80
}
You can now restart your compose setup so that it also runs your Offen instance:
docker compose down && docker compose up -dTo check the status of your setup, use docker compose ps:
$ docker compose ps
NAME           IMAGE                COMMAND                  SERVICE   CREATED              STATUS                        PORTS
user-caddy-1   caddy:2.8.4-alpine   "caddy run --config …"   caddy     3 minutes ago        Up 3 minutes                  443/tcp, 0.0.0.0:80->80/tcp, :::80->80/tcp, 2019/tcp, 443/udp
user-offen-1   offen/offen:v1.4.2   "/sbin/tini -- offen"    offen     About a minute ago   Up About a minute (healthy)   80/tcp, 443/tcp
$
Step 3.2 - Use the in-browser setup to finish setup
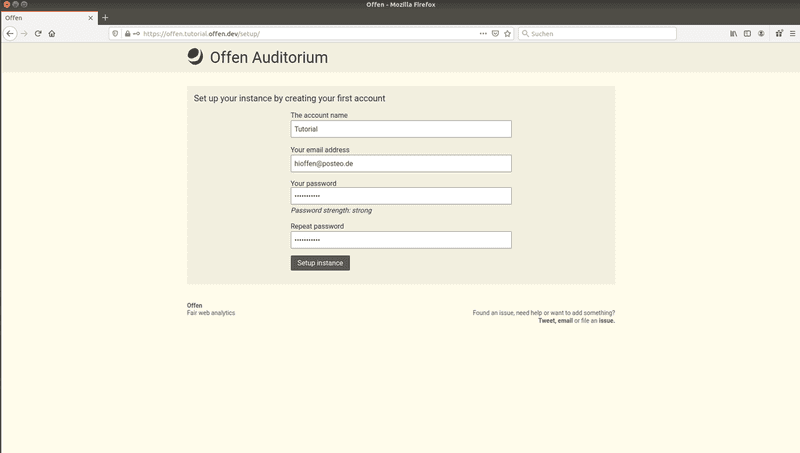
Both your static site as well as your Offen instance are now being served. You can head to https://offen.example.com/setup/ to create your login and your first account:
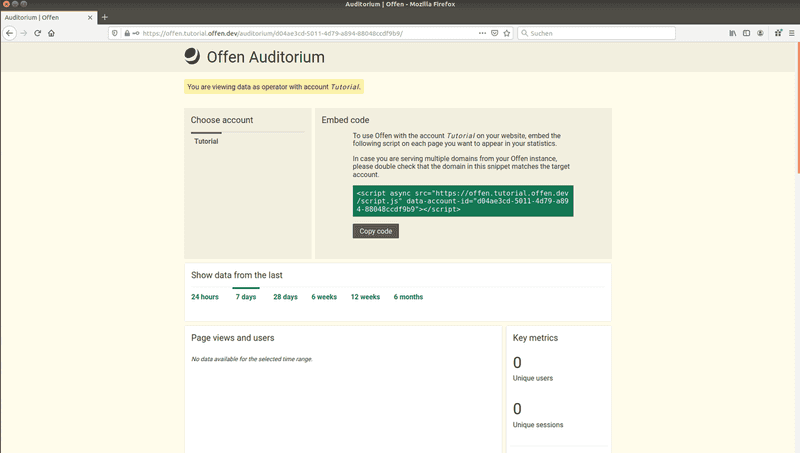
You can now access the Offen instance using your new login. Here, you can also create additional logins as well as accounts in case you need them.
Step 3.3 - Add the Offen script to your website
To enable Offen to collect usage data on your site, you need to add the script to any page you want to appear in your stats. The snippet can be copied from the account view when you are logged in.
In the case of our minimal example, this would mean editing ~/site/index.html to look like this (make sure to use the correct account id from your installation here):
<!DOCTYPE html>
<html lang="en">
<head>
    <meta charset="UTF-8">
    <title>Tutorial site</title>
</head>
<body>
    <h1>Hello world!</h1>
    <script async src="https://offen.example.com/script.js" data-account-id="YOUR_ACCOUNT_ID"></script></body>
</html>
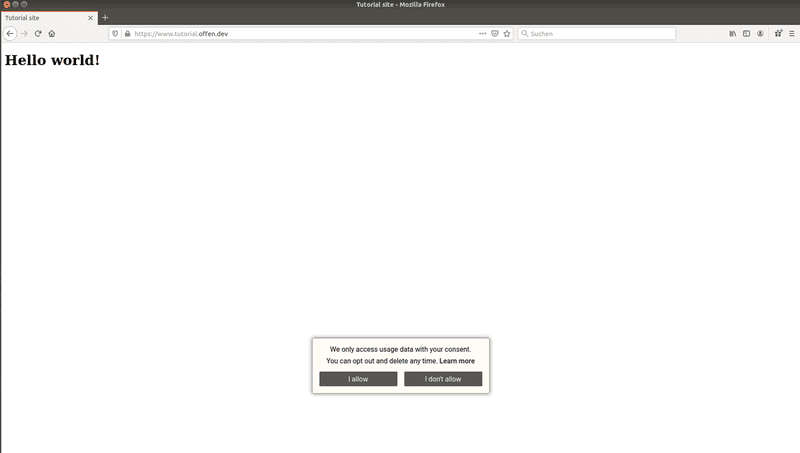
Caddy will pick up the changes to your site instantly, so there is no need to restart anything. You can now visit https://www.example.com and see Offen in use:
Step 4 - Finalizing your setup to be production ready
While the above setup works, there are some tweaks you likely want to apply to it if you plan to use this in production. All of these items are optional, but recommended.
Step 4.1 - Set up a firewall
Assuming your VPS is not behind some sort of firewall yet - you can close all ports but HTTP, HTTPS and SSH in this setup - you can use ufw to setup such rules for your server:
$ sudo ufw default deny incoming
Default incoming policy changed to 'deny'
(be sure to update your rules accordingly)
$ sudo ufw default allow outgoing
Default outgoing policy changed to 'allow'
(be sure to update your rules accordingly)
$ sudo ufw allow ssh
Rules updated
Rules updated (v6)
$ sudo ufw allow http
Rules updated
Rules updated (v6)
$ sudo ufw allow https
Rules updated
Rules updated (v6)
$ sudo ufw --force enable
Firewall is active and enabled on system startup
$
Step 4.2 - Configure rsyslog and logrotate
Over time, both your static site as well as Offen will generate a lot of logs, so it's a good idea to think ahead and setup rsyslogd (for redirecting log output to dedicated files) as well as logrotate (for removing old log files) now.
It makes sense to redirect the log output of your static site to a log file at /var/log/caddy.log and the log output of Offen to /var/log/offen.log. To do so, create a file called 10-static-site.conf in /etc/rsyslog.d/ and populate it with the following rules:
:syslogtag, startswith, "caddy" /var/log/caddy.log
:syslogtag, startswith, "offen" /var/log/offen.log
Restart the rsyslog service:
$ sudo systemctl restart rsyslog.service
$
Now, you can define rotation rules for your new log files by appending the following to /etc/logrotate.d/rsyslog:
# existing content is left untouched

/var/log/caddy.log
/var/log/offen.log
{
        rotate 7
        daily
        missingok
        notifempty
        delaycompress
        compress
        postrotate
                /usr/lib/rsyslog/rsyslog-rotate
        endscript
}
As a last step, specify the syslog logging driver to be used in your docker-compose.yml:
services:
  caddy:
    image: caddy:2.8.4-alpine
    ports:
      - 80:80
      - 443:443
    volumes:
      - ./Caddyfile:/etc/caddy/Caddyfile
      - ./site:/usr/share/caddy
      - caddy_data:/data
    logging:
      driver: syslog
      options:
        tag: caddy

  offen:
    image: offen/offen:v1.4.2
    volumes:
      - offen_data:/var/opt/offen
      - ./offen.env:/etc/offen/offen.env
    logging:
      driver: syslog
      options:
        tag: offen

volumes:
  caddy_data:
  offen_data:
Restart your setup for the changes to have effect:
docker compose down && docker compose up -dTo check if your logs arrive in the desired places you can tail one of the log files:
$ sudo tail -f /var/log/offen.log
... continuous log output ...
Step 4.3 - Set up database backups
Production systems should always have recurring backups of their data so you can recover from hardware failures or similar.
As the setup you just created stores its database file in a Docker volume, you can leverage the docker-volume-backup tool to create automated backups.
It can be installed by adding another service to your docker-compose.yml:
services:
  caddy:
    image: caddy:2.8.4-alpine
    ports:
      - 80:80
      - 443:443
    volumes:
      - ./Caddyfile:/etc/caddy/Caddyfile
      - ./site:/usr/share/caddy
      - caddy_data:/data

  offen:
    image: offen/offen:v1.4.2
    volumes:
      - offen_data:/var/opt/offen
      - ./offen.env:/etc/offen/offen.env
    labels:
      # this means the backup process will stop Offen for a short
      # time in order to guarantee consistent database backups
      - docker-volume-backup.stop-during-backup=true

  backup:
    image: offen/docker-volume-backup:v2
    volumes:
      - offen_data:/backup/offen_data:ro
      - ./backups:/archive
      # allow use of the "stop-during-backup" feature
      - /var/run/docker.sock:/var/run/docker.sock:ro

volumes:
  caddy_data:
  offen_data:
By default, this will create daily, timestamped backups in ~/backups. Feel free to adjust this to your needs and also think about moving these backups to another system to increase redundancy. For example, the docker-volume-backup image would already know about how to upload files to compatible storages. Refer to the docs for a full list of options.
Conclusion
As you've just seen, self-hosting your analytics software does not need to be daunting or complex, and is a real world option for bigger and smaller projects alike. The setup covered by this tutorial is capable of running on very small (i.e. cheap) VPS instances and requires zero to no maintenance once set up.
Self-hosting your analytics instead of using a service gives you full control over your data. Using Offen shares this control with your users, which makes this a perfect setup if you need to collect usage statistics and also care about the privacy of your users.
Further reading
The official documentation site for Offen can be found at https://docs.offen.dev, Documentation for Caddy is available at https://caddyserver.com/.


