Introduction
OpenCart is an open-source online shop system that provides a flexible and extensible platform for creating and managing web shops. It is suitable for both small and larger shops and offers a modular structure with a wide range of extensions.
Example names
- User name:
opencap - Host name:
<wwwXXX> - Domain:
<example.com> - Subdomain:
<opencart.example.com>
Step 1 – Download OpenCart
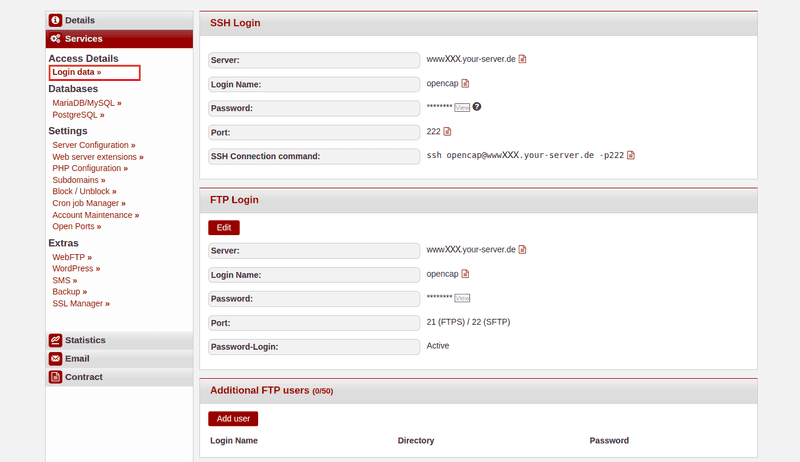
To download OpenCart, you can either establish an SSH connection or an FTP connection. The access data can be found in konsoleH under Access details→Login data ».
Option 1 – Via SSH connection
For this option, you need at least Web Hosting Level 9.
- Download ZIP file
Once an SSH connection has been established, the ZIP file can be downloaded directly to the public_html folder.
opencap@<wwwXXX>:~$ cd public_html
opencap@<wwwXXX>:~/public_html$ wget https://github.com/opencart/opencart/releases- Unzip ZIP file
Once theopencart-<version>.zipfile has been downloaded, it can be unzipped.
opencap@<wwwXXX>:~/public_html$ unzip opencart-latest.zipThe opencart-4.0.2.3 folder should now be visible in the public_html folder.
- Move files
The entire contents of the upload folder within the opencart-4.0.2.3 folder can now be moved to the public_html folder.
opencap@<wwwXXX>:~/public_html$ cd opencart-latest/upload
opencap@<wwwXXX>:~/public_html/opencart-latest/upload$ mv * ../..
The upload folder should now be empty. Instead, all files should now be located in the public_html folder.
- Rename files
Within the public_html folder, the config-dist.php file can now be renamed to config.php. Repeat this step for the file in the admin subfolder.
opencap@<wwwXXX>:~/public_html$ mv config-dist.php config.php
opencap@<wwwXXX>:~/public_html$ mv admin/config-dist.php admin/config.php
Option 2 - Via FTP connection
-
Download ZIP file to your local device
Open https://www.opencart.com/index.php?route=cms/download and then select ‘Download & host your own’DOWNLOAD NOW. -
Unzip the ZIP file
-
Open the ‘Downloads’ folder on your local device. The OpenCart file should be there.
-
Right-click on the OpenCart file.
-
In the menu that opens, select ‘Extract All’ (Linux) or ‘Extract All’ (Windows).
-
Upload unzipped files via FTP
The files must now be copied to the server via FTP. The folder opencart-latest should be in the ‘Downloads’ folder.
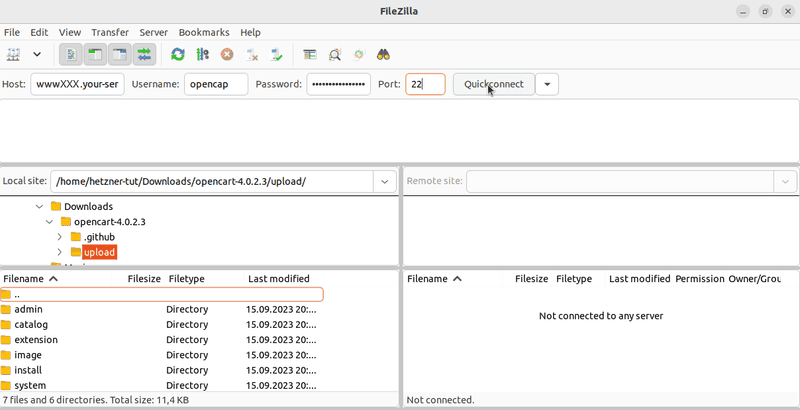 Inside the
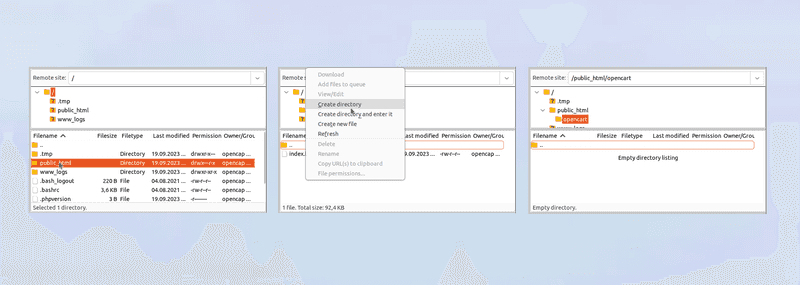
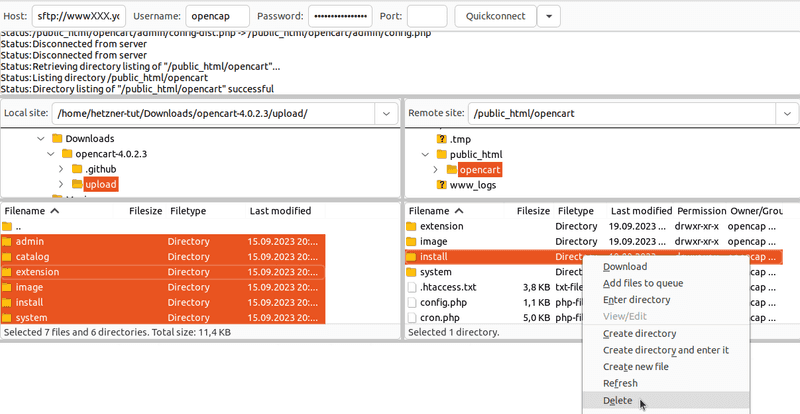
 opencart-latest folder is a folder called upload. Select all files within the upload folder on your local device and copy them to the public_html folder on the server. If you do not want the shop to appear directly on the main page, you can create a subfolder called opencart within the public_html folder. The files from the upload folder must then be added to this subfolder.
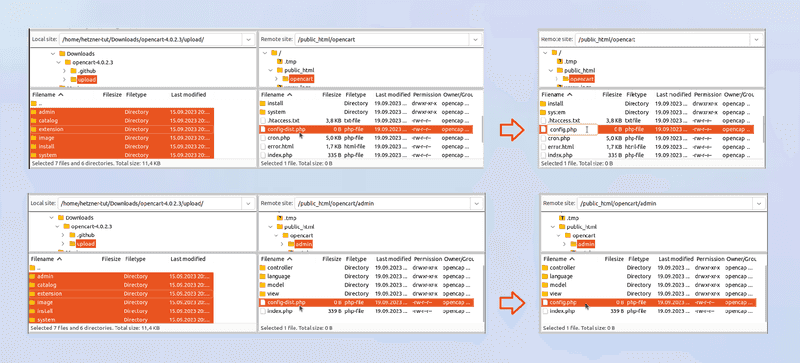
- Rename files
Next, the config-dist.php file must be renamed to config.php in two folders:
-
public_html/config-dist.php -
phblic_html/admin/config-dist.php
Select the files by right-clicking on them and clicking on ‘Rename’. Rename the files config.php and save the changes.
Step 2 - Install OpenCart
Enter the domain name in your web browser (e.g. opencart.example.com). If the files were saved in a subfolder, this must be added to the end of the domain (e.g. opencart.example.com/opencart). The installation page for OpenCart should now be displayed.
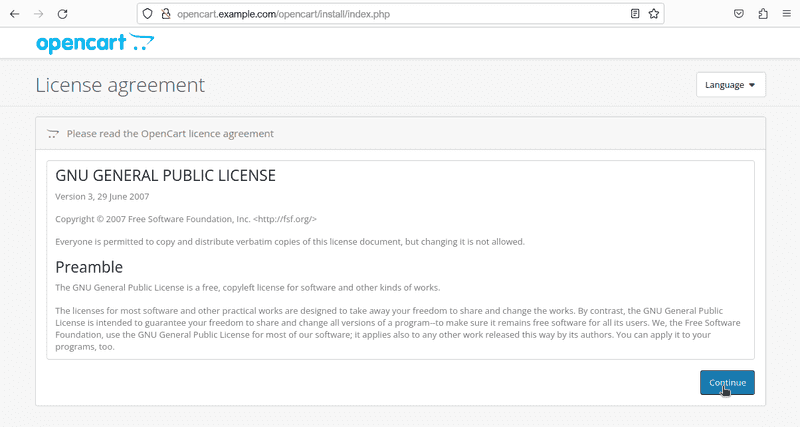
2.1 Accept the licence agreement
Read the licence agreements and click Continue.
2.2 Automatic check
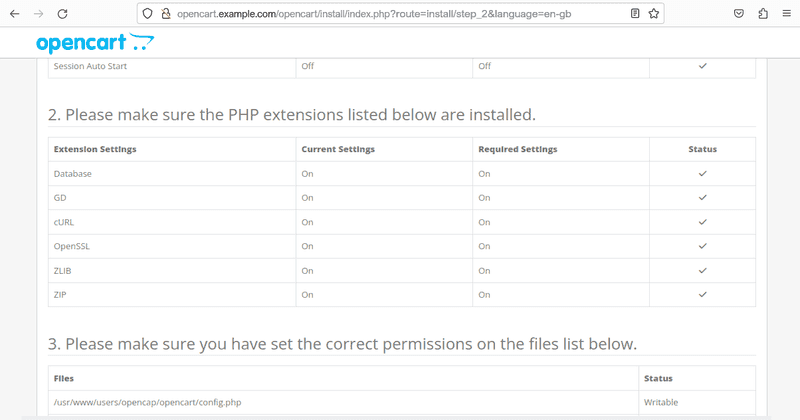
The next step checks that the configuration is correct. All boxes should be green and the status of the files should be ‘Writable’.
If you encounter problems with the files below, set the permissions for these files to 777 for the duration of the installation.
2.3 Set up database and user
Add a database and create a new user with administrative user rights to manage the shop. Then click on Continue.
The exact information regarding the database can be found in konsoleH under
Databases→MariaDB/MySQL ». If no database has been added yet, one can be created now.
The installation should now be completed automatically.
Step 3 - Delete the installation folder
For security reasons, the install folder on the server should be deleted last. As before, there are two options here:
- Option 1 - Via SSH connection
This option requires at least Web Hosting Level 9.
1.
After establishing an SSH connection, the folder can be deleted directly from the public_html folder.
opencap@<wwwXXX>:~/public_html$ rm -rf install- Option 2 - Via FTP connection
Once a connection to the server has been established, the file can be deleted directly from thepublic_htmlfolder. If the files were saved in a subfolder, the file must be deleted from there (e.g.public_html/opencart).
Select theinstallfolder by right-clicking on it and click on the ‘Delete’ option.
Troubleshooting – Common problems and solutions
- Incorrect file permissions
- Warnings during the installation process indicate that write permissions are missing.
- Solution: Temporarily set write permissions (e.g. 755 or 775, or 777 if necessary) and then adjust them again.
- Empty page after installation
- Cause: Usually an incompatible PHP version or missing modules.
- Solution: Check whether the necessary PHP modules such as
curl,mbstring,gdorzipare installed.
- ‘Permission Denied’ error in the admin area
- Cause: Missing user rights.
- Solution: Set the required permissions in the admin area under System → User groups.
- Slow loading times
- Solution: Activate caching, check extensions, optimise server performance.
- Error when uploading extensions
- Cause: Upload limit or ZIP support disabled.
- Solution: Adjust PHP settings (
upload_max_filesize,post_max_size) or upload modules via FTP.
Further links and tips
- Installing extensions
Additional modules and themes can be integrated via the OpenCart Marketplace.
- Updates and upgrades
Always make a complete backup of your files and database before updating. Check whether themes and extensions are compatible.
Official information: OpenCart Upgrade Guide
-
Security
-
Change the default admin path
-
Enable HTTPS
-
Install regular updates
-
Manage multiple shops
With a single installation, multiple shops can be controlled via the admin panel.
- Search engine optimisation (SEO)
- Enable SEO URLs
- Set up meta information and URL aliases
